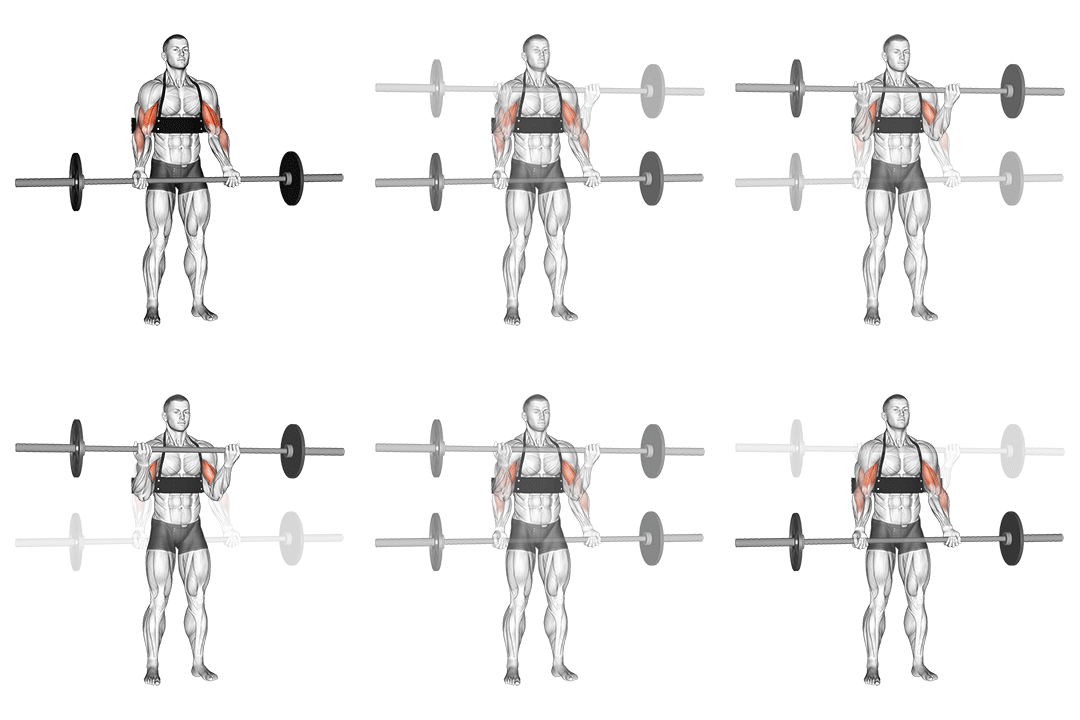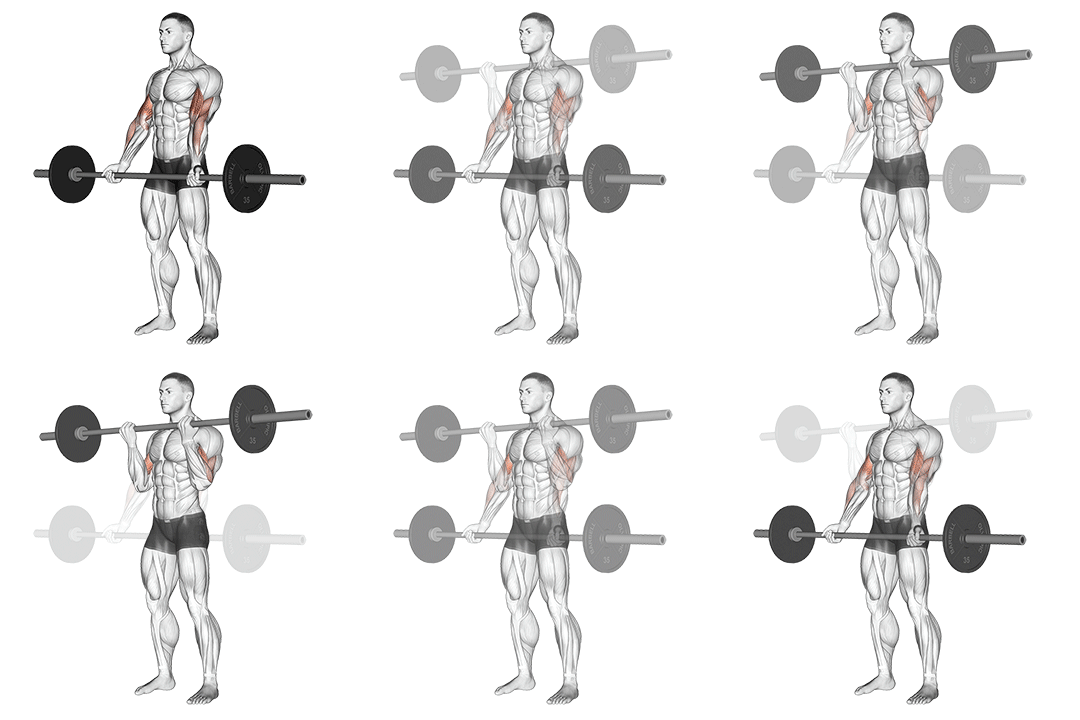

Barbell Biceps Curl (with Arm Blaster) vs Barbell Curl

Compare target muscles, equipment, difficulty, movement type, and secondary muscles for Barbell Biceps Curl (with Arm Blaster) and Barbell Curl.

Change comparison Share

Get comparison link

Select the link and use your device's Copy command.

Comparison overview

AI-generated
Barbell Biceps Curl (with Arm Blaster) vs Barbell Curl — if you want bigger, stronger arms you need to pick the right tool for the job. I’ll break down how each move loads the biceps, the differences in secondary muscle recruitment, setup and equipment needs, and clear programming advice (rep ranges, tempos, and progressions). You’ll get technique cues you can use on your next set, biomechanics—like length-tension and force vectors—and decisive recommendations for hypertrophy, strength, beginners, and home workouts.

Exercise Comparison

Exercise A
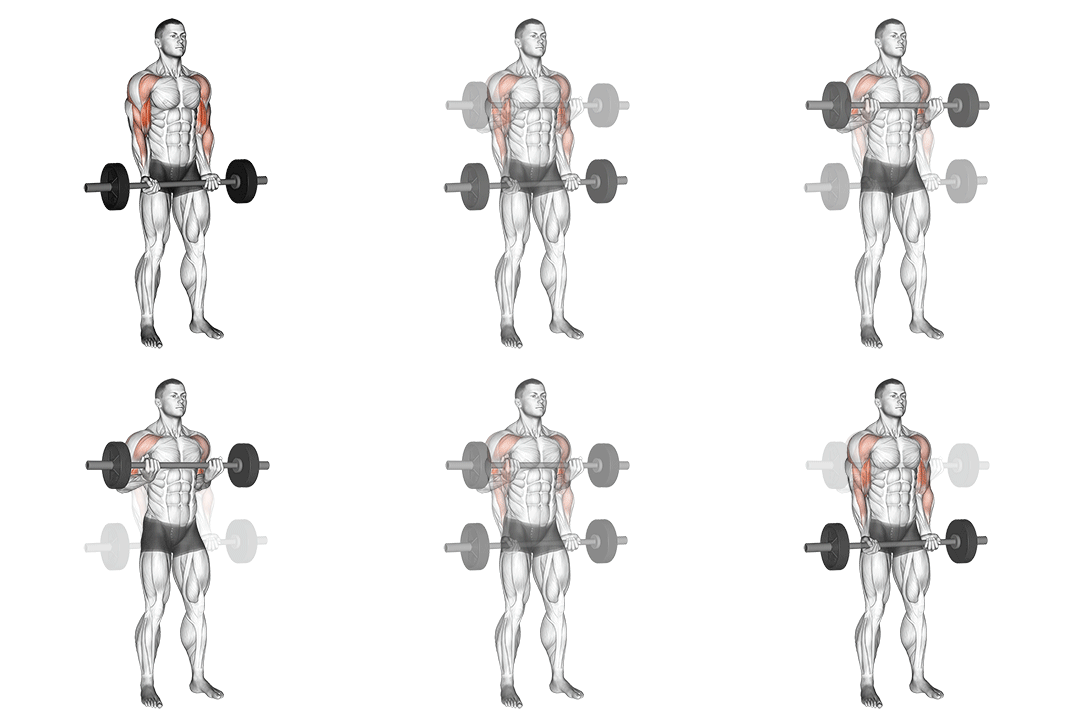
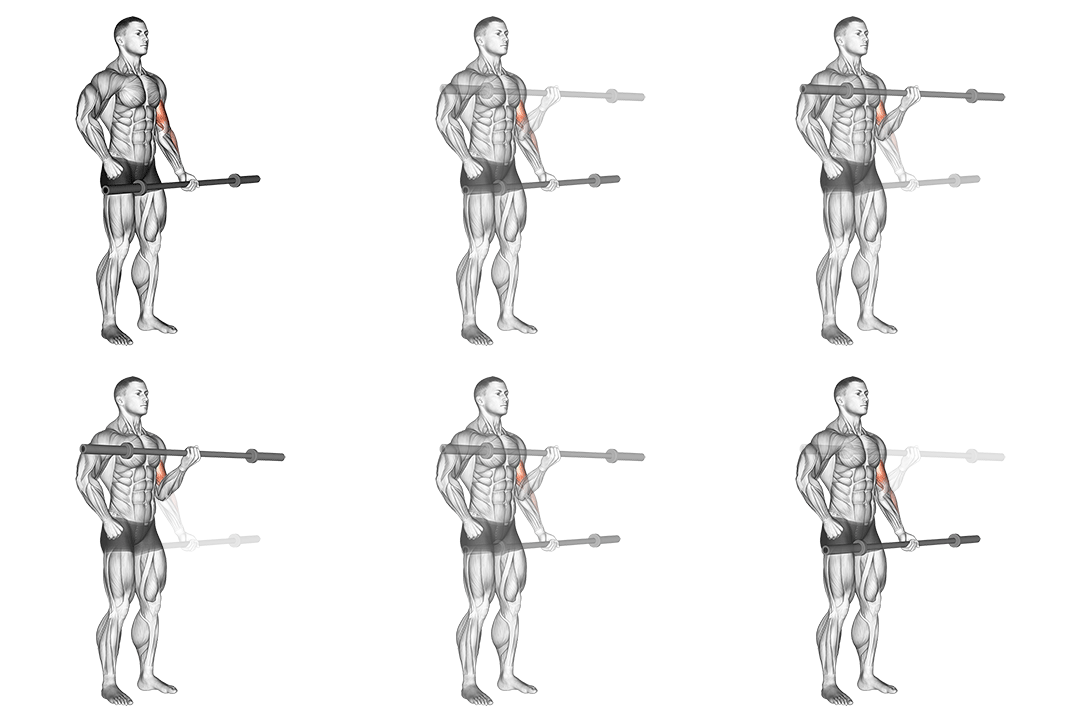
Barbell Biceps Curl (with Arm Blaster) demonstration

Barbell Biceps Curl (with Arm Blaster)

Target Biceps
Equipment Barbell
Body Part Upper-arms
Difficulty Beginner
Movement Isolation
Secondary Muscles
Forearms
VS
Exercise B
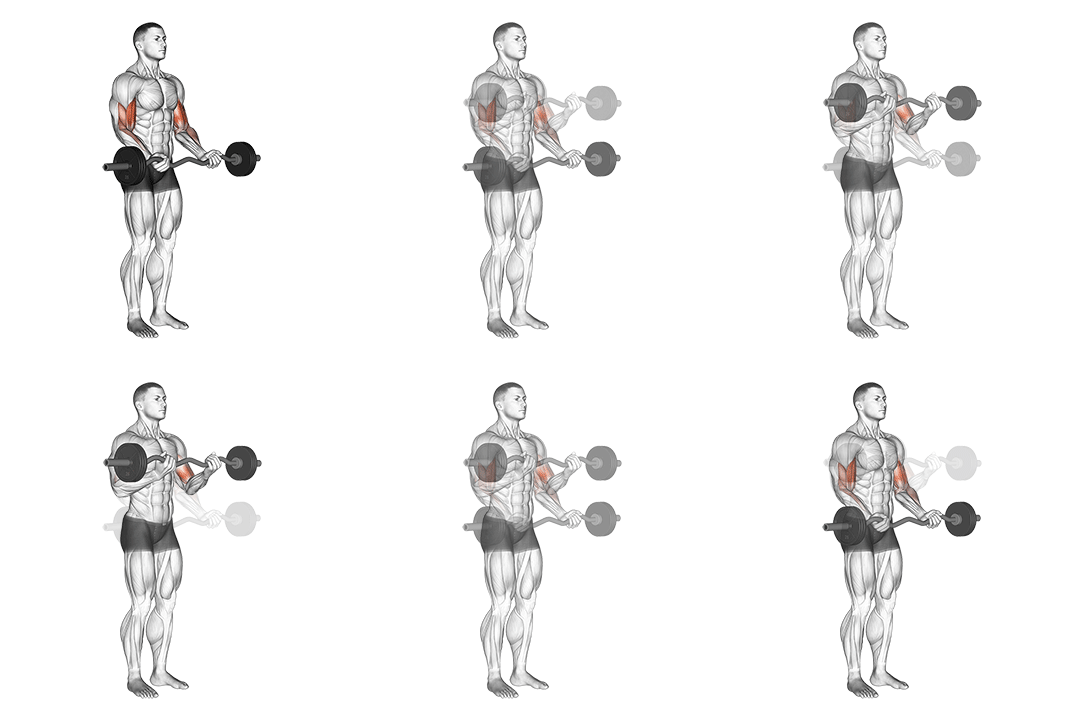
Barbell Curl demonstration

Barbell Curl

Target Biceps
Equipment Barbell
Body Part Upper-arms
Difficulty Beginner
Movement Isolation
Secondary Muscles
Forearms

Head-to-Head Comparison

Different values are marked. These are catalogue attributes, not performance scores.

Muscles used

Listed target and secondary muscles, shown on the body. Locations, not activation or strength scores.

  • Target
  • Secondary
  • Not highlighted

Barbell Biceps Curl (with Arm Blaster)

Front
Barbell Biceps Curl (with Arm Blaster): front muscle locationsSolid: listed target. Striped: listed secondary. Grey: not highlighted. Locations, not activation or strength scores. See the muscle names below.
Back
Barbell Biceps Curl (with Arm Blaster): back muscle locationsSolid: listed target. Striped: listed secondary. Grey: not highlighted. Locations, not activation or strength scores. See the muscle names below.
Target
Biceps
Secondary
Forearms

Barbell Curl

Front
Barbell Curl: front muscle locationsSolid: listed target. Striped: listed secondary. Grey: not highlighted. Locations, not activation or strength scores. See the muscle names below.
Back
Barbell Curl: back muscle locationsSolid: listed target. Striped: listed secondary. Grey: not highlighted. Locations, not activation or strength scores. See the muscle names below.
Target
Biceps
Secondary
Forearms

Grey does not mean a muscle is unused. The diagrams show only the mapped catalogue labels.

Attribute Barbell Biceps Curl (with Arm Blaster) Barbell Curl
Target Muscle
Biceps
Biceps
Body Part
Upper-arms
Upper-arms
Equipment
Barbell
Barbell
Difficulty
Beginner
Beginner
Movement Type
Isolation
Isolation
Secondary Muscles
Forearms
Forearms

Visual Comparison

An illustrative 1–10 profile derived from catalog difficulty, equipment, and listed-muscle fields—not measured performance or muscle activation.

Key Differences

  • Both exercises target the Biceps using Barbell. The catalogue does not establish which exercise is better for an individual goal.

Muscle comparison

Shared target muscles

Both moves isolate elbow flexion and primarily load the biceps brachii (long and short heads). Biomechanically they produce similar peak torque in the mid-range of elbow flexion—roughly around 70–100°—where biceps length-tension and moment arm combine to create maximal force. With strict form both exercises emphasize concentric shortening and eccentric control of the biceps across a near-identical range of motion.

Secondary muscle differences

The Arm Blaster pins the upper arm at the torso, reducing scapular and shoulder contribution so anterior deltoid and upper traps are minimized. A standard Barbell Curl allows slight shoulder flexion and torso lean, which can recruit anterior deltoid, long head assist, and spinal stabilizers when heavier loads are used. Forearm muscles (brachioradialis and wrist flexors) act similarly in both, but grip variations and wrist position can shift load between forearms and biceps by ~5–15%.

Muscle involvement analysis

With the Arm Blaster the elbow stays fixed; the biceps produce a cleaner, more consistent force vector through the elbow joint so peak activation concentrates in the concentric mid-range. In a free Barbell Curl, tiny shoulder motion and torso momentum change the force vector throughout the lift, allowing slightly higher loads but blunting pure biceps activation at the top. Length-tension principles mean both hit optimal force near 70–90° elbow flexion, but the Arm Blaster increases time under tension at that joint angle.

Equipment and setup

Barbell Biceps Curl (with Arm Blaster): setup

Barbell, collars, and an arm blaster (a rigid pad that anchors the upper arms to the torso). Optional: rack or bench to rest the bar between sets.

Barbell Curl: setup

Barbell and collars are sufficient. No special accessory required; can be done in a rack, with dumbbells as alternatives, or using an EZ bar to change wrist angle.

Access and practicality

Barbell Curl — it only needs a barbell, so it's easier to do at home or in crowded gyms. The Arm Blaster adds one piece of kit and slightly more setup, making the standard Barbell Curl more accessible for most lifters.

Learning and progression

Learning the movements

Barbell Curl is easier to learn: set your grip, bend at the elbow, and curl. The Arm Blaster requires precise pad placement and maintaining constant upper-arm contact, which takes additional setup and coordination.

Progression considerations

Both allow progressive overload. Barbell Curl typically offers more raw overload potential because you can use slight body momentum to add heavier loads (useful for low-rep strength blocks). The Arm Blaster favors progressive hypertrophy via strict sets, higher time under tension, and microloading in the 6–12 rep range.

Limitations and precautions

Barbell Curl carries higher risk of form breakdown (lower-back arching and shoulder cheating) when pushing heavy loads. The Arm Blaster reduces shoulder involvement but can concentrate stress at the elbow and wrist if wrists aren’t neutral; improper pad fit can also irritate the brachialis or distal biceps tendon. Overall injury risk is low when using appropriate loads and technique.

Pros & Cons

Barbell Biceps Curl (with Arm Blaster)

+ Pros

  • Enforces fixed-elbow position for cleaner biceps isolation
  • Increases peak contraction and time under tension around 70–90°
  • Reduces shoulder and trap substitution, improving stimulus specificity
  • Great for hypertrophy work in 8–12 rep ranges with 2–3s eccentrics

Cons

  • Requires an arm blaster accessory and correct fit
  • Less load ceiling for heavy strength work due to eliminated momentum
  • Can concentrate stress on the elbow/wrist if you have joint issues

Barbell Curl

+ Pros

  • Minimal equipment — barbell only, highly accessible
  • High overload potential for low-rep strength phases (3–6 reps)
  • Easier to learn and scale for beginners
  • Versatile (can switch to EZ bar, dumbbells, or change grip width)

Cons

  • More prone to cheating with shoulder and torso momentum
  • Slightly less pure peak biceps activation when form breaks down
  • Harder to achieve strict isolation without a coach or strict cues

When Each Exercise Wins

1
For muscle hypertrophy: Barbell Biceps Curl (with Arm Blaster)

The Arm Blaster enforces strict upper-arm position, increasing time under tension and peak contraction in the mid-range (70–90°). For 8–12 reps with 2–3 second eccentrics it delivers cleaner biceps stimulus and less compensatory deltoid involvement.

2
For strength gains: Barbell Curl

Barbell Curls let you safely use heavier loads and controlled momentum to build maximal force capacity in the elbow flexors. Low-rep blocks (3–6 reps) with progressive loading translate better to raw strength improvements.

3
For beginners: Barbell Curl

A simple setup and intuitive motion make the Barbell Curl easier to learn. Beginners gain coordination and baseline strength faster with barbell-only work before adding isolation tools.

4
For home workouts: Barbell Curl

You only need a barbell and plates, which most home lifters have. The Arm Blaster is helpful but not essential, making the standard curl the practical choice at home.

Frequently Asked Questions

Can I do both Barbell Biceps Curl (with Arm Blaster) and Barbell Curl in the same workout?

Yes. Start with Barbell Curls if you plan heavy work (3–6 reps) to prioritize strength, then use the Arm Blaster for isolation finishers (3 sets of 8–12). That sequence uses heavy load first, then precise time under tension to maximize muscle fatigue.

Which exercise is better for beginners?

Barbell Curl is better for beginners because it requires less setup and teaches basic elbow flexion under load. Once you can maintain strict elbow positioning, add the Arm Blaster to improve isolation and peak contraction.

How do the muscle activation patterns differ?

The Arm Blaster fixes the upper arm, keeping the force vector square through the elbow and increasing biceps activation in the mid-range (≈70–90°) by reducing shoulder contribution. The free Barbell Curl allows small shoulder motion and torso lean, which spreads activation to anterior deltoid and spinal stabilizers as load increases.

Can Barbell Curl replace Barbell Biceps Curl (with Arm Blaster)?

Yes, functionally it can—but you’ll lose some isolation specificity. If your goal is pure hypertrophy, add strict sets or a finishing Arm Blaster variation to replicate the higher mid-range tension the accessory provides.

Comparison Summary

Use the Barbell Biceps Curl with an Arm Blaster when you want surgical isolation and to maximize mid-range biceps tension for hypertrophy. Program it in 3–4 sets of 8–12 reps with controlled 2–3 second eccentrics and short rests (60–90s). Choose the plain Barbell Curl when your goal is raw strength, accessibility, or when you’re just starting—load it for 3–6 reps during strength phases or 6–10 reps for general development. If you can, rotate both across cycles: heavy Barbell Curls for strength, then Arm Blaster sets as an isolation finisher to drive muscle growth and technique.

Exercise instructions

Steps from the exercise catalogue. Read the full sequence before starting.

Barbell Biceps Curl (with Arm Blaster)

  1. Stand up straight with your feet shoulder-width apart and hold a barbell with an underhand grip, palms facing up.
  2. Place your upper arms against the arm blaster, keeping your elbows close to your torso.
  3. Keeping your upper arms stationary, exhale and curl the weights while contracting your biceps.
Read remaining steps for Barbell Biceps Curl (with Arm Blaster)
  1. Continue to raise the barbell until your biceps are fully contracted and the bar is at shoulder level.
  2. Hold the contracted position for a brief pause as you squeeze your biceps.
  3. Inhale and slowly begin to lower the barbell back to the starting position.
  4. Repeat for the desired number of repetitions.

Barbell Curl

  1. Stand up straight with your feet shoulder-width apart and hold a barbell with an underhand grip, palms facing forward.
  2. Keep your elbows close to your torso and exhale as you curl the weights while contracting your biceps.
  3. Continue to raise the bar until your biceps are fully contracted and the bar is at shoulder level.
Read remaining steps for Barbell Curl
  1. Hold the contracted position for a brief pause as you squeeze your biceps.
  2. Inhale as you slowly begin to lower the bar back to the starting position.
  3. Repeat for the desired number of repetitions.

Also Compare

Compare another pair

Choose two exercises to see their differences side by side.

Compare Exercises