Weight training for hypertrophy and strength gains involves lifting progressively heavy weights to ensure consistent progress. Contrary to what many people believe, your work doesn’t end as soon as you leave the gym.
You break muscle tissue during your lifting sessions. They grow back bigger and stronger while you’re resting.
While relaxing on a couch is a viable recovery method, there are several more efficient ways to boost your strength and muscle gains. One such protocol is recovery yoga. (1)
Recovery yoga, also known as restorative yoga, is a gentle style of yoga that can boost mental and physical relaxation and healing. As a personal trainer with over 17 years in the trenches, I often recommend recovery yoga for combating delayed onset muscle soreness (DOMS). Furthermore, it can also boost cardiovascular fitness, increase joint mobility, and relieve stress and anxiety.
This yoga practice involves holding poses for extended periods, often with the help of blocks. Props like these help you ease into a position and hold it for extended periods.
Lifting weights can lead to muscle tightness and joint pain. In this article, I’ll take you over yoga poses for opening up the hips, shoulders, and hamstrings that will help take your training and daily functioning to the next level. I’ll also share my go-to yoga sequence for lifters to unlock peak performance. We have a lot to cover, so sit tight and read on.
Understanding Muscle Tightness and Joint Pain in Lifters
Pushing your body to its limits every day in the gym has its consequences. Tight hips, a nagging pain in the lower back, and poor overhead mobility are some of the most common issues that strength training athletes face.
But why does this happen, you ask? It ultimately boils down to three factors:
- Muscle Imbalances: Most people have a dominant side. Not making adjustments in your training routine can make some muscles stronger and tighter than others, significantly hampering your mobility.
- Repetitive Movements: Doing the same exercises daily or multiple times during the week can overload certain muscles and joints, which can cause stiffness and pain.
- Poor Form: You know what is worse than repetitive motions? Doing it with a poor form. Incorrect technique can cause additional strain on the joints, tendons, and muscle tissues, increasing the risk of injury.
Yoga Poses for Hip Openers
Tight hips are one of the most common mobility issues among lifters. People who lift heavy spend a considerable time squeezing and contracting the hip muscles, which can lead to tightness.
Hip-opening yoga poses can help counteract these negative side effects by improving your flexibility and reducing pain. Here are the best yoga poses for better hip mobility:
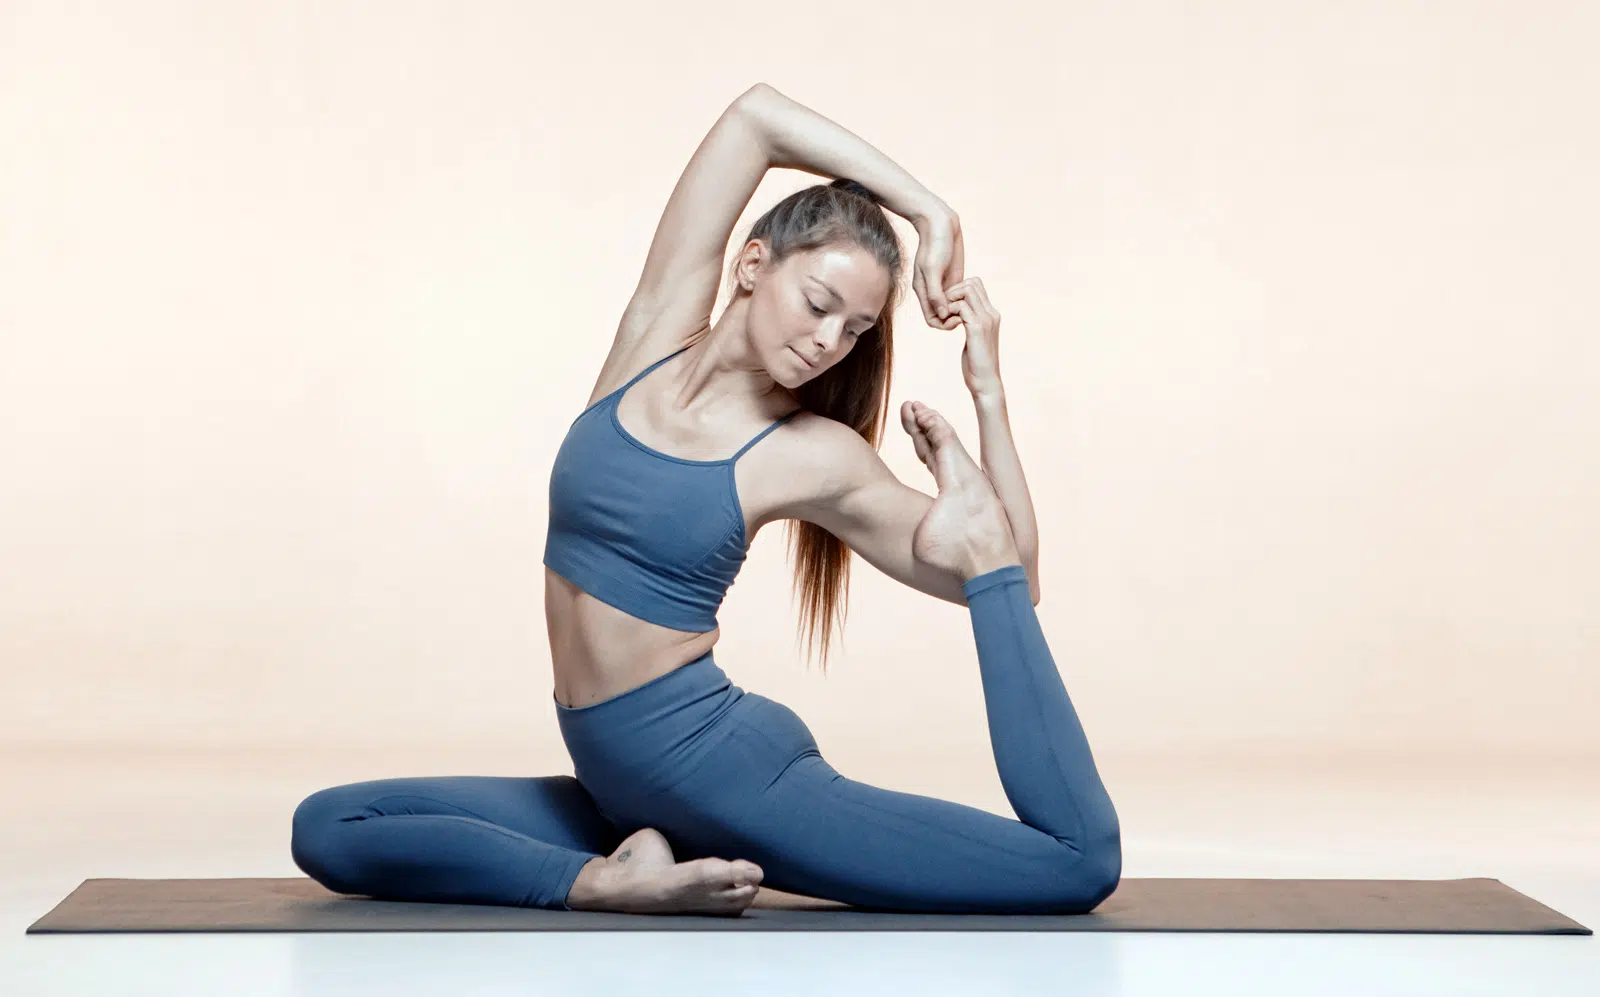
Pigeon Pose
This is one of the most unassuming yoga poses, but it is incredibly effective for improving hip mobility. Ease into this pose to give your quads, glutes, hip flexors, hip rotators, adductors, and abductors time to adapt. These muscles tend to tighten up due to prolonged heavy lifting, and it can take a long time to reset the damage.
This exercise alone has helped me significantly improve my overall hip range of motion (ROM), leading to greater depth in exercises like squats and lunges.
Lastly, since this is a static hold, it can help calm the mind and ease stress.
How To Perform Pigeon Pose
- Get into a tabletop position.
- Lift your knees off the floor, bring your right knee forward, and place it behind your right wrist.
- Slide your left leg back while keeping it as straight as possible.
- Your hips should be square in this position.
- Walk your hands forward and lower your torso toward the mat.
- Hold for five to 10 breaths.
- Repeat on the other side.
Coach Tip: Keep your spine straight and core engaged throughout the exercise. Avoid bouncing in the fully lengthened position, as it can increase the risk of muscle strains.
Modifications For Pigeon Pose
- Place a yoga block or a blanket under your hip for support.
- Avoid forcing your shin parallel to be perpendicular to the body. Feel free to flex your knee to get into a comfortable position.
Lizard Pose
This pose might look intimidating, but it will become an indispensable part of your training routine once you get a hold of it. The lizard poses primarily targets the hip flexors, glutes, and hamstrings, leading to better lower body mobility.
How To Perform Lizard Pose
- Get into a low lunge position.
- Place both your elbows in line with your front foot so your forearms are parallel.
- Keep your back straight and core engaged.
- Hold for as long as possible before switching sides.
Coach Tip: Keep your neck and spine neutral. Avoid looking up, as it can lead to neck strain.
Modifications For Lizard Pose
- Beginners can start by placing their hands on the floor and keeping their elbows locked out.
- Place your rear knee on the floor to take some tension off during longer holds.
Frog Pose
This pose screams ‘beginner,’ but it is everything but that. The frog pose is one of the most intense hip openers you can do, but the rewards make them worth the pain and discomfort. This pose can be a game changer for people dealing with inner thigh tightness.
How To Perform Frog Pose
- Start in a quadruped position.
- Widen your knees until you feel a deep stretch in your inner thighs.
- Then, turn your feet outward and try to touch your ankles to the floor while keeping them in line with your knees.
- Place your elbows and forearms on the floor.
https://www.youtube.com/watch?v=bxO4MK8YDWE&pp=ygUJRnJvZyBQb3Nl
Coach Tip: Avoid holding your breath. Instead, take deep and long breaths while focusing on attaining a deep lower body stretch.
Modifications For Frog Pose
Beginners should place their knees at a width that provides a good stretch without causing pain.
Butterfly Pose
This beginner-friendly pose is an excellent way to cool down after a workout and release any tension in the hips. The butterfly pose is also excellent for unwinding after a long day and blowing off steam.
How To Perform Butterfly Pose
- Sit upright on the floor with your legs extended.
- Bend your knees and bring the soles of your feet together.
- Slowly lower your knees toward the floor.
- Hold your feet, drive your heels toward your body, and lengthen your spine.
Coach Tip: Avoid pressing your knees. Relax your hips and allow gravity to do the work.
Modifications For Butterfly Pose
- Experienced yogis can lean forward from the hips for a deeper stretch. However, maintain a neutral spine to prevent lower back strain.
Yoga Poses for Shoulder Stretches
Tight shoulders can take some time to fix. Having these exercises in your arsenal can help tremendously:
Cow-Face Pose
I’m not going to lie; this might be one of the most challenging poses for people with limited upper-body mobility. However, I have all my clients perform this in their cool-down routine. It is especially great for folks dealing with a forward hunch.
How To Perform Cow-Face Pose
- Sit upright on the floor and bend your knees to bring your heels toward your hips.
- Slide one leg over the other and stack your knees.
- Reach one arm straight up toward the ceiling and bring the hand down toward your upper back.
- Extend the other arm out to the side and behind and up your back.
- Try to clasp your hands behind your back.
Coach Tip: Use a towel or strap if you have limited shoulder mobility.
Modifications For Cow-Face Pose
- Sit with your back against a wall to help maintain a good posture.
Thread the Needle Pose
If you encounter excessive tension in your upper back and shoulders after a workout, you should make this pose a staple in your routine. This pose biases the shoulder blades, which often get tight from lifting. Furthermore, it improves spinal rotation, leading to better overall mobility and injury prevention.
How To Perform Thread the Needle Pose
- Begin in a tabletop position.
- Slide your right arm under your left and reach as far toward the left side as possible.
- Bring your right shoulder toward the mat for a deep stretch.
Coach Tip: Keep your chest lifted and avoid sinking it toward the mat.
Eagle Arms
Besides being an excellent stress reliever, it is a potent exercise to test your shoulder mobility. It also improves blood circulation and recovery and strengthens the shoulder girdle.
How To Perform Eagle Arms
- Sit on your lower legs and reach your arms forward so your upper arms are parallel to the floor.
- Cross your right elbow over your left and wrap your forearms around each other.
- Try to grab your left thumb with your right hand.
- Lift your elbows for a deeper stretch.
Coach Tip: Hold your shoulders in a relaxed position and pull them away from your ears.
Downward-Facing Dog
This yoga pose is one of the best full-body stretches, and I highly recommend you add it to your warm-up and cool-down routine for improved blood circulation. This also engages your shoulder muscles, helping improve strength and stability.
How To Perform Downward-Facing Dog
- Begin in a high plank position.
- Drive your hips toward the ceiling to form an inverted ‘V.’
- Focus on achieving a deep posterior chain stretch. Hold this position for as long as possible.
Coach Tip: Ensure a slight knee bend during the fully extended position to avoid hyperextension.
Yoga Poses for Hamstring Lengthening
Most hamstring injuries are a result of tightness. Plus, they can limit your performance and increase the risk of lower back pain. Yoga poses for hamstrings are usually basic but very effective. Add these poses to your regime:
Forward Fold
This exercise should be a staple in your lower body training routine, as it can help combat tight hamstrings and lower back.
How To Perform Forward Fold
- Stand erect with a shoulder-width stance.
- Hinge at the hips and fold forward while keeping your back as straight as possible.
- Grab your ankles and gently pull your head to your shins.
Coach Tip: Pull your belly button toward your spine while performing this exercise for a better core engagement.
Modifications For Forward Fold
You can also perform this exercise while seated on the floor. Make sure that you’re not flexing your knees, as it can limit hamstring stimulation.
More experienced yogis can perform the Padahastasana pose, which involves placing your hands under your feet during the forward bend. This results in a much deeper hamstring stretch.
Downward-Facing Dog
Although I have already covered this pose in the shoulder section, it deserves a spot in your hamstring routine, too. Push your hands into the floor and drive your hips toward the back wall for a deep hamstring stretch.
Reclining Hand-to-Big-Toe Pose
This is one of my favorite poses to isolate the hamstrings and attain a deep hamstring stretch. You can also feel your hip flexors during this stretch, helping improve muscle stiffness.
How To Perform Reclining Hand-to-Big-Toe Pose
- Lie supine on the floor with your arms at your sides and legs extended.
- Lift one leg off the floor and raise the foot toward the ceiling with minimal knee flexion.
- Grab your foot and bring your knee closer to your chest.
- Hold this position for a deep stretch.
Coach Tip: Ensure that your back is flat on the floor throughout the ROM. A curved spine can cause discomfort and pain.
Modifications For Reclining Hand-to-Big-Toe Pose
People with limited mobility can use a yoga strap. Wrap the strap around your foot and pull on it gently to stretch the hamstrings.
Sample Yoga Sequence for Lifters
Here is a 30-minute sequence that blends all the poses explained in this article (and a few more) that will relieve hip, shoulder, and hamstring tightness and joint pain. This routine includes a five-minute warm-up and cool-down routine to ensure optimal results.
| Exercise | Time | |
| Warm-Up (5 minutes) | Warrior Pose | 2.5 minutes |
| Cat-Cow | 2.5 minutes | |
| Sequence (20 minutes) | Standing Forward Fold | 1 minute |
| Downward-Facing Dog | 1 minute | |
| Pigeon Pose | 1 minute | |
| Lizard Pose | 1 minute | |
| Eagle Arms | 1 minute | |
| Butterfly Pose | 1 minute | |
| Cow-Face Pose | 1 minute | |
| Thread the Needle Pose | 1 minute | |
| Frog Pose | 1 minute | |
| Reclining Hand-to-Big-Toe Pose | 1 minute | |
| Cool-Down (5 minutes) | Child’s Pose | 2.5 minutes |
| Samson Stretch | 2.5 minutes |
Perform each warm-up and cool-down exercise for 30 seconds and alternate between them until you complete the five minutes. After the warm-up, perform two rounds of the 10-minute yoga circuit.
Conclusion
Recovery yoga is an incredibly effective way to unleash your strength and flexibility potential. It can help promote recovery and reduce the occurrence of DOMS. People with packed schedules should start by performing recovery yoga once or twice weekly and slowly increase frequency as they gain more experience.
Learn to listen to your body. Take a break if a pose feels weird or uncomfortable. Start small and slowly increase your training time and intensity as you gain more experience. Stick to this recovery yoga routine for at least eight to 12 weeks, and the results will speak for themselves.
If you have any questions about the yoga poses or the sequence listed in this article, post your questions in the comments below, and I’ll be happy to help!
References:
- Woodyard C. Exploring the therapeutic effects of yoga and its ability to increase quality of life. Int J Yoga. 2011 Jul;4(2):49-54. doi: 10.4103/0973-6131.85485. PMID: 22022122; PMCID: PMC3193654.


