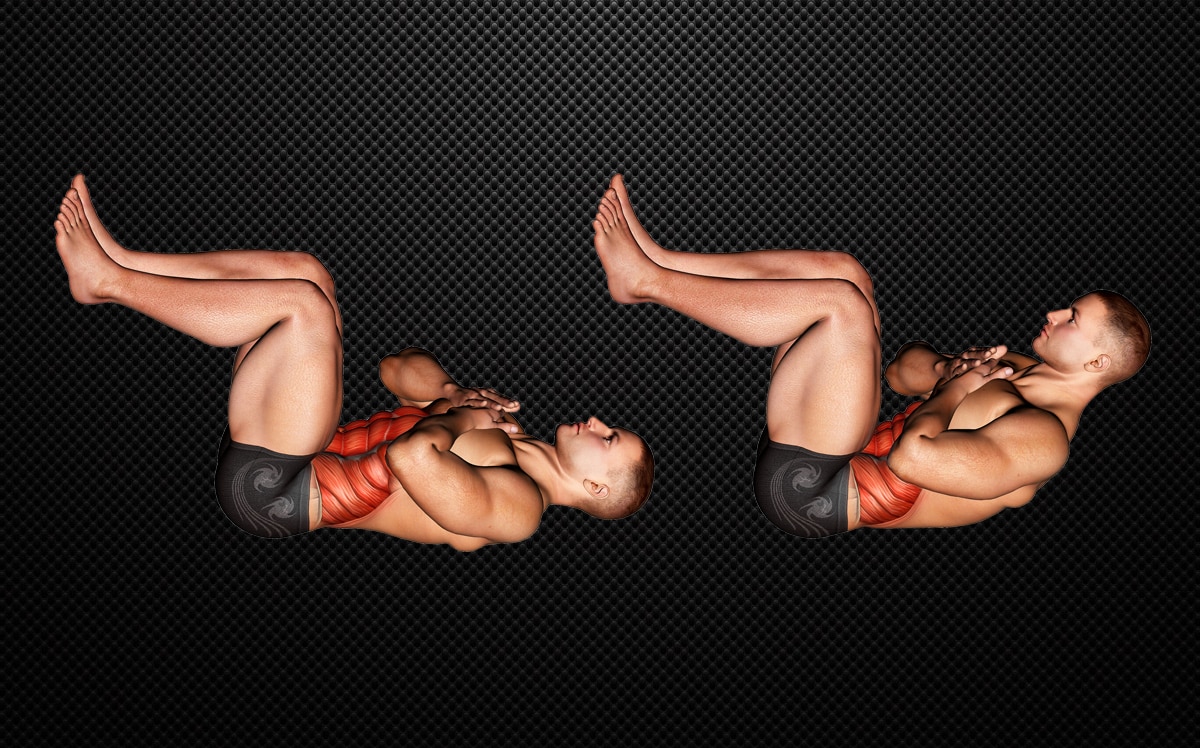
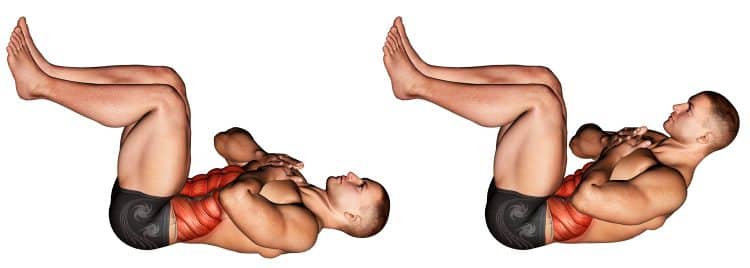
A versatile, entry-level ab exercise, tuck crunches use isometric loading of the lower body, and a regular crunch to stimulate the rectus abdominis six-pack muscles. It’s a also great learning variation as you should focus on core activation at both ends of where the abdominal muscles attach and function. No ab tools or equipment required, we can’t recommend this convenient variation enough.
But if you find tuck crunches too easy, there’s a simple way to progress them, plus you can and should utilize the more advanced variations and alternatives included below.
Check out our full tuck crunch guide below with simple how-to instructions, benefits, drawbacks, and programming tips!
Muscles Worked During Tuck Crunches
If you want to maximize your gains, it’s important that you understand how your muscles work so you can train them properly. Crunches are a core exercise that primarily involves one function of the abs explained below.
Rectus abdominis
The aim of any crunch variation is to improve your six-pack (If we’re being honest) muscles. Also called the rectus abdominis in scientific terms, your abs are long, twin muscles parallel to each other that extend from the lower chest area down to the pelvis region.
Read: How Many Abs Can You Have? 4-Pack vs 6-Pack vs 8-Pack
Not for aesthetic purposes, the rectus abdominis functions relative to its location, curling both ends the trunk, between the ribcage and pelvis, toward each other. This is experienced when you do a basic ab crunch which emphasizes the upper abs, or a leg lift that works the lower core muscles.
Obliques
Playing Robin to the rectus abdominis in tuck crunches, your obliques are side core muscles, found and functioning laterally. As a result, obliques do things like bend us sideways, and rotate our upper bodies. However, the obliques will always get action, no matter what exercise you do.
How To Do Tuck Crunches
Tuck crunches are a very beginner-friendly exercise, but it’ll be most effective if you understand the mechanics of a basic core crunch (one of the variation included below). Because you’re just incorporating the legs via hip flexion, to isometrically engage the lower abs.
You can find the simple tuck crunch exercise steps below, and we also included a quick video tutorial.
Steps
- Find a cushioned but firm surface, or use an exercise mat.
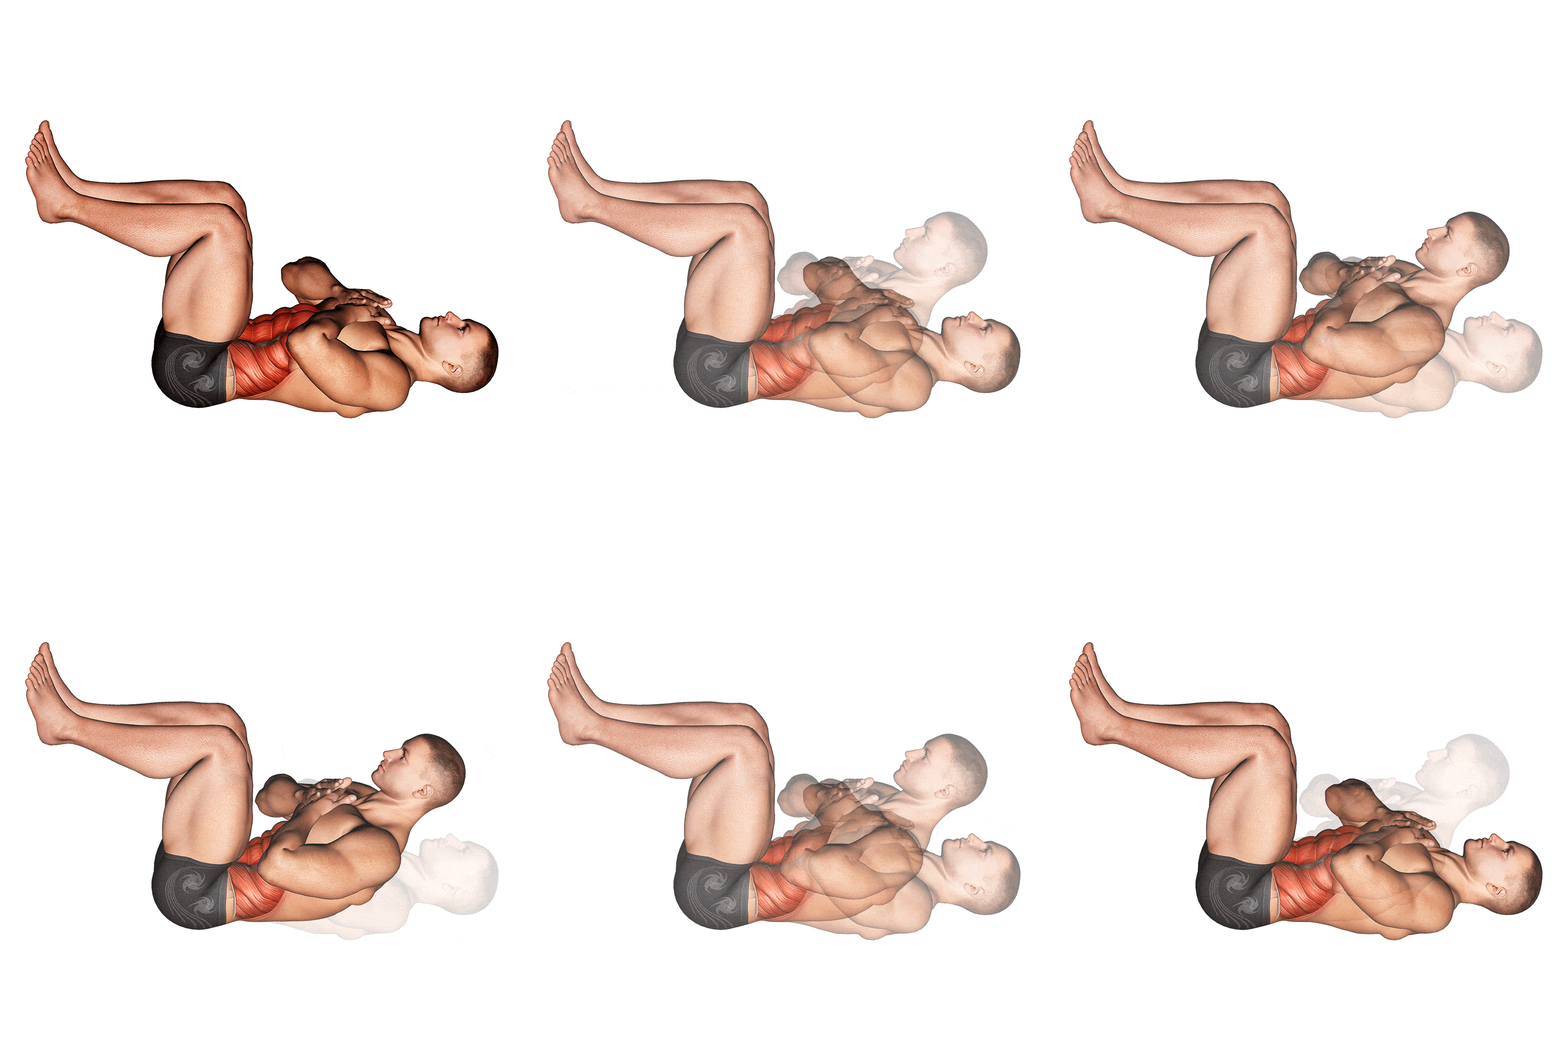
- Lie on your back, then lift your knees up perpendicular to the floor, and bend your legs at a 90-degree angle. Your lower back should be flat and pressed into the floor.
- Cross your arms on your chest, tense your core, and use your ab muscles to curl your upper body toward your knees. Push as far as you can without lifting your upper back. Squeeze your abs hard, and exhale.
- While maintaining a tense core, slowly reverse the motion by lowering your shoulders to the ground. Inhale, and prepare for the next rep. Continue for the desired number of repetitions.
It’s that easy and effective!
Here’s an example of tuck crunches:
Tips
- You can also place your fingers behind your head during tuck crunches. However, do not pull up on your neck. Keep your head neutral and use your abs to control the movement.
- Your lower back should not leave the ground during tuck crunches.
- For increased ab activation, bend your knees in as you crunch your upper body, then extend your legs out as you drop your shoulder to the floor. Just make sure your back stays flat against the floor, which means you won’t be able to drop your legs too far down.
- Hold a weight in both hands to drive more stimulation in your abs!
This Exercise
- Target Muscle Group/s: Rectus abdominis
- Secondary muscle group/s: Obliques
- Type: Hypertrophy
- Mechanics: Isolation
- Equipment: Cushioned surface, exercise mat
- Difficulty: Beginner/Intermediate
Benefits of Tuck Crunches
If you need convincing of why tuck crunches are a cool ab exercise, here are a few reasons.
Show off your midsection
As the summer months draw near, eyes will also right in that midsection area if you put together the right ab training routine. Tuck crunches are not only a good way to stimulate your core, but they’re so quick and simple that you can even do them before you hit the sand, and get a nice midriff pump!
No ab tools needed
No bars, cables, weights, or machines necessary… tuck crunches require nothing but a cushioned surface, your commitment, and intensity.
Related: The best six-pack workout you can do at home
Learn to use your lower body to load your core
While leg involvement is minimal in tuck crunches, incorporating your legs in ab training is good practice. Your legs weigh a lot and are a convenient way to add a lot more resistance. You can do gradual progressions starting from tuck crunches, incorporating the many leg crunch variations.
Drawbacks of Tuck Crunches
Tuck crunches are a good exercise choice, but they aren’t perfect. Here are some drawbacks of this movement.
You’ll eventually need more…
Unless you’re maintaining or using it to warmup (both strategies are beneficial), there will come a point when you need to step up your tuck crunch game. Think around the 35+ rep mark, then progress by holding a weight, or progress to more challenging variations.
Leg movement would be better!
In tuck crunches, your legs remain in one static position, not moving. While it may increase lower ab activation, it’s undoubtedly better to move your legs, whether it’s lifting them up and down, doing bicycle crunches, or pulling them in and out.
More lower body involvement will simulate a lower core crunch, contracting the abs more, which should translate to a more effective exercise.
But holding your legs steady is a a good way to introduce your legs in your ab training, or cool down after an intense workout.
Variations and Alternatives of Tuck Crunches
There are endless crunch variations and alternatives, however, we wanted to choose ones that closest replicate a similar body position and movement to tuck crunches.
Basic ab crunch
The standard ab crunch is known as the exercise in its most basic and beginner-friendly form. You should definitely learn how to do it correctly before introducing your legs into the movement. That means contracting your abs, and using them to curl your torso off the ground.
As simple as they seem, there’s a right and wrong way to do them, and it’s too easy to slack off.
Steps
- Lie on your back on a cushioned yet firm surface such as a carpet or training mat.
- Bend your knees, and place your feet flat on the floor roughly hip width apart. Your feet should be close enough to your butt that you can reach forward and touch your heels. Your lower and upper back should be flat against the floor.
- Then place both hands behind your head and keep your elbows flared out to the sides, where they should stay throughout the movement.
- Now tighten your core, and lift your shoulders in, squeezing your abdominals. Keep your head neutral.
- Slowly lower your upper body to the floor and repeat until you’re satisfied.
Here’s a short and sweet video of the basic ab crunch.
Weighted tuck crunch
It’s as easy as picking up a five pound dumbbell, weight plate, or any evenly weighted object that you can hold in both hands. Crunches may have a reputation of being a bodyweight-based exercise. However, your abs are muscles like any other muscles, and they need progressive resistance to respond and develop.
If you’re more advanced in your training, you should always add more weight/ more reps, and variations that challenge your core further.
Steps
- To avoid dropping a weight on yourself, first, place the weight on the floor, and then sit next to it.
- Then, hold the weight with both hands in front of your chest, lie on your back, and lift both legs up while keeping your knees bent at 90 degrees. Your lower back should be flat on the floor.
- Press the weight up over your chest and lock out your elbows.
- Engage your core, and use your ab muscles to crunch up and forward while reaching for your toes. Squeeze your core muscles hard.
- Slowly roll back to the starting position but don’t allow yourself to rest. Immediately perform the next repetition and continue until the set is completed.
Bicycle crunches
They look simple, but bicycle crunches done right are a crazy good core builder that also promotes more mobile hips. While more of a rotation exercise, the legs follow a similar movement to wind sprints, and they’re totally worth including in your workouts.
Steps
- Lie down on an exercise mat or soft surface.
- Place your fingertips behind your head near your ears and lift your feet about 12 inches off of the floor.
- Then, pull your left knee into your abdominals while twisting your body to the left. Try to touch your left knee and right elbow. Contract your abs during this part of the movement.
- Immediately do the opposite motion with your legs, and rotate to the right.
- Alternate your legs until you’ve completed one set. Rest for 30 seconds, and repeat.
Pro tips:
- Pretend you’re trying to touch your shoulder to the opposite knee. This will ensure that you get optimal trunk rotation, and hence fully stimulate the obliques.
- Make sure to alternate between bent and extended legs, kicking your legs in circles like you’re riding a bicycle.
On a weight loss journey? Use our calories burned during bicycle crunches calculator to track your progress.
V-Ups
A worthy variation in our books, v-ups allows you to perform a bodyweight floor crunch using the full weight of your arms and legs at the same time, targeting both the upper and lower abdominals. It is advanced though, so you should be somewhat of a crunch master beforehand.
Steps
- Lie on the floor face up with your legs straight out, feet pressed together, and arms extended above your head.
- Brace your core by pushing the pelvis down, taking a breath in, and tensing the midsection.
- Then, simultaneously lift your legs up toward the center of the body, and reach your arms toward your toes.
- Reverse the motion and return to the starting position while keeping your heels a few inches off the floor. Your back should always be flat against the floor and your core tensed.
FAQs
What are the best sets and reps for tuck crunches?
Because tuck crunches are a fairly basic bodyweight based ab crunch variation, we recommend doing 2-3 sets of high rep sets, or training to complete muscular failure.
Then when you become more advanced, switch to weighted tuck crunches (included in this guide), and aim for a 12-20 rep range, using a weight that challenges you and makes you work for the last five repetitions!
How far should I crunch?
The idea is to crunch as far as you can forward without lifting your upper back. You want to squeeze hard and contract your core muscles, which is best with a full range of motion, getting as much spine flexion as possible.
Tuck crunches are too easy. How to make them harder?
Grab a weight plate, dumbbell or evenly weighted object and hold it above your chest. You can also bend and extend your legs as you crunch. See variations and alternatives section for reference.
Wrapping Up
There’s really nothing more to it… tuck crunches are simple but ab gains friendly exercise when you’re ready to go beyond a basic crunch, need a quick ab pump, or a warmup before your more intense core training. It’s a great exercise to train both ends of your core, while developing your mind muscle connection, making your ab training even better, so you can get those dreamy abs!
Interested in measuring your progress? Check out our strength standards for Bicycle Crunch, Crunches.


