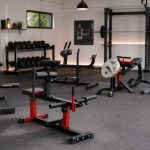
Most new home gym owners never think about barbell storage until they buy their second barbell. However, overlooking barbell storage can reduce your bar’s longevity and hamper your training performance by spoiling its knurling.
I don’t think barbell storage gets its fair share of attention. We have foldable weight benches, treadmills, and even squat racks, but I don’t think a foldable barbell will ever be a reality. Olympic barbells are 7 feet long and are made to handle a lot of weight. Most weightlifting barbells have a 1,000-pound capacity. Some specialty powerlifting barbells can also handle up to 1,500 pounds, which is more than what 99.9% of people will ever lift.
Most home gym owners refrain from purchasing commercial barbell storage equipment, as they feel their price doesn’t justify their utility. In this article, I will take you over the seven best DIY barbell holder ideas that cost you under $10 and can be built within a couple of hours. We will also uncover the advantages of DIY barbell holders and the most frequently asked questions on the subject. So, sit tight and read on.
7 Best DIY Barbell Holder Blueprints
DIY barbell holders come in different shapes and sizes, and you must choose the ones that best fit your needs. Here are the seven designs you should consider:
1. Wall Hook DIY Barbell Holder

Some home gym owners prefer DIY training equipment over commercial ones because they can customize them to their unique needs. Most garage gym enthusiasts own a single barbell, and don’t usually need elaborate multi-barbell holders.
Building a DIY barbell holder can save you space, and you can place it in any corner of your home gym. I recommend buying the garage storage hooks over building steel or wooden hooks, as making these requires expertise with power tools, can take a couple of hours to complete, and will cost about the same as the commercial garage storage hooks.
Plus, if you mold steel into hooks, you’ll have to coat them with UHMW plastic to ensure the steel doesn’t spoil your bar’s knurling. On the flip side, most garage storage hooks are coated with PVC sheaths, improving their longevity and preserving the barbell’s knurling.
Tools and Materials:
- Garage storage hooks
- Drill machine
- Level
- Take measure
- Pencil
- Screws
- Wall anchor
This is pretty much all you need to set up the most basic DIY barbell holder. You should invest in high-quality garage storage hooks as they can handle more weight and last a long time. I recommend the 3-H Garage Hooks Garage Hooks.
Steps:
Here are the step-by-step instructions for building a single wall hook DIY barbell holder:
Step One — Choose the Location
This is one of the most important but overlooked aspects of building a DIY barbell holder. You want to set up the barbell holder in a place that doesn’t restrict your movement or make your home gym feel congested.
There should be enough space on both sides of the anchor to place and remove a seven-foot barbell without bumping it into other equipment. Also, ensure that you install the hooks at a convenient height. The holder shouldn’t be too high or low.
Step Two — Mark the Wall
After determining the right height for the barbell holder, use a measuring tape and a pencil to mark two points on the wall at the same height. Confirm the barbell holder’s angle with a carpenter’s level. Remember, the barbell’s shaft length is usually 51.5 inches (4.3 feet). For a secure fit, you must install the hooks around 45.6 inches (3.8 feet) apart.
Step Three — Pre-Drill Holes & Insert Anchors
Most garage storage holders have two holes to ensure a secure fit. However, you must pre-drill the screws in the wall using the marked points as a guide. Ensure the holes are the right size for the storage holders’ anchors. After drilling the holes, insert wall anchors for extra stability.
Pro Tip: People with drywall in their home gym should securely anchor the storage holders by drilling them into the wall studs. Use electronic stud finders to find the right place to install the holders. Conversely, people with concrete or brick walls can drill directly into the wall.
Step Four — Attach the Garage Hooks
Alight the screw holes of the garage storage hooks with the holes on the wall. Remember, if the storage hooks have two holes, you should drill two holes into the wall. Use a drilling machine to screw in the hooks.
Step Five — Test
There is just one way to test a barbell holder — place a barbell on it. However, avoid dropping the barbell on the hooks. Place the barbell gently on the pins and ensure they are secure. Check if the barbell is level. Then, you can test your DIY barbell holder’s strength by pressing on the barbell while it is racked.
Pros of Wall Hook DIY Barbell Holder
- The most budget-friendly and convenient DIY barbell holder setup.
- Can hold a 20-kilogram Olympic barbell.
- The PVC sheath keeps the bar’s knurling safe.
Cons of Wall Hook DIY Barbell Holder
- Not ideal for folks with more than one barbell.
- It is not the most aesthetically appealing barbell holder.
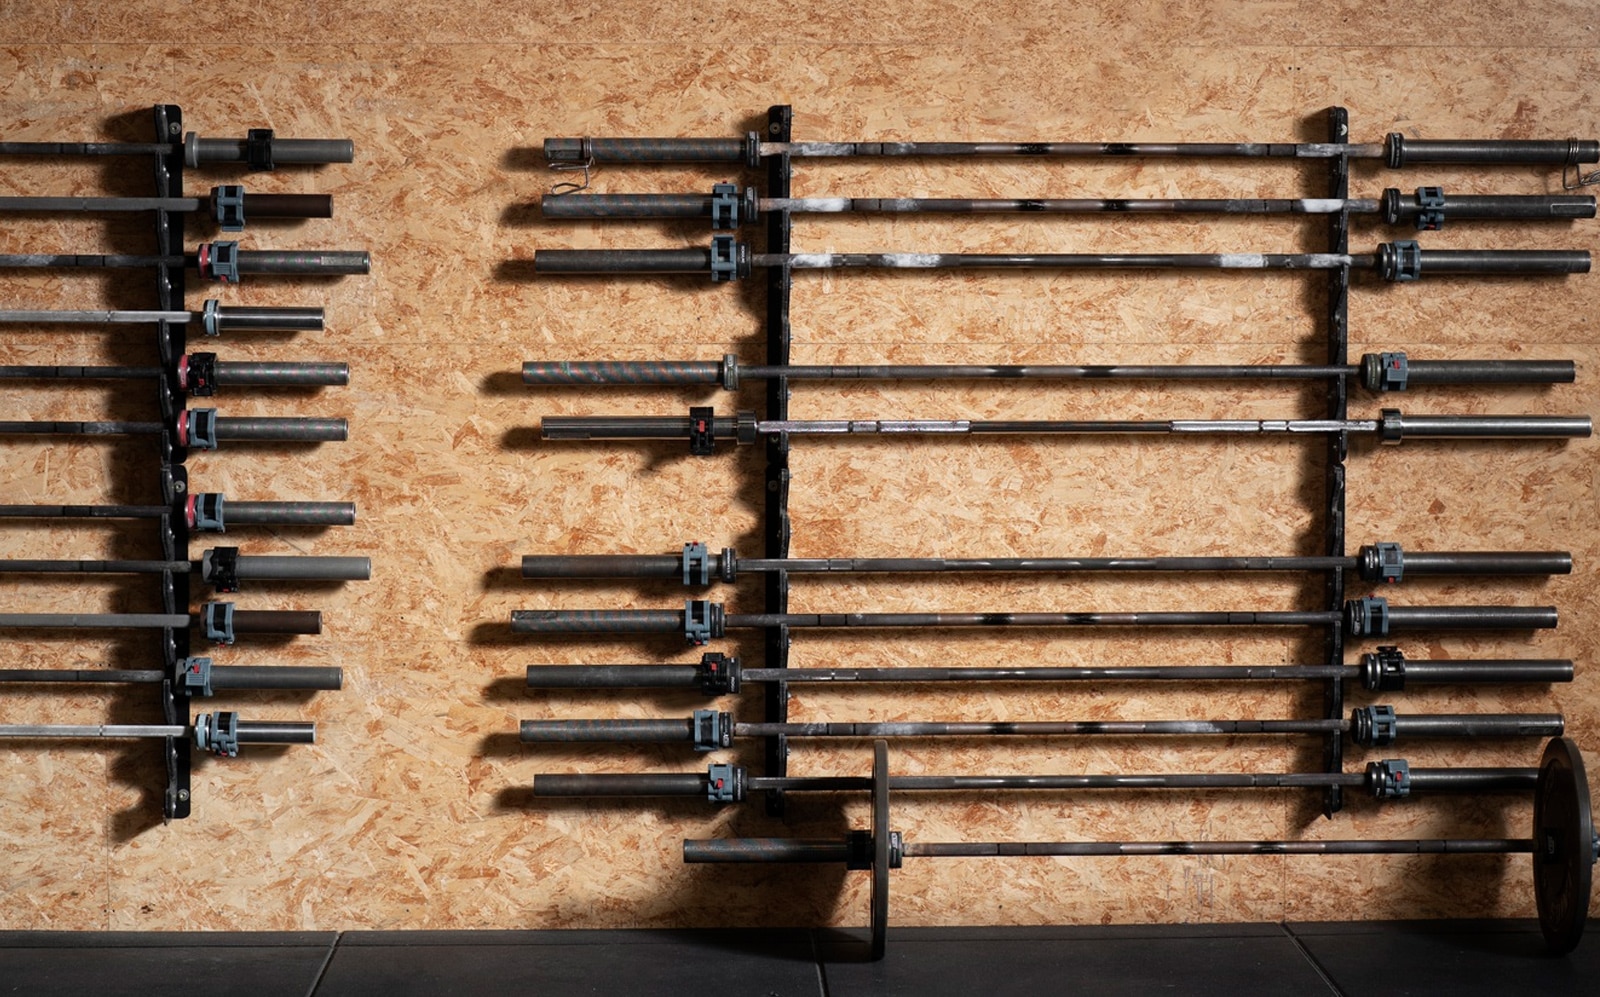
2. Horizontal DIY Multi Barbell Holder
This step up is a better choice for serious lifters. This barbell holder variation is more secure and can handle significantly more weight.
Tools and Materials:
- Garage storage hooks
- Two 2×4 lumbers
- Drill machine
- Level
- Take measure
- Pencil
- Screws
- Wall anchor

Steps:
Follow these steps to build your multi-bar holder:
Step One — Drill the Wood
Pre-drill the 2X4s at three places — near the top and bottom and around the middle. Pre-drilling prevents the wood from cracking during installation. Use a 5-inch drill bit for the holes. Then, pre-drill for the garage storage hooks. You should be able to install six hooks on the lumber.
Using lumber instead of drilling directly into the wall distributes the barbells’ weight over a bigger surface area, reducing the risk of the hooks falling out of the wall.
Pro Tip: You could use J-cups instead of garage hooks for this setup. Although it might significantly increase the project’s cost, it will make your DIY barbell holder look more professional.
Step Two — Choose the Location & Pre-Drill the Holes in the Wall
Find an appropriate location for the barbell holder on the wall studs and use a pencil, measuring tape, and level to mark the holes to install the lumber. Pre-drill the holes in the wall and insert the wall anchors.
Step Three — Install the Lumber, Attach the Garage Hooks, & Test
Align the screw holes on the lumber with the holes on the wall and attach them using a drilling machine. Then, use a drill machine to secure the garage storage hooks or J-cups to the lumber. Test the setup to ensure the fit is snug and the holders don’t wobble under the barbell’s weight.
Pros of Horizontal DIY Multi Barbell Holder
- An excellent setup for people with multiple barbells.
- Allows you to change the placement of the hooks to accommodate specialty barbells.
Cons of Horizontal DIY Multi Barbell Holder
- Not the best choice for people with a barebone home gym with limited space.
3. Vertical DIY Barbell Holder
This is a vertical barbell storage solution for folks with multiple bars. It is an excellent choice for people with limited space in their home gym who cannot store the Olympia barbell horizontally.
Tools and Materials:
- Garage storage hooks
- 1×4 lumber
- Drill machine
- Level
- Take measure
- Pencil
- Screws
- Wall anchor
Steps:
Follow this detailed guide to build your vertical DIY barbell holder:
Step One — Drill the Wood
You will be installing this piece of lumber horizontally on the wall. Pre-drill the 1×4 lumber at four equal distances to install the storage hooks. Then, pre-drill using a 5-inch drill bit for the wall installation bolts.
Step Two — Choose the Location & Pre-Drill the Holes in the Wall
Choose an appropriate height to install the lumber and ensure it can take a 7-foot Olympic barbell. Mark the holes on the wall using a measuring tape and pencil. Use a level to ensure the wood is straight. Pre-drill into the wall studs and add anchors to ensure better stability.
Step Three — Install the Lumber, Attach the Garage Hooks, & Test
Attach the lumber to the wall using wood screws. Then, screw the garage hooks to the lumber. I recommend using the 3-H Garage Hooks Garage Hooks for this project, as the hooks are wide enough to accommodate the bar’s collar. Test the lumber’s stability by hanging four barbells on it.
Pros of Vertical DIY Barbell Holder
- Great for home gym owners with limited space.
- Easy to set up.
Cons of Vertical DIY Barbell Holder
- Not as stable as horizontal barbell holders.
4. Fixed Vertical DIY Barbell Holder
If the vertical barbell wall mount (blueprint number three) is the iPhone 15 of barbell storage, the fixed variation is the iPhone 15 Pro Max. Most people don’t necessarily need the additional features, but they are nice to have and definitely add to the user experience.
The biggest problem with the previous barbell holder idea is that the barbells are not locked into place. People with kids should avoid the previous DIY barbell holder as the barbells may not be securely fixed and could potentially dislodge with minimal force applied to the free end.
Tools and Materials:
- 2X4 lumber
- 3-H garage hooks
- Screws
- Miter saw
- Drill machine
- Wall anchors
- Screws
- Wood glue
- Sandpaper
- Measuring tape
- Pencil
Steps:
This is how to build the fixed vertical DIY barbell holder:
Step One — Cut and Mark the Lumber
Cut the lumber into three 40-inch pieces using a miter saw. Use a tape measure to mark every five inches on two lumber pieces. Ensure the markings are aligned. You’ll be attaching the garage storage hooks here.
Step Two — Drill the Wood & Attach the Wood Pieces
Use a two-and-a-half-inch Forstner bit to drill halfway through one of the lumber pieces; drill seven holes into the lumber. Place the drilled lumber piece on the floor and attach the vertical lumbar piece on its long side using wood glue and screws. Attach the garage hooks to the top lumber piece.
Step Three — Install the Lumber, Attach the Garage Hooks, & Test
Mark the exact position where you’ll install the DIY barbell holder on the wall, and ensure that the garage hooks and the hollowed lumber fit an Olympic barbell perfectly. Once satisfied, drill the lumber into the wall and test the setup by placing barbells on the rack.
Pros of Fixed Vertical DIY Barbell Holder
- This DIY barbell holder costs less than $10 to make, which makes it an excellent option for people on a tight budget.
- A sturdy barbell storage solution for people with limited space in their home gym.
Cons of Fixed Vertical DIY Barbell Holder
- You need power tools.
5. Wooden DIY Barbell Holder
Some people don’t like the idea of using garage storage hooks in their barbell holders and don’t want to invest in expensive J-cups. For these folks, we have the wooden DIY barbell holder. The bottom end of this vertical barbell holder acts as a stand, and the top end is the hook.
Two main differences exist between the fourth and fifth DIY barbell holder blueprints explained in this article. First, you’ll need four 40-inch pieces instead of three, and you’ll drill halfway through one lumber piece and all the way through the second piece.
Tools and Materials:
- 2X4 lumber
- 3-H garage hooks
- Screws
- Miter saw
- Drill machine
- Wall anchors
- Screws
- Wood glue
- Sandpaper
- Measuring tape
- Pencil
Steps:
Here is how to put together the all-wood DIY barbell holder:
Step One — Cut and Mark the Lumber
Use a miter saw to cut the 2X4 lumber into four 40-inch pieces. Mark a hole every five inches on two 40-inch pieces using a pencil and tape measure. You should have seven such markings on each lumber piece.
Step Two — Drill & Attach the Wood Pieces
Drill halfway through one 40-inch piece and all the way through for the second one. Ensure the holes are aligned. Attach the undrilled lumber piece sideways onto the drilled pieces.
Step Three — Install the Lumber & Test
Mark the wall studs where you will install the lumber. Ensure the barbell’s top end protrudes at least three inches above the uppermost lumber piece for added safety. Drill the lumber into the wall and test the setup by placing the barbells in it.
Pros of Wooden DIY Barbell Holder
- Great for people who want a wall-mounted barbell holder but don’t want to use metal hooks or J-cups.
- Extremely sturdy and secure.
Cons of Wooden DIY Barbell Holder
- Requires power tools.
- You cannot place shorter barbells in this rack.
6. Floor DIY Barbell Holder
The floor DIY barbell holder is an excellent option for people with limited space in their home gym who cannot hoist a barbell holder on the wall. Remember, use high-quality, heavy-duty plywood to ensure the box can hold the weight of four barbells.
Tools and Materials:
- Plywood
- PVC pipe (inside diameter of at least 2 inches)
- Wood screws
- Wood glue
- Jigsaw
- Measuring tape
- Pencil
- Screwdriver
- Drill
Steps:
Use the following steps to build the floor DIY barbell holder:
Step One — Cut the Plywood
Use a jigsaw to cut the plywood into the following dimensions:
- 2 x 12 inches by 8 inches (for the sides)
- 2 x 24 inches by 8 inches (for the front and back)
- 1 x 12 inches by 24 inches (for the top)
- 1 x 12 inches by 24 inches (for the bottom)
Step Two — Make Holes For the Barbells, Drill the Slots, & Assemble the Box
On the 12 x 24-inch top wood piece, use a pencil to mark the holes for the four barbells. Ensure they are evenly spaced and placed along the length of the board. Putting them too close toward the center can throw the box off balance. The slots should be 2 inches wide and 6 inches deep.
Drill the holes in the plywood with a 2-inch hole saw attachment. Then, use wood glue and screws to assemble the box.
Step Three — Cut & Insert the PVC Pipes
Cut four 9-inch pieces of PVC pipe. Insert these PVC pipes into the barbell slots. Ensure these pipes fit snugly into the wooden box. Add PVC cement if the pipes are loose or wobble inside the box. Test the box by inserting four barbells into it.
Pros of Floor DIY Barbell Holder
- A portable barbell holder that you can store in any corner of your gym.
- A durable design that will last you a lifetime.
Cons of Floor DIY Barbell Holder
- Adding or removing the barbells from the floor holder can be a hassle.
- Can cause obstruction in the gym.
7. Power Rack DIY Barbell Holder
If you are a single-barbell type of lifter who owns a power rack and has no plans of buying a second barbell, this is the barbell holder for you.
Tools and Materials:
- PVC pipe (2-inch inner diameter)
- Galvanized strut (4-inch)
- 2 x 1-inch bolts
Steps:
Here is the step-by-step guide to building this easy power rack barbell holder:
Step One — Drill through the PVC
Cut a 19-inch PVC pipe using a saw. Drill two holes in the PVC pipe so that the bolts can pass through the PVC pipes, galvanized strut, and the power rack. The holes should be near the bottom of the pipe so that you can place a barbell securely in the holder.
Step Two — Spray Paint the Pipes (Optional)
Although optional, I highly recommend spray painting your pipes black, as it will make your setup look much more professional.
Step Three — Screw the Pipe to the Power Rack
Screw the pipe and strut to the power rack using the two bolts. Test the setup by inserting a barbell.
Pros of Power Rack DIY Barbell Holder
- Takes 10 minutes to build.
- Space saver.
- Budget-friendly.
Cons of Power Rack DIY Barbell Holder
- Can only take one barbell.
- Not as sturdy as the other options on this list.
https://www.instagram.com/p/CeEbg1pr9TI/?img_index=1
Benefits of DIY Barbell Holder
Here are the advantages of adding the DIY barbell holder to your home gym:
Saves Space
DIY barbell holders, especially the wall-mounted variants, free up significant space in your home gym. It also eliminates the need to move around the barbell whenever you need to use the squat rack for exercises like pull-ups and DIY cable pulley exercises.
Keeping the barbell on the floor not only takes up a lot of space in your home gym but it also increases the risk of injury due to tripping over the barbell. An organized home gym will also significantly improve your productivity and output.
Cost Efficient
Quality commercial barbell holders can cost you more than $50. Conversely, most DIY barbell holders can be built for under $10 and will last a long time. Plus, since barbell holders are minimalistic equipment, you can easily replace different parts of the equipment to improve its utility.
Improves Barbell Longevity
Storing the barbells in a holder can improve their longevity. Storage hooks with PVC sheath or UHMW plastic J-cups can protect your bar’s knurling, giving you a better grip on the barbell.
Storage For Smaller Equipment
Besides barbells, you can also use most DIY barbell holders detailed in this article to store small training equipment like resistance bands, skipping rope, and barbell collars. I also know people who use it as their coat hanger in winter.
FAQs
What are the things you must consider while building a DIY barbell holder?
The most important thing while building a DIY barbell holder is to keep the design modular. Use tools like garage storage hooks to hold the barbell. Most storage hooks are made of thick steel. Additionally, they use a non-slip PVC sheath, which keeps the barbell from sliding when racked and preserves the bar’s knurling.
Add a UHMW plastic to prevent the metal from scrapping the knurling if you’re using metal hooks in your barbell holder. While a smoother barbell might be more pleasant to grip, it significantly hampers your grip, increasing your risk of injury while training.
Do I need a DIY barbell holder if I have only one barbell?
Contrary to what most people think, a barbell holder is a must-have for your home gym, even if you have a single barbell. It frees up a lot of space in your home gym, which can be invaluable, especially for folks into functional training.
Lifters who have just one barbell and don’t plan on buying new ones any time soon can build the wall hook DIY barbell holder detailed in this article.
Will these DIY barbell holders spoil my barbell’s knurling?
Using metal hooks as your barbell holders can spoil your barbell’s knurling. While building a DIY barbell holder, you must use garage storage hooks with PVC sheath, wooden, or UHMW plastic J-cups to protect your barbell’s knurling.
Wrapping Up
Home gym owners with at least one barbell must use a holder. While most high-quality commercial barbell holders can cost over $50, this article contains DIY barbell holder blueprints that cost less than $10 to build, can hold up to seven barbells, and take less than 30 minutes to complete.
If you have any questions about the barbell holders explained in this article, drop them in the comments section below, and I’ll be happy to help!