
Bent Over Barbell Row vs T-bar Row With Handle

Compare target muscles, equipment, difficulty, movement type, and secondary muscles for Bent Over Barbell Row and T-bar Row With Handle.

Change comparison Share

Get comparison link

Select the link and use your device's Copy command.

Comparison overview

AI-generated
Bent Over Barbell Row vs T-Bar Row With Handle — both are staple compound back moves, but they load your back differently. You’ll learn which exercise emphasizes the lats versus middle-back, how torso angle and grip change force vectors, and which one fits your goals (hypertrophy, strength, or beginner training). I’ll walk you through technique cues, biomechanics like length-tension and moment arms, equipment needs, progression paths, and clear recommendations so you can pick the one that accelerates your muscle growth and strength safely.

Exercise Comparison

Exercise A
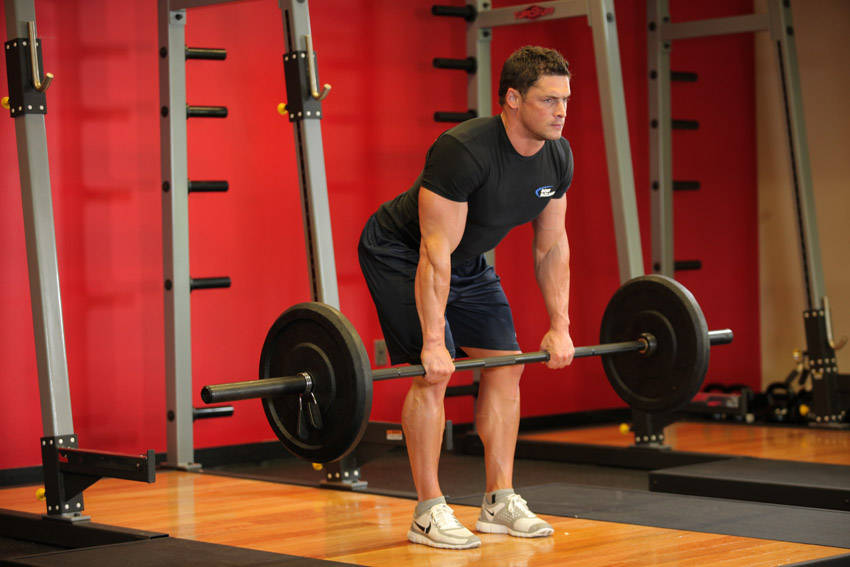
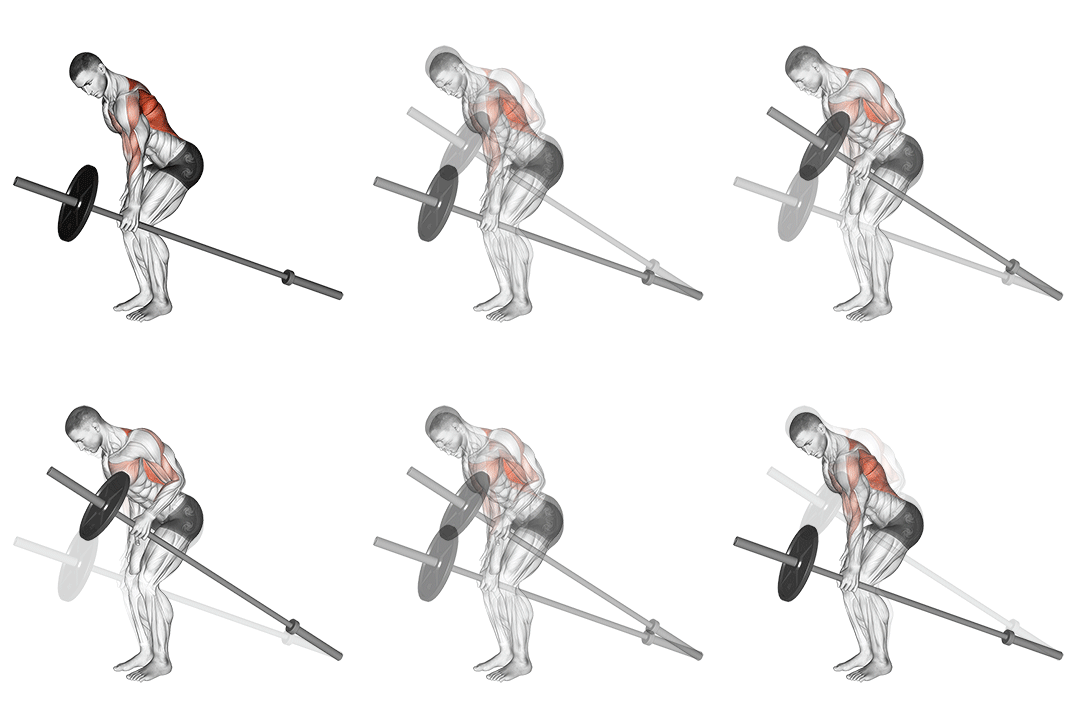
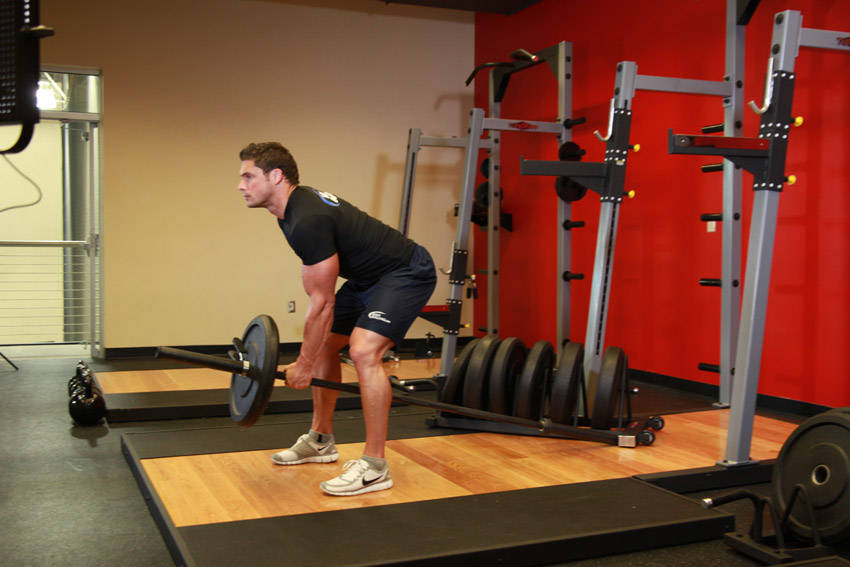
Bent Over Barbell Row demonstration

Bent Over Barbell Row

Target Lats
Equipment Barbell
Body Part Back
Difficulty Intermediate
Movement Compound
Secondary Muscles
Biceps Lats Shoulders
VS
Exercise B
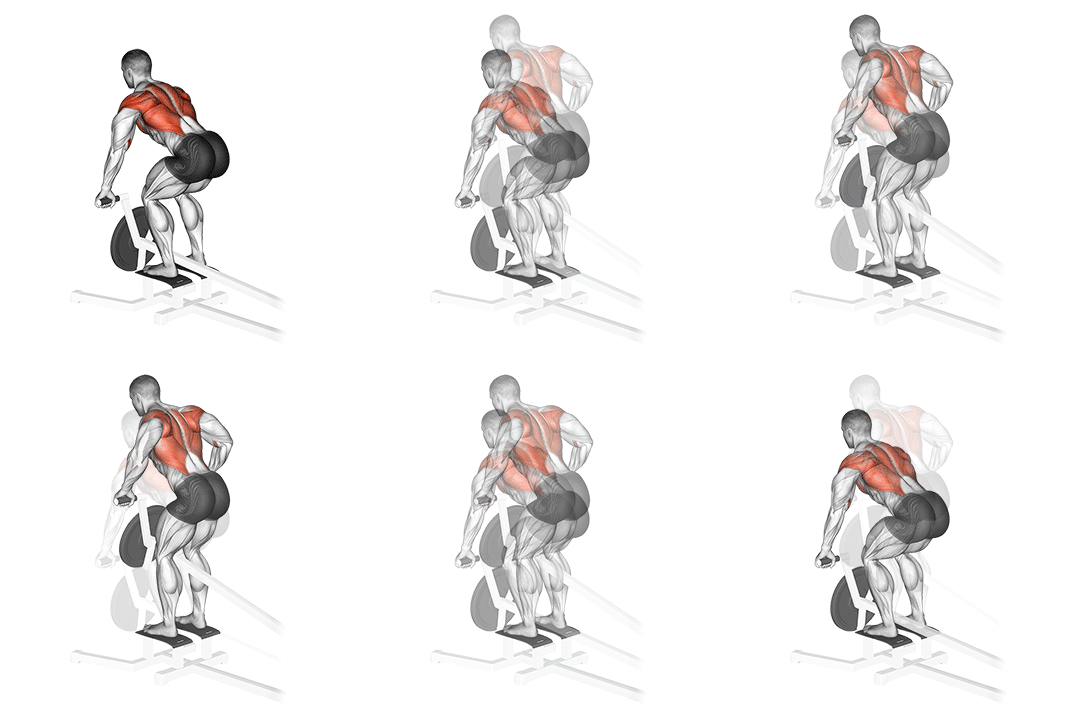
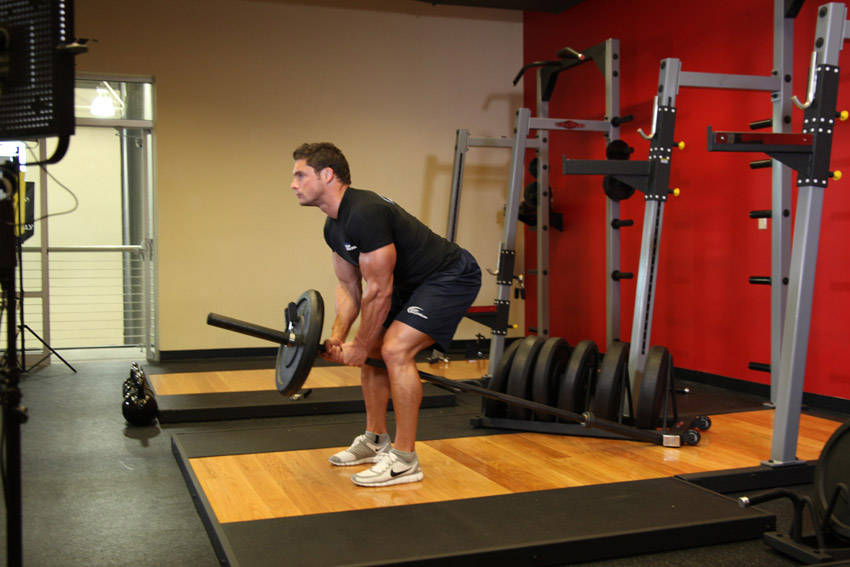
T-bar Row With Handle demonstration

T-bar Row With Handle

Target Middle-back
Equipment Barbell
Body Part Back
Difficulty Intermediate
Movement Compound
Secondary Muscles
Biceps Lats

Head-to-Head Comparison

Different values are marked. These are catalogue attributes, not performance scores.

Muscles used

Listed target and secondary muscles, shown on the body. Locations, not activation or strength scores.

  • Target
  • Secondary
  • Not highlighted

Bent Over Barbell Row

Front
Bent Over Barbell Row: front muscle locationsSolid: listed target. Striped: listed secondary. Grey: not highlighted. Locations, not activation or strength scores. See the muscle names below.
Back
Bent Over Barbell Row: back muscle locationsSolid: listed target. Striped: listed secondary. Grey: not highlighted. Locations, not activation or strength scores. See the muscle names below.
Target
Lats
Secondary
Biceps, Lats, Shoulders

Not shown on diagram: Shoulders. These labels do not identify a precise region on this map.

T-bar Row With Handle

Front
T-bar Row With Handle: front muscle locationsSolid: listed target. Striped: listed secondary. Grey: not highlighted. Locations, not activation or strength scores. See the muscle names below.
Back
T-bar Row With Handle: back muscle locationsSolid: listed target. Striped: listed secondary. Grey: not highlighted. Locations, not activation or strength scores. See the muscle names below.
Target
Middle-back
Secondary
Biceps, Lats

Not shown on diagram: Middle-back. These labels do not identify a precise region on this map.

Grey does not mean a muscle is unused. The diagrams show only the mapped catalogue labels.

Attribute Bent Over Barbell Row T-bar Row With Handle
Target Muscle Different
Lats
Middle-back
Body Part
Back
Back
Equipment
Barbell
Barbell
Difficulty
Intermediate
Intermediate
Movement Type
Compound
Compound
Secondary Muscles Different
Biceps, Lats, Shoulders
Biceps, Lats

Visual Comparison

An illustrative 1–10 profile derived from catalog difficulty, equipment, and listed-muscle fields—not measured performance or muscle activation.

Key Differences

  • Bent Over Barbell Row primarily targets the Lats, while T-bar Row With Handle focuses on the Middle-back.

Muscle comparison

Shared target muscles

Both lifts are horizontal-pull compounds that load the posterior chain and recruit the lats, rhomboids, and scapular retractors. Bent Over Barbell Row biases the latissimus dorsi more due to a more horizontal torso (typically 30–45° from horizontal), increasing lat length-tension and long-range-of-motion. The T-Bar Row With Handle shifts the load into the mid-thoracic region (middle traps and rhomboids) because your torso is more upright (about 15–30°), producing a more vertical-ish force vector toward the sternum.

Secondary muscle differences

Secondary recruitment differs: Bent Over Row stresses the posterior deltoids and spinal erectors to maintain the hip hinge, increasing low-back and hamstring isometric demand. T-Bar Row With Handle reduces low-back shear and increases middle-trap and teres major contribution, letting you load heavier without the same lumbar torque. Biceps activation is similar across both but may feel stronger on T-bar due to a more fixed path and less torso bracing.

Muscle involvement analysis

Bent Over Row uses a longer concentric ROM for the lats—shoulder extension from ~90° flexion to ~20° extension—creating a longer muscle length-tension curve and strong peak tension near lockout. T-Bar Row shortens the lat’s working length but increases scapular retraction force through more vertical pulling, concentrating activation mid-range. Biomechanically, Bent Over emphasizes horizontal force vectors and hip-hinge stability; T-Bar has a steeper upward force vector and less lumbar moment arm.

Equipment and setup

Bent Over Barbell Row: setup

Bent Over Barbell Row needs only a straight barbell and plates, plus a flat open floor and enough room for hip-hinge motion. No specialized attachments required.

T-bar Row With Handle: setup

T-Bar Row With Handle typically requires a landmine or T-bar row handle and a barbell with one end anchored, plus plates. Some gyms have a dedicated T-bar station; at home you’ll need a landmine setup or corner anchor.

Access and practicality

Bent Over Barbell Row is more accessible because you only need a barbell and plates—common in most gyms and home setups—whereas T-Bar Row demands an extra handle or landmine anchor.

Learning and progression

Learning the movements

Bent Over Barbell Row has a steeper learning curve because you must maintain a neutral spine under load, master the hip hinge, and control torso angle (30–45°). T-Bar Row With Handle is easier to learn since the bar path is more fixed and torso is more upright, reducing low-back stabilization demands.

Progression considerations

T-Bar Row allows safer linear progression to heavier loads because the setup stabilizes the bar path and reduces lumbar loading. Bent Over Row offers progression via tempo, paused reps, and increased ROM but requires careful loading to avoid form breakdown.

Limitations and precautions

Bent Over Row carries higher risk to the lumbar spine if form breaks (increased shear and flexion). T-Bar Row lowers lumbar shear but can increase shoulder strain if you flare elbows excessively. Overall, injury risk is higher with Bent Over when performed with poor bracing or excessive rounding.

Pros & Cons

Bent Over Barbell Row

+ Pros

  • Greater lat stretch and long ROM for muscle growth
  • Only needs a barbell and plates—very accessible
  • Trains hip hinge stability and spinal erector endurance
  • Versatile grips (overhand, underhand) to shift emphasis

− Cons

  • Higher lumbar stress if form breaks
  • Requires more technical skill to maintain torso angle
  • Less stable loading for very heavy sets

T-bar Row With Handle

+ Pros

  • More stable bar path lets you handle heavier loads
  • Stronger middle-back (trapezius/rhomboid) recruitment
  • Reduced lumbar shear compared with a steep hinge
  • Easy to cue and scale for beginners

− Cons

  • Requires landmine/T-bar handle or specific setup
  • Shorter lat working length—less end-range stretch
  • Can encourage elbow flare and shoulder strain if performed poorly

When Each Exercise Wins

1
For muscle hypertrophy: Bent Over Barbell Row

The more horizontal torso and longer ROM place the lats under greater length-tension, especially in the 6–12 rep hypertrophy range. Use slow eccentrics (2–3 seconds) and full shoulder extension to maximize tension.

2
For strength gains: T-Bar Row With Handle

T-bar allows a steadier bar path and safer loading so you can progressively add heavier weight (3–6 reps) with less lumbar risk, promoting maximal force development and posterior chain thickness.

3
For beginners: T-Bar Row With Handle

A more upright torso and fixed path reduce technical demand and lumbar stress, letting beginners learn scapular retraction, elbow drive, and grip before introducing complex hip-hinge control.

4
For home workouts: Bent Over Barbell Row

You only need a barbell and plates; no landmine or specialty handle required. Maintain a 30–45° torso angle and moderate loads to protect the lower back.

Frequently Asked Questions

Can I do both Bent Over Barbell Row and T-Bar Row With Handle in the same workout?

Yes. Pair them by intensity: perform the heavier movement first (typically T-bar for low reps) and follow with Bent Over Barbell Rows for 8–12 reps to target lats and finish with extra volume. Keep total weekly volume in check to avoid overworking the low back.

Which exercise is better for beginners?

T-Bar Row With Handle is better for most beginners because it requires less hip-hinge control and reduces lumbar shear while teaching scapular retraction and elbow path. Once your hinge and core bracing are solid, add Bent Over Rows for lat development.

How do the muscle activation patterns differ?

Bent Over Rows create a horizontal force vector that lengthens the lats and stresses spinal erectors, so peak tension occurs toward lockout. T-Bar Rows shift force more vertically toward the sternum, increasing mid-trap and rhomboid recruitment mid-range while shortening the lat’s working length.

Can T-Bar Row With Handle replace Bent Over Barbell Row?

T-Bar can replace Bent Over for thickness and heavy pulling phases, especially if you have low-back concerns. However, to fully prioritize lat length-tension and hip-hinge strength you should keep Bent Over Rows in your program at least periodically.

Comparison Summary

Choose Bent Over Barbell Row when your priority is lat-dominant hypertrophy and training the hip hinge—aim for 6–12 reps with controlled eccentrics and a 30–45° torso to maximize lat stretch and long-range tension. Opt for T-Bar Row With Handle when you want to move heavier weights, emphasize middle-back thickness, or reduce lumbar load—use 3–6 reps for strength blocks or 8–12 for hypertrophy with a focus on scapular retraction. If you’re new or rehabbing lower-back issues, start with T-bar; if you train at home or want more lat length-tension, prioritize the bent-over row. Program both across a mesocycle: one heavy, one higher-volume, to cover both width and thickness.

Exercise instructions

Steps from the exercise catalogue. Read the full sequence before starting.

Bent Over Barbell Row

  1. Holding a barbell with a pronated grip (palms facing down), bend your knees slightly and bring your torso forward, by bending at the waist, while keeping the back straight until it is almost parallel to the floor. Tip: Make sure that you keep the head up. The barbell should hang directly in front of you as your arms hang perpendicular to the floor and your torso. This is your starting position.
  2. Now, while keeping the torso stationary, breathe out and lift the barbell to you. Keep the elbows close to the body and only use the forearms to hold the weight. At the top contracted position, squeeze the back muscles and hold for a brief pause.
  3. Then inhale and slowly lower the barbell back to the starting position.
Read remaining steps for Bent Over Barbell Row
  1. Repeat for the recommended amount of repetitions.

T-bar Row With Handle

  1. Position a bar into a landmine or in a corner to keep it from moving. Load an appropriate weight onto your end.
  2. Stand over the bar, and position a Double D row handle around the bar next to the collar. Using your hips and legs, rise to a standing position.
  3. Assume a wide stance with your hips back and your chest up. Your arms should be extended. This will be your starting position.
Read remaining steps for T-bar Row With Handle
  1. Pull the weight to your upper abdomen by retracting the shoulder blades and flexing the elbows. Do not jerk the weight or cheat during the movement.
  2. After a brief pause, return to the starting position.

Also Compare

Compare another pair

Choose two exercises to see their differences side by side.

Compare Exercises