The pistol squat is an exercise which most people avoid due to the fact that it’s challenging… and even more so than a conventional barbell squat. But sometimes we should do things we don’t fancy because they’re often what give great results! Squats should be in your routine if you’re serious about making gains and this variation can take your progress even further.
The pistol squat builds muscle, strength, unilateral function, improves core stability and even balance; which is why it’s also beneficial for athletes, along with anyone looking to make functional improvements.

But it’s also important that you’ve developed a strong base in order to do the exercise effectively. The pistol squat is not necessarily a beginner’s exercise, but you can work up to it.
So, we’ll explain what the pistol squat is; and how you can incorporate it into your routine safely and effectively to make those gains…
What Exactly Is The Pistol Squat?
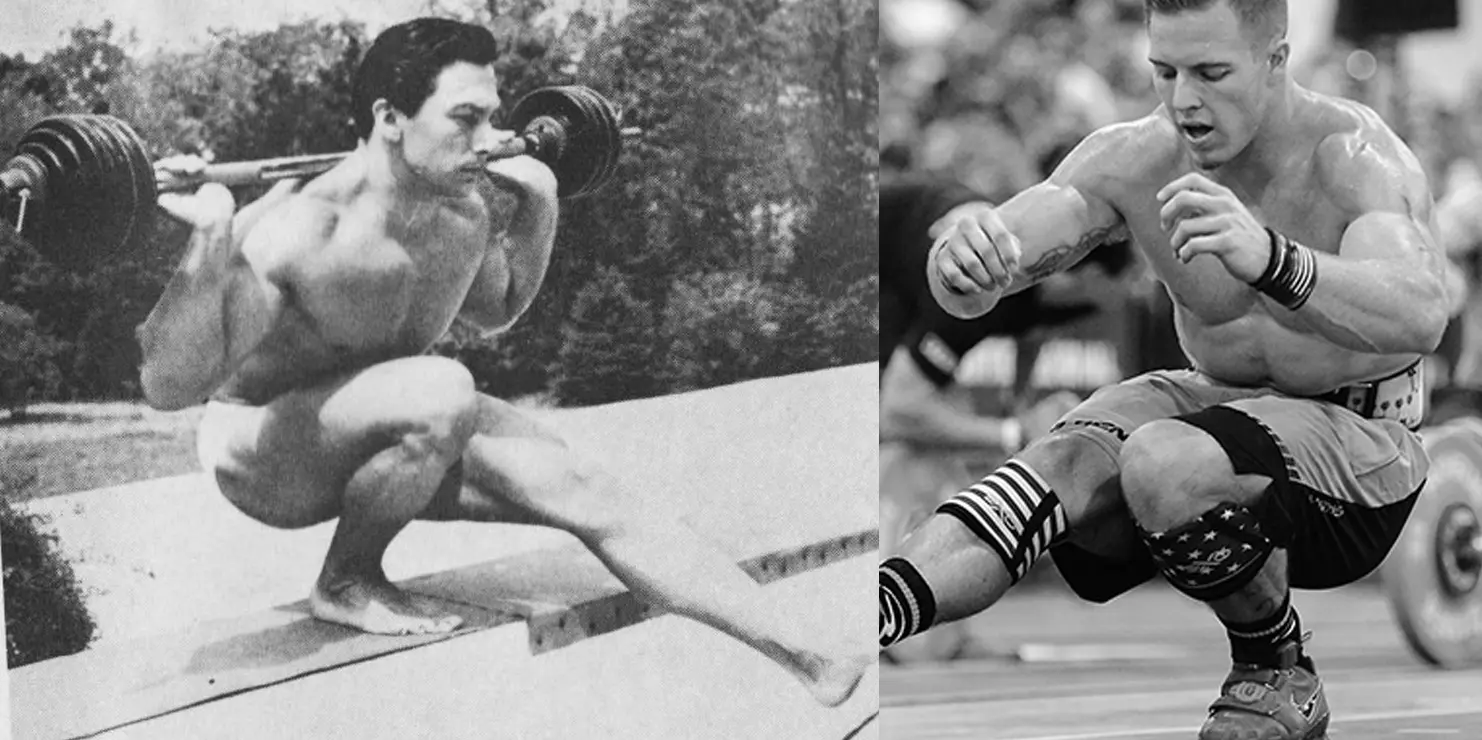
The pistol squat is a single-leg variation of the king of lower body exercises… the squat. Now, the name comes from the body forming the shape of a pistol with arms straight out and one leg forward.
But it requires some decent balance and mobility of the joints to do effectively. The movement involves squatting down pretty low and extending one foot straight out in front of you. The other leg will remain in a bent position with your foot flat on the floor.
Muscles Worked
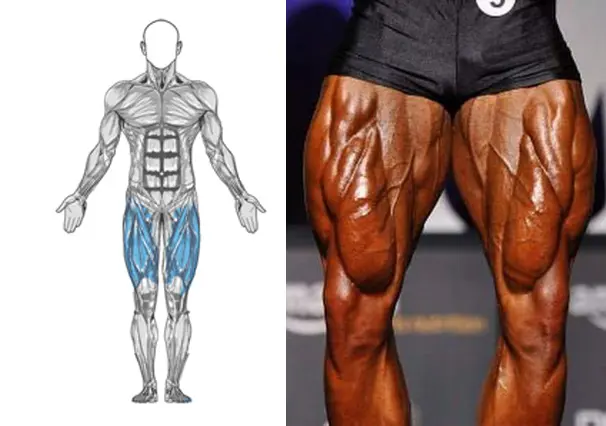
The squat is a lower-body exercise which works every muscle from the midsection down. Core stability is necessary for balance, posture, injury prevention, and the transfer of resistance loads along the kinetic chain. (1)
But building the core is a process and that’s why exercise progressions are necessary to gradually work into the pistol squat and other more complex movements.
Pistol squat muscles worked include:
- Quadriceps
- Hamstrings
- Gluteus Maximus
- Calves
- Core
How To Do A Pistol Squat
Alright, so we’ve taken care of the ankle mobility issues and squat depth. So now it’s time to get into the actual movement from the progressions.
Now, it’s important to remember to never jump into a movement without warming up, especially when the knees are involved. So, you can do a few minutes of light cardio just to get the blood flowing or you can do a two-legged squat with your body weight or little resistance. This will prevent injury and discomfort when you get into your working sets.
The movement…
- Stand with feet closer than hip-width apart and raise arms out to the sides for balance.
- Squat all the way down with one leg into a sitting position while keeping the other straight out in front of you. Keep your torso completely straight.
- Now, as you squat back up, bring your arms directly in front of you. This will help with control and balance.
- Repeat the exercise and then do the same with the opposite leg.
Pistol Squat Variations
Here are a few variations you can do, although the movement still remains the same.
1. Pistol squat from a platform
Stand on the edge of a platform with the non-working leg hanging freely. Squat down but keep the hanging leg closer to the ground. Then squat back up to a standing position.
You don’t have to keep the non-working leg straight out in front of you since your leg can hang more freely. The reason for keeping the leg straight and in front during a conventional pistol squat is because that’s the only option.
2. TRX pistol squat
The TRX suspension training system is very effective for building a functional physique because it allows you to use your body weight for resistance. This is a variation but it’s also a very good progression into doing the bodyweight-only pistol squat.
To perform the TRX pistol squat, use the handle for balance. So if you’re training your left side (Leg), grip the handle with your right hand and vice versa.
Before You Can Do A Pistol Squat…
First off, it’s a good idea to learn and practice the conventional squat using two legs before attempting the pistol squat. This is a good base to start from and you’ll learn how to develop a good form for optimal results.
Then you’ll do a pistol squat progression which we recommend that involves some rolling movements. This will allow you to progress into the movement pretty easily but it may take some time to fully be able to perform a pistol squat with good form.
Now, if you can perform a pistol squat effectively, then great! But if you have limited joint mobility in the ankles then you’ll need to work on this first or you’ll have a hard time with this exercise.
Limited dorsiflexion (foot raised toward shin) is an issue for getting full squat depth and here’s an easy fix you can do which will improve your ankle mobility instantly. However, you must do this frequently, and every week until your joints adjust.
How to improve mobility?
We’re going to focus on bringing the tibia (shinbone) forward while the lower joint in the ankle remains in a fixed position.
See the video for visual instructions.
- Place a band around the back of your tibia about 4 inches above your ankle joint and wrap the other end around something to provide resistance.
- Place one foot forward in a lunge position.
- Lunge forward so that the band will pull the tibia forward and move the joint backward.
- Repeat this around 10-12 times.
Here’s a more advanced solution if the first exercise fails to increase your mobility as desired. This movement will focus on moving the ankle joint backward by applying tension on the area.
- Place your foot on a bench and wrap a thick band around your ankle under your fibia joint to where it overlaps, and grasp firmly.
- Lean forward and backward for multiple repetitions until you get more dorsiflexion.
If you don’t have thick resistance bands or serious mobility issues, then you can always do this movement without the band.
Now we’re going to focus on the bottom part of the squat which many might call the “hole”.
And a simple way to improve the bottom position of a squat is to hold onto something (Sort of like an assisted pistol squat) for balance and go through the movement. It’ll take some getting used too but it’s a great way to improve strength in the position.
You can also sit on a bench and practice lifting your body up using one leg while the heel of the non-working leg remains on the floor.
You want to be able to squat down with your legs narrow and be able to generate enough strength to get out of the hole.
But now we’re going to detail a very effective progression into the pistol squat.
Pistol Squat Progression (Bodyweight Squat and Rolling Into Position)
Ok, these progressions will have you rolling into a pistol squat but be very patient and persistent. It could take weeks and even a few months to build up sufficient strength and balance but it’s worth it!
Follow these steps…
The first movement is a deep bodyweight squat. Practice this one until you can comfortably sit in a deep squat position.
- Stand with feet shoulder-width apart and place your arms directly out in front of you.
- Squat down but keep your weight on the heels and midfoot and make sure your back is straight.
- Squat back up to a standing position by pushing through your heels.
Tip: Do not lean forward or backward. You want to pretend you’re sitting down with your back straight.
Ok, you’ve mastered the bodyweight squat. Now, it’s time to rock and roll… literally!
Rolling into position
To improve balance and strength in the squat position, rocking backward and rolling onto your feet is very effective.
See video for visual instructions.
Progression movement 1
Simply grab your shins and roll back onto a soft surface without hitting your head. Then, roll forward until both feet are flat on the ground so that you’re in the bottom position of the squat. Keep your chin tucked as much as possible and pull your heels as close to your butt as possible.
At first, you don’t have to roll all the way onto your feet but just keep practicing this exercise until you can.
Progression movement 2
Now, you’ll do the same exact movement as the first progression but you’ll roll onto one foot this time. You’ll want to pop up onto one foot and even push upward and lift your butt off of the ground slightly if possible. Make sure to keep your foot in the center of your body for balance and to do the movement effectively.
Use your hands to assist if you must at first and then only use the roll to get into position after you’ve built enough strength. Alternate both legs for as many reps as you can.
Progression movement 3
Do the same movement as the second progression but make it a little more explosive so that you can stand up just a little bit higher this time.
Progression movement 4
This time around you are going to start the movement from a standing position on one leg.
So what you’re going to do is squat down with one leg into a full roll on your back like the previous progressions. Then, you’re going to roll back up and squat into a standing position. Keep your arms straight out to your sides for balance.
Make sure you’re explosive and lift your chest to assist your body in a standing position. Repeat the movement but don’t perform the next rep using momentum as you want to do it in a controlled manner. This will also protect you from hitting your head.
Wrapping Up
The pistol squat is an awesome variation of a very effective lower body exercise. It’s challenging but doing the progressions as explained will have you doing the movement in no time (Or maybe a little). If you have the mobility to jump into the pistol squat, then go for it.
But if not, work with the ankle mobility movements until you can squat deeper. Being able to do the pistol squat is a process and it’s safer for the joints and more beneficial overall to go through the progression process and have patience.
You’ll definitely reap the benefits of incorporating it into your routine, not only for muscle growth and strength but for function and improvements in core stability.
References:
- Huxel Bliven KC, Anderson BE. Core stability training for injury prevention. Sports Health. 2013 Nov;5(6):514-22. doi: 10.1177/1941738113481200. PMID: 24427426; PMCID: PMC3806175.


