Squats are, without a doubt, the most commonly performed lower body exercise. They also happen to be among the best movements to shred your leg muscles.
Squats place all the focus on your quads, targeting the largest group of anterior leg muscles for maximum recruitment. If you’re trying to build lower body strength, squats are the exercise of choice.
Did you know that using the uniquely designed safety bar can actually improve your squat performance? Not only will it improve squat performance, it’ll also give you better control over weight placement during the squat.
You’ll find that it’s an amazing enhancement to your lower body routine, and an exercise you should definitely include in your workout. Read on to find out everything you need to know about Safety Bar Squats…
What is a Safety Bar?

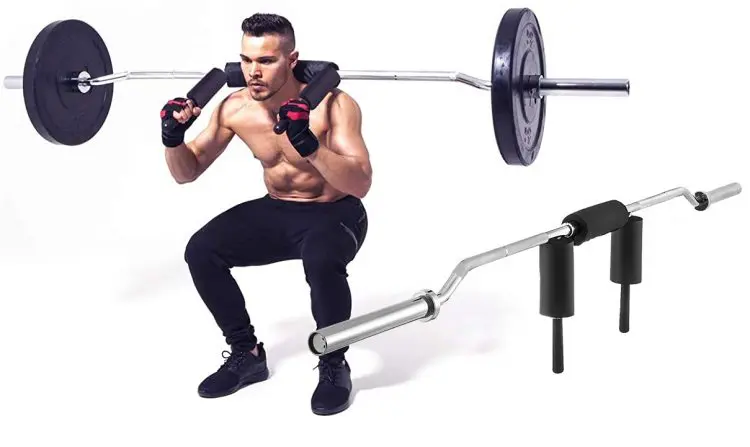
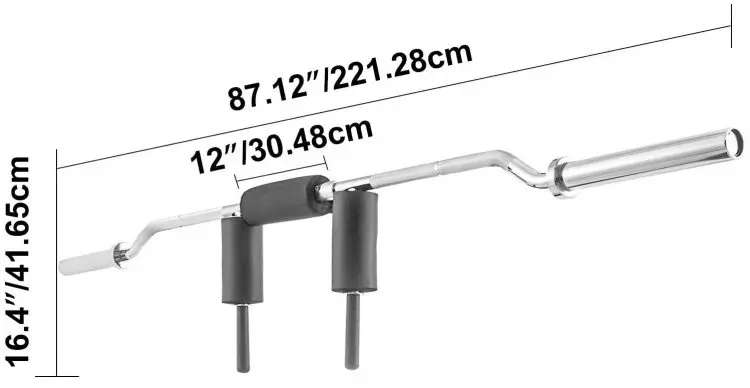
A safety bar is a variation of the classic barbell. It has two arms that extend from the bar, which slide over your traps to provide convenient grip on the bar. The bar itself also has a cambered curve at both ends, which creates sort of an “ox yoke” shape.
Most safety bars come with padding around the grips that provides cushioning both for the back of your shoulders (where most of the weight is resting) and your traps (where the arms/handles extend from the bar). This not only increases the comfort of the bar—especially if you’re working with heavy weights—but also helps to provide better stability for the bar as it sits on your back.
Is a Safety Bar Better than a Regular Barbell?
Standard barbells are a pretty classic staple for squats, but the safety bar is an addition that can actually improve your workout for a number of reasons:
Additional padding
For people who squat very heavy, the padding provides a cushion between the hard steel of the bar and your bones and muscles. You can avoid bruises and prevent strain on your neck (a very real problem if you squat with a high bar placement). Plus, without the padding, the arms pressing on your traps would be VERY painful and dig into both your muscles and collarbone.
But the padding also works quite effectively to improve the way the load is distributed on your upper body. Because the padding elevates the bar (the weight’s center point) off your shoulders, it creates a higher center of gravity. This helps to adjust the moment arms (the length between the joint axis and the force acting on the joint) away from your hips. This adjustment will improve the positioning of the weight so more of the burden is on your upper back and less on your lower back.
Adjusted load placement
Because of the cambered (curved) arms, when you bend forward, the weight shifts forward with you. This mimics the form of a front squat (where the burden is loaded in front of your shoulders, rather than behind with a back squat), yet the placement is on your shoulders where it is much easier to grip and stabilize as you squat and stand.
Better grip
Thanks to the two arms, you can easily keep a tight grip on the bar without needing to grip the barbell itself. For people with limited mobility or a shoulder injury that prevents them from reaching the full range of motion, this is an absolute plus. They can hold the bar safely in place using just the arms, which are in a very natural, easy-to-reach position in front of your body.
The arms also provide an easy way to adjust the distribution of weight on your back. You can shift the weight higher or lower as desired just by raising or lowering your arms, enabling you to control the barbell’s position. This is particularly helpful for people who tend to lean forward or hunch their shoulders. Holding the arms of the safety bar helps to lock in the muscles of the arms, shoulders, and forearms, encouraging better upper body stability as you drop into the squat. The result is improved upper body engagement to provide support and maintain your balance as you go low.
Easier on the shoulders and arms
For those who are suffering from injuries to the shoulders, elbows, or wrist, the safety bar provides an easier solution to lifting weight. Shoulder injuries, in particular, can decrease your range of motion and make it difficult (and painful) to grip a standard Olympic barbell behind your back. However, thanks to the handles incorporated into the design of the safety bar, you’ll have a much easier time keeping the weight steady on your back while you squat.
One study from 2018 found that professional baseball players who performed squats using the safety bar improved both their 1-Rep Max and their vertical jump. There was also significantly less strain on their shoulder and elbow joints while squatting. As the study summed up, “coaches and athletes can consider the SSB variation of the squat as a viable option for developing lower body strength and power when an Olympic barbell may be contraindicated because of an upper body injury.”
However, the evidence isn’t entirely in favor of the safety bar.
In 2019, a study examined the differences between using a safety bar and standard barbell, specifically how the two bars affect muscle activity and mechanics while performing squats. A dozen competitive powerlifters participated in a workout consisting of 3 sets of 5 reps at 75% of their 3-Rep Max. The researchers analyzed both peak joint flexion and mean muscle activity to determine which bar provided the most effective movement.
The study found that using the safety bar decreased flexion in the hip and trunks, and increased muscle activation in the traps. There was also an 11.3% decrease in 3-Rep Max among those who used the safety bar. However, the researchers also noted a decrease in the hamstrings, abs, and some of the quad muscles.
As the study concluded, “the (safety bar) may not be as effective as a standard bar to increase lower-extremity strength. However, squatting with the SSB resulted in a more upright trunk angle, which places less stress on the lower back, a commonly injured area when squatting.”
Simply put: you might lift a little less and see fractionally less growth in your leg strength, but the benefits on your lower back are significant enough to be absolutely worth it!
In a 2021 study, again ran the comparison between the safety bar and standard bar, analyzing bar velocity, muscle activation, and strength. This time, more than 30 participants were included, performing two different sets of 3 reps using 65 to 85% 1-Rep Max weight. Electrical activity in the muscles was tracked to determine just how effectively both bars engaged the target muscles.
Again, using the safety bar resulted in less weight (average of 128.8 kg versus 144.7 kg using the standard bar), and electrical activity in the muscles was better using the standard barbell.
As both studies prove, the standard barbell is better for targeting your leg muscles to build strength. However, as the first study highlighted, the reduced load on your lower back offers a very important benefit. Given how prevalent lower back injuries are among powerlifters and resistance trainees, it’s a good option to consider if you’re concerned. The improved positioning of the weight using the safety bar is a “pro” that could definitely outweigh the minor “con” of a marginally less effective lower body movement.
How to Safely Perform Safety Bar Squats
The steps to perform safety bar squats are identical to regular squats, only with the added benefit of the padded bar with convenient built-in handles:
https://www.youtube.com/watch?v=B3kq5xoooOE
Step 1: Load up the bar with as much weight as desired
Remember that in the studies cited above, the lifters using the safety bar saw a decrease in their weight capacity. It might be better to drop the weight by 5 to 10% for the first few sets, just to make sure you nail the form safely. Once you get accustomed to the feeling of the safety bar, you can adjust the weight as needed.
Step 2: Get under the bar
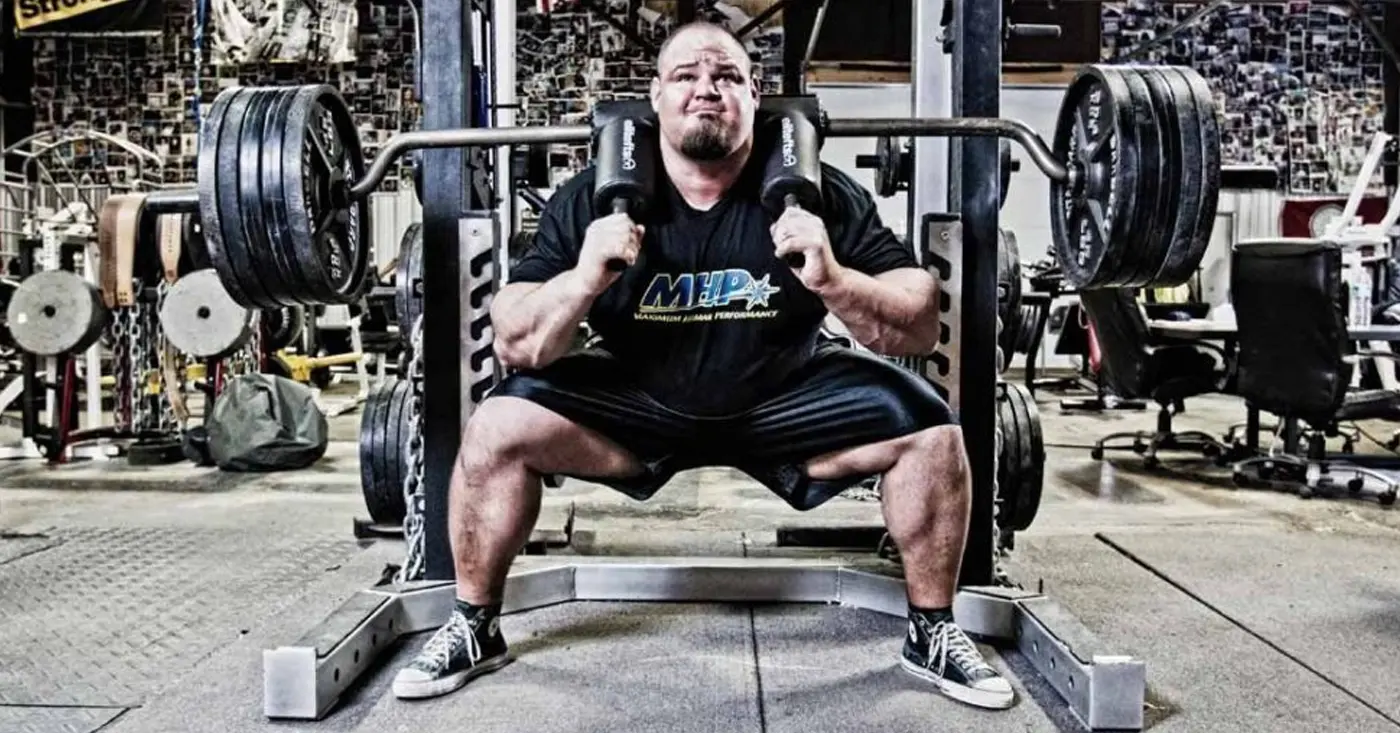
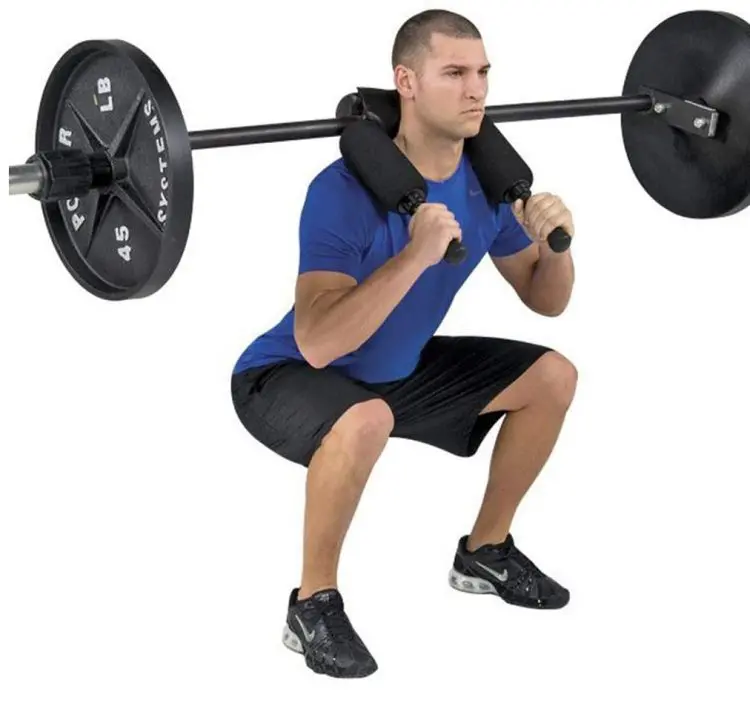
Step into place beneath the bar, with the bar’s two arms on either side of your neck, running down your traps. Grip the arms and push up against the padding to situate the bar in the right position on your back. Use the arms to help you adjust the bar angle and placement until you’ve got it balanced just right.
Step 3: Squat
The ideal form for a safety bar squat is similar to that of a High Bar Back Squat:
- Step back from the rack—about 2-3 steps
- Plant your feet roughly shoulder width apart, pointing your toes slightly outward
- Look at a spot on the floor roughly 2 meters in front of you, as this will help to keep your spine aligned. DO NOT DROP YOUR CHIN! That will hunch your upper back and shoulders, affecting your posture.
- Squat by “sitting” back and downward, as if you’re lowering yourself into a chair. Keep your chest up and push your elbows forward.
- Lower until the crease of your hips drops below your knee level. Make sure to keep your knees aligned with your toes.
- Rest your weight primarily on your heels, and keep your feet flat on the floor as you drive back upward to a standing position.
- Repeat as desired
Step 4: Adjust the position of the weight as needed
As you are performing the squat, pay close attention to your lower and upper back, shoulders, knees, and hips. Feel how your body adapts to the load of the uniquely shaped bar. Use the arms to help you adjust the placement of the weight in order to find the spot that feels most comfortable and natural.
The beauty of the safety bar is that it will decrease the strain on your lower back, making squats a significantly safer exercise to include in your Leg Day workout.
Additional Exercises You Can Perform with the Safety Bar
The safety bar isn’t just great for squats—you can use the amazingly designed padded bar to perform a number of different exercises:
- Lunges
- Good Mornings
- Split Squats
- Step-Ups
- Hip Thrusts
- Calf Raises
- and many more!
Basically, any exercise where the weight is resting on your upper back and shoulders is compatible with the safety bar. You’ll find that the additional padding makes it much easier for you to load up the weight comfortably, and the arms provide you with easy, convenient grip.
[Related: Front Squat Hypertrophy Guide – Build Bigger Legs]
Conclusion
Safety bar squats may not maximize muscle growth and lower body muscle recruitment, but they are far safer for your lower back and, as a bonus, increase upper back stability and tension to provide additional spinal support. If you are looking for a better way to squat with less risk of straining your lower back, this uniquely shaped bar is definitely a good option to consider.
However, be warned: it will take some time and practice to get accustomed to the feel of the safety bar. You’ll need to perform a few sets at lower weight until you master the proper form using the padded (elevated) bar with the cambered arms that shift the weight slightly forward as you squat. Practicing with lighter weight will help to avoid injuries as you adapt to this new and amazing lower body movement.
Happy lifting!


