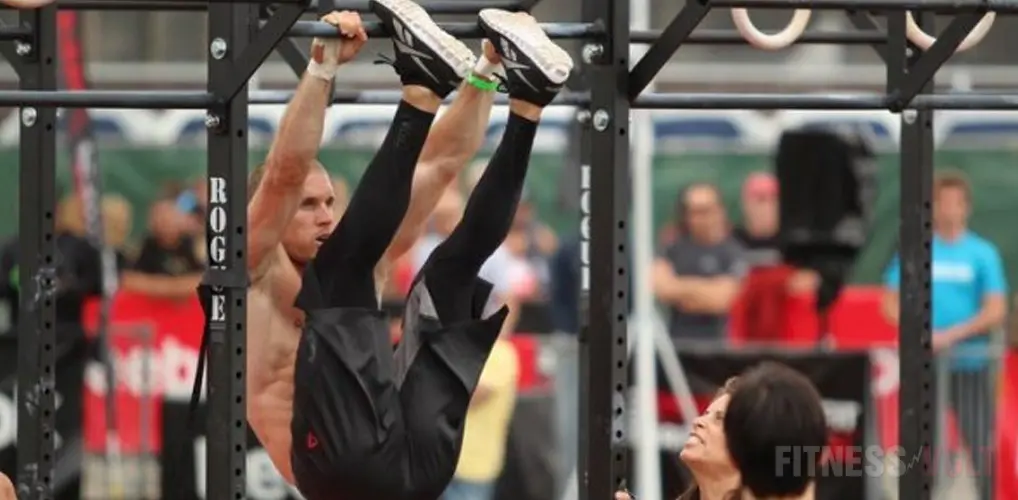
Toes to Bar might seem like a not so difficult movement to most people who are somewhat flexible and athletic. But, rest assured, they’re not as easy as one would think. And to make matters more complex, the movement can be dangerous on the shoulder joints if not done correctly.
Not to mention, you won’t be as efficient when it comes time to put your strength and endurance to the test. And to be able to execute this movement, you’ll need to implement some strategic techniques.
So, we’ll go over a step-by-step progression that you can follow to maximize your success when it comes to performing toes to bar like a CrossFit athlete… and you’ll probably even get some core development as a result.
Note: Before you start the progression, make sure your shoulders are healthy/strong enough to hold your bodyweight. You don’t want to make a structural issue worse by attempting this complex movement where pressure is placed on the joints (In other words, this may not be for everyone). (1)
Now Onto The Toes To Bar Progression…
Before we explain the steps it’s important to know that the toes to bar movement isn’t just about swinging your legs up to the bar. You have to be able to use your entire body similar to how a gymnast would do to successfully execute the movement.
Here’s an excellent video of the progression with step-by-step instructions…
Step #1: Kipping Levers
This step is just the beginning and it’s necessary to be able to get your body in a position where you can lift your toes overhead. So, the focus here is to use the shoulders and lats to pull your torso back behind the bar.
This is an essential step in being able to arch the back to raise the legs upward.
- To start, you’ll grip the bar with a comfortable hand placement (usually a little wider than shoulder-width distance apart from each other). Then you’ll engage the shoulders and lats while keeping your legs close together.
- Now, for the last part of the kipping levers, slowly swing your torso back behind the bar using your shoulders and lats to pull and move your upper body.
Step #2: Lifting The Knees
Ok, so this step should follow the first one in order to get some knee action going on which will help you raise your toes to the bar. Here you begin to get a feeling for how the swinging motion of the legs tie into the movement.
- So, you’re going to do the kipping lever movement from step one. But this time when your torso moves back behind the bar, you’ll lift your knees until your thighs are just about parallel to the floor (doesn’t have to be exact). You want to make sure your shoulders and lats are involved just like the first step.
This should be a nice fluid movement.
Step #3: Lifting Knees To Chest
Now, you’re going to lift your knees as high as you can to where they’re almost touching your chin. This is where you’ll really need to develop a consistent movement to avoid deviating from the proper motion. This action is similar to the hanging leg and hip raise.
- This step should just be an extension of the previous ones but the entire movement will need to be more pronounced in order to raise your knees higher and move your body well out of the way to make room for the movement. Your shoulders and lats should be working even harder to pull your torso backward. So, you’ll drop your legs back down and get a little momentum to raise them back upward.
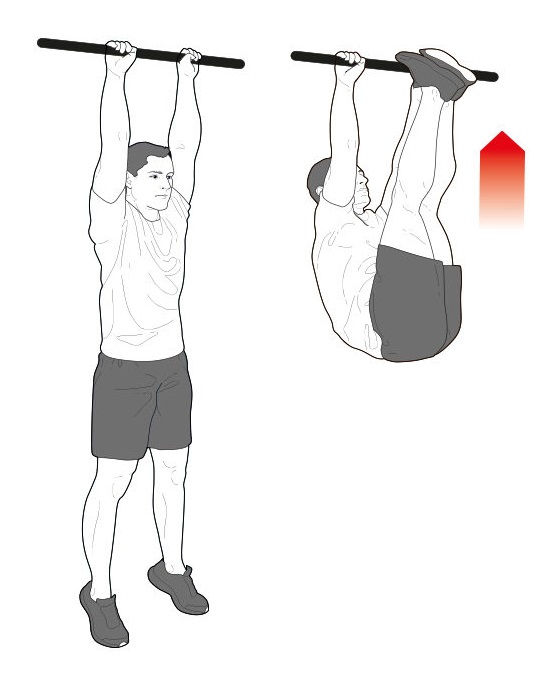
Step #4: Toes To Bar
This is where we’re going to combine all of the steps to achieve the objective which is to touch your toes to the bar in an effective, CrossFit style manner.
- So, you’ll lever back pretty aggressively, lift your knees as high as you can while pulling yourself back and flick your toes up to the bar. The shoulders and lats should be maximally engaged to get a good, controlled momentum going.
Practice these steps until you’ve effectively mastered each one. It’s ok to take your time to ensure you’re able to advance to the next movement.
Tips For Executing The Movement Effectively
Using your shoulders and lats to pull your torso back behind the bar is essential for being able to effectively move your legs upward toward the bar for several repetitions.
And even though some people may be able to swing their legs upward without proper technique, this isn’t efficient and you open yourself up to possible shoulder injuries. And there’s a reason why certain movements must be done in a specific way.
Now, when lifting the knees upward as each step progresses; it’s very important that you develop your own rhythm to ensure you’re not getting in your own way. The Toes to Bar should be a fluid movement, otherwise, you risk inhibiting the continual motion.
And for CrossFit, this is no Bueno!
You also want to make sure you’re flicking your toes upward toward the bar as this will make the movement much more efficient.
Also, you can bend the knees, even more, to make the movement easier and relieve pressure off of the lumbar spine. The legs are heavy and the straighter they are kept, the more risk of discomfort and/or injury for some people. But you have to know your own strengths (or weaknesses) and take the progression rather slow to get a feel for how you need to adjust accordingly. (2)
So, get out there and practice as that’s the only way to learn. Watch the instructional video as many times as needed and/or seek the help of someone who can effectively guide you through the process.
You’re Ready To Execute!
If you follow these steps, you’ll be doing toes to bar in no time but make sure to mentally note the different step-by-step aspects of each movement so that it’ll translate into the progression.
Sometimes it takes a little longer to be able to get a movement down but remember that it’s a progression, not a race. So, go out there and start training!