
Barbell Decline Bent Arm Pullover vs Barbell One Arm Bent Over Row

Compare target muscles, equipment, difficulty, movement type, and secondary muscles for Barbell Decline Bent Arm Pullover and Barbell One Arm Bent Over Row.

Change comparison Share

Get comparison link

Select the link and use your device's Copy command.

Comparison overview

AI-generated
Barbell Decline Bent Arm Pullover vs Barbell One Arm Bent Over Row — two barbell moves that hit the lats but do it very differently. If you want clear direction on which exercise to use for hypertrophy, strength, equipment limitations, or programming, this comparison helps you decide. I'll break down how each move loads the lats, the secondary muscle recruitment, setup and technique cues, equipment needs, and specific rep ranges and progressions so you can pick the right tool for your goals.

Exercise Comparison

Exercise A
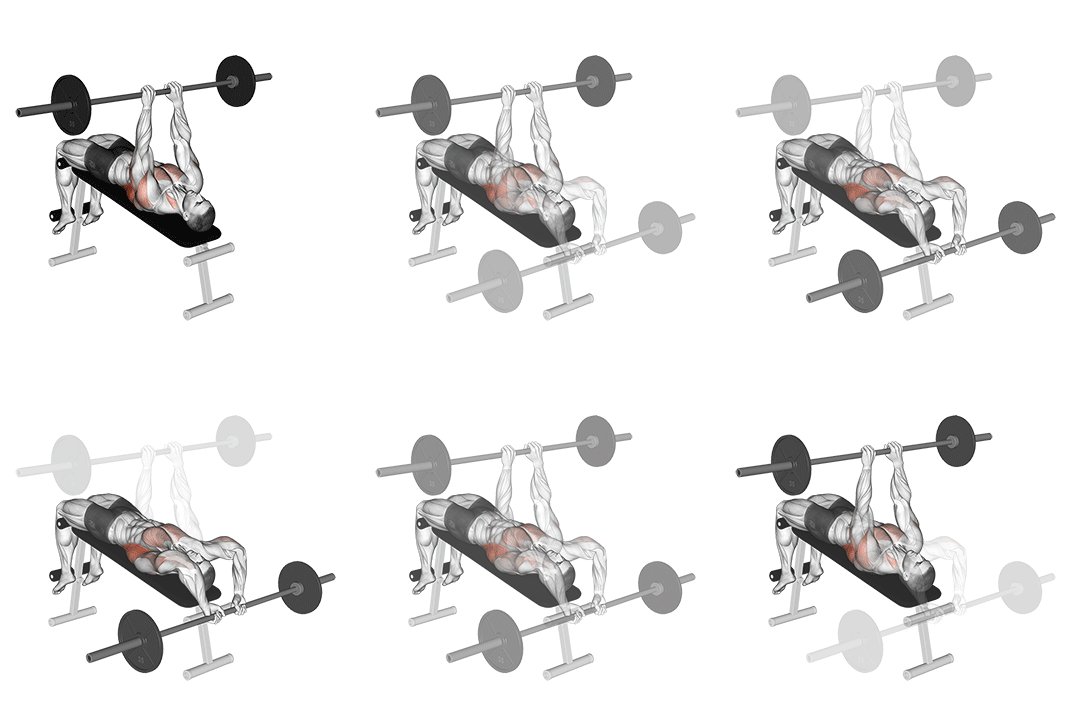
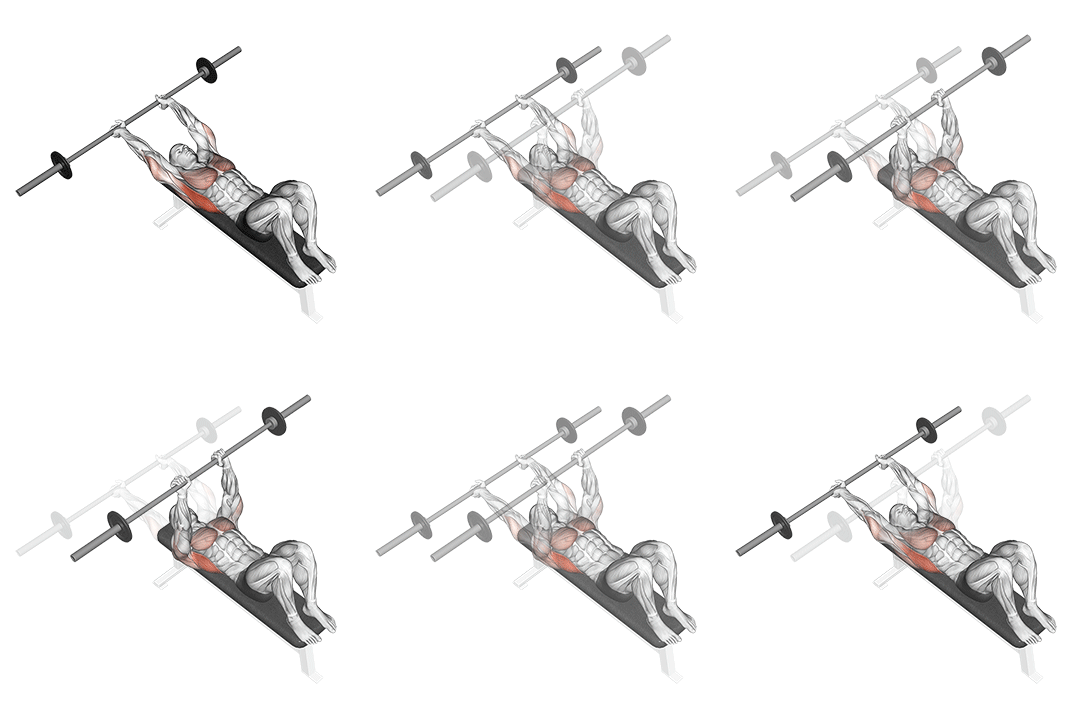
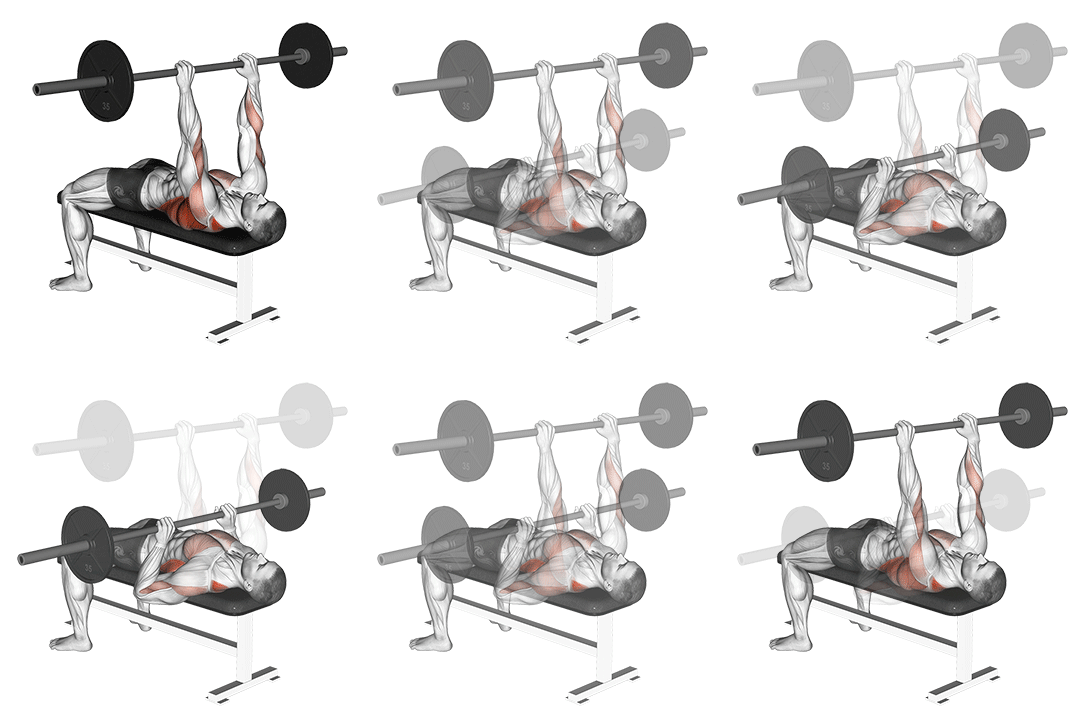
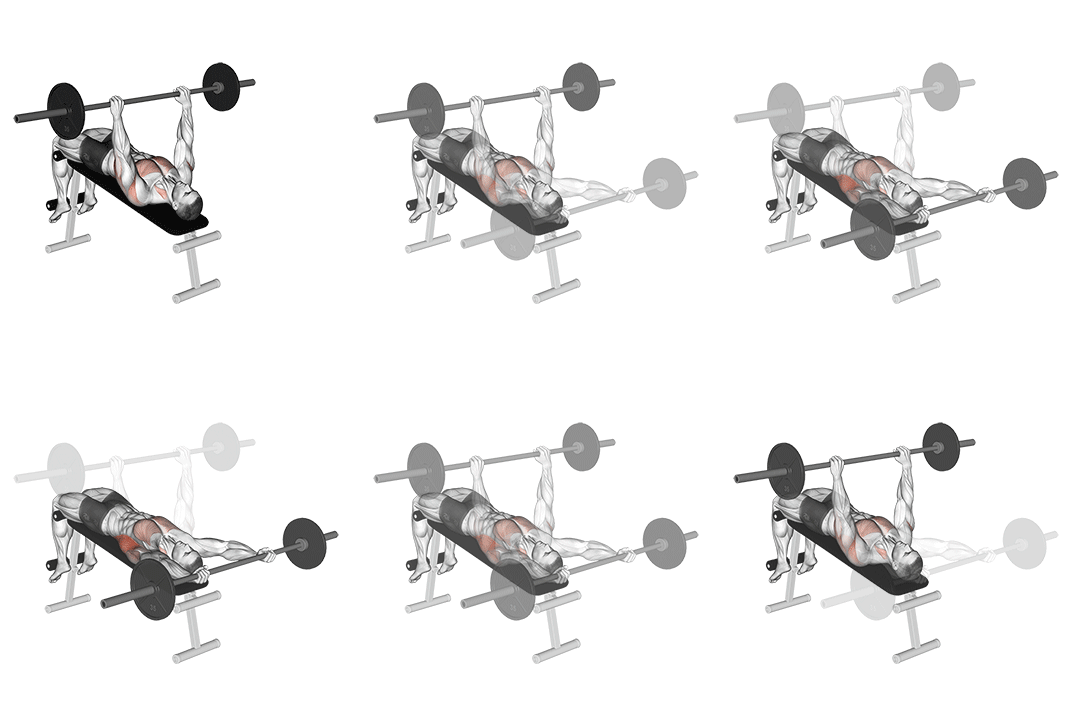
Barbell Decline Bent Arm Pullover demonstration

Barbell Decline Bent Arm Pullover

Target Lats
Equipment Barbell
Body Part Back
Difficulty Intermediate
Movement Isolation
Secondary Muscles
Triceps Chest
VS
Exercise B
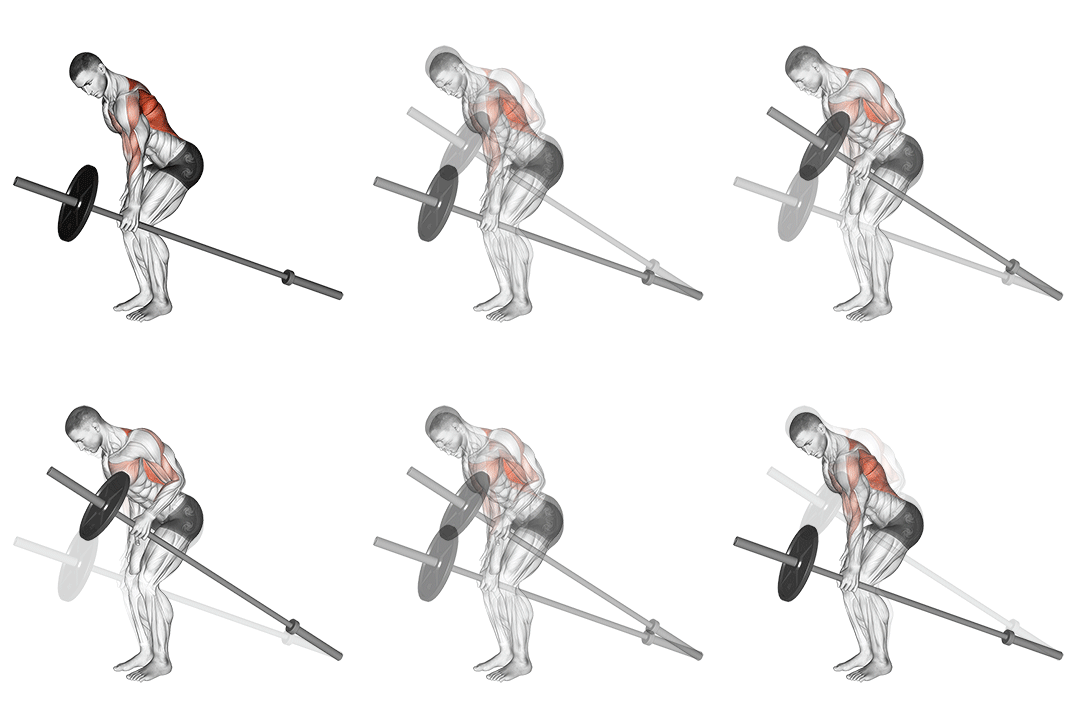
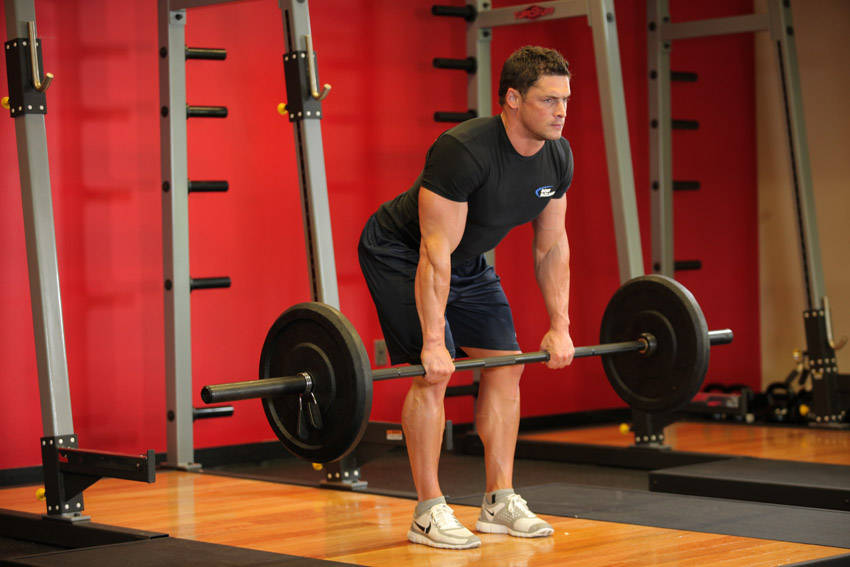
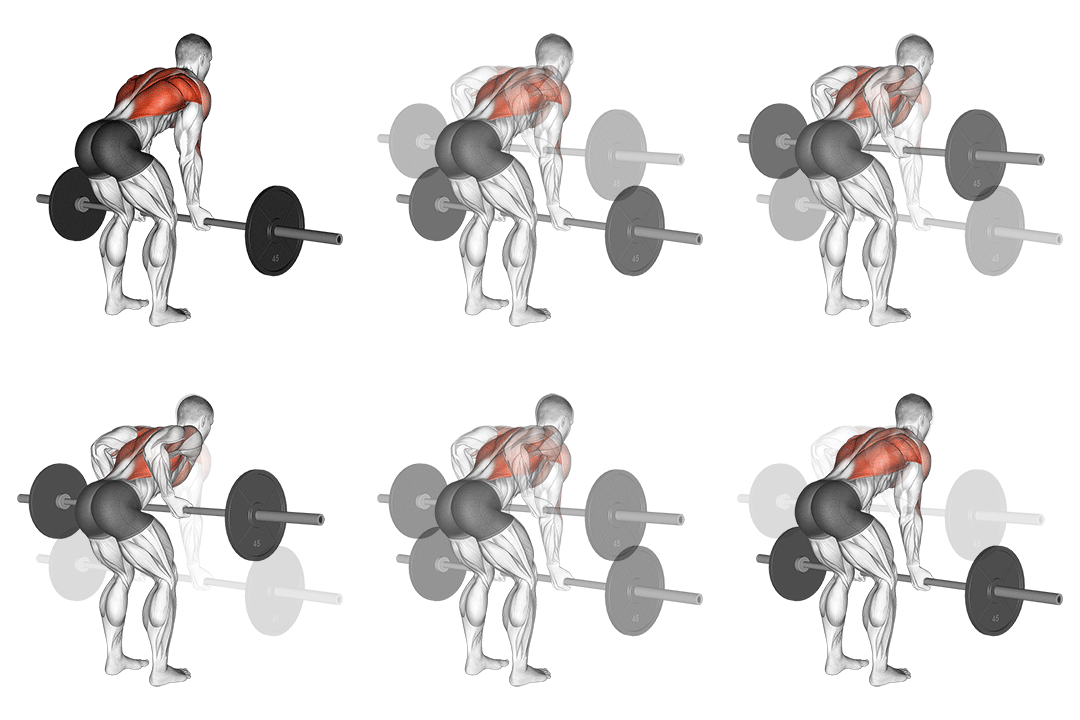
Barbell One Arm Bent Over Row demonstration

Barbell One Arm Bent Over Row

Target Lats
Equipment Barbell
Body Part Back
Difficulty Intermediate
Movement Compound
Secondary Muscles
Biceps Forearms

Head-to-Head Comparison

Different values are marked. These are catalogue attributes, not performance scores.

Muscles used

Listed target and secondary muscles, shown on the body. Locations, not activation or strength scores.

  • Target
  • Secondary
  • Not highlighted

Barbell Decline Bent Arm Pullover

Front
Barbell Decline Bent Arm Pullover: front muscle locationsSolid: listed target. Striped: listed secondary. Grey: not highlighted. Locations, not activation or strength scores. See the muscle names below.
Back
Barbell Decline Bent Arm Pullover: back muscle locationsSolid: listed target. Striped: listed secondary. Grey: not highlighted. Locations, not activation or strength scores. See the muscle names below.
Target
Lats
Secondary
Triceps, Chest

Barbell One Arm Bent Over Row

Front
Barbell One Arm Bent Over Row: front muscle locationsSolid: listed target. Striped: listed secondary. Grey: not highlighted. Locations, not activation or strength scores. See the muscle names below.
Back
Barbell One Arm Bent Over Row: back muscle locationsSolid: listed target. Striped: listed secondary. Grey: not highlighted. Locations, not activation or strength scores. See the muscle names below.
Target
Lats
Secondary
Biceps, Forearms

Grey does not mean a muscle is unused. The diagrams show only the mapped catalogue labels.

Attribute Barbell Decline Bent Arm Pullover Barbell One Arm Bent Over Row
Target Muscle
Lats
Lats
Body Part
Back
Back
Equipment
Barbell
Barbell
Difficulty
Intermediate
Intermediate
Movement Type Different
Isolation
Compound
Secondary Muscles Different
Triceps, Chest
Biceps, Forearms

Visual Comparison

An illustrative 1–10 profile derived from catalog difficulty, equipment, and listed-muscle fields—not measured performance or muscle activation.

Key Differences

  • Barbell Decline Bent Arm Pullover is an isolation exercise, while Barbell One Arm Bent Over Row is a compound movement.
  • Both exercises target the Lats using Barbell. The catalogue does not establish which exercise is better for an individual goal.

Muscle comparison

Shared target muscles

Both exercises target the latissimus dorsi by producing shoulder extension and adduction moments, so they overlap on primary lat activation. The pullover emphasizes a long-range, lengthened-stretch stimulus across the lats because the shoulder moves through ~120–140 degrees of flexion-to-extension on a decline plane. The one-arm bent over row emphasizes force production through a horizontal pull vector and typically allows higher concentric force, so it emphasizes mid-range lat tension and scapular retraction strength.

Secondary muscle differences

The pullover recruits triceps and chest more through shoulder adduction and long-axis humeral torque, especially with bent-arm technique. The one-arm bent over row loads the biceps brachii and forearms heavily through elbow flexion and grip force; it also activates the posterior deltoid and scapular retractors more because of the horizontal pull and torso bracing.

Muscle involvement analysis

Pullover: prime mover action comes from shoulder extension with the lats active in a lengthened position, emphasizing stretch-mediated tension and controlled eccentric loading. One-arm row: concentric force is driven by elbow flexion plus scapular retraction; lats act more isometrically to stabilize and more concentrically through mid-range. Biomechanically, the pullover has a larger moment arm at the shoulder in end-range, while the row uses a more favorable force vector for heavy loading.

Equipment and setup

Barbell Decline Bent Arm Pullover: setup

Barbell Decline Bent Arm Pullover requires a barbell, a decline bench (or a declined setup using blocks), and room to move the bar in an arc behind the head. You also need collars and moderate space behind the bench for the path of the bar.

Barbell One Arm Bent Over Row: setup

Barbell One Arm Bent Over Row requires a barbell, space to hinge at the hips, and ideally a bumper or knurled grip for single-arm loading (you can load one side or use a landmine/loaded end). No bench is necessary, but a stable stance and flat floor are required.

Access and practicality

Barbell One Arm Bent Over Row is more accessible because it only needs a barbell and floor space; decline benches are less common in home gyms and commercial gyms, making the pullover harder to set up for many lifters.

Learning and progression

Learning the movements

The one-arm bent over row is generally easier to learn because it relies on a simpler hip-hinge and single-arm pull pattern. The pullover demands controlled shoulder mobility and trunk stability on a decline plane, which takes more motor control and a deeper understanding of shoulder mechanics.

Progression considerations

The one-arm row offers broader progression options — heavier loading, tempo manipulation, rep-range shifts (3–6 for strength, 6–12 for hypertrophy), and unilateral overload to fix imbalances. The pullover progresses by increasing ROM, tempo, or reps (8–15 range), but maximal external load is limited by shoulder and grip mechanics.

Limitations and precautions

Pullover carries higher shoulder risk if you lack thoracic mobility or try to use heavy loads in deep shoulder extension; the long moment arm increases stress on the glenohumeral joint. The one-arm row carries a higher lumbar risk if you neglect a neutral spine, but risks are lower with proper bracing and lighter progression.

Pros & Cons

Barbell Decline Bent Arm Pullover

+ Pros

  • High lat stretch and length-tension stimulus through large ROM
  • Good isolation of lats with limited elbow flexion when performed correctly
  • Low lumbar loading when performed on a stable decline bench
  • Effective finisher for lat hypertrophy in the 8–15 rep range

− Cons

  • Requires a decline bench or special setup
  • Higher shoulder stress in deep end-range positions
  • Limited ability to load very heavy relative to rows

Barbell One Arm Bent Over Row

+ Pros

  • Greater capacity for heavy loading and strength progression
  • Stronger carryover to compound pulling patterns and daily function
  • Unilateral work helps correct left-right imbalances
  • Minimal equipment—works in most gyms and home setups

− Cons

  • Higher lumbar loading risk without good hip-hinge and bracing
  • More biceps and forearm involvement reduces pure lat isolation
  • Single-arm balance can limit load if stability or grip is weak

When Each Exercise Wins

1
For muscle hypertrophy: Barbell Decline Bent Arm Pullover

The pullover produces a larger lat stretch and sustained tension through end-range shoulder extension, which stimulates hypertrophy via stretch-mediated mechanisms; use 8–15 reps with slow eccentrics (2–4 s) to exploit that length-tension relationship.

2
For strength gains: Barbell One Arm Bent Over Row

The row allows heavier loads and more progressive overload (3–6 rep range) and trains scapular retraction and trunk bracing that transfer to heavier compound pulls, making it superior for raw pulling strength.

3
For beginners: Barbell One Arm Bent Over Row

Rows are easier to teach (hip hinge + pull) and scale with load and technique cues; start with light weight, focus on neutral spine and 45–60 degree torso angle, and build to heavier sets.

4
For home workouts: Barbell One Arm Bent Over Row

It only needs a barbell and floor space while the pullover often requires a decline bench or awkward setup, so the row is more practical for most home gyms.

Frequently Asked Questions

Can I do both Barbell Decline Bent Arm Pullover and Barbell One Arm Bent Over Row in the same workout?
Yes. Pair the pullover as a hypertrophy finisher after heavy rows: start with rows for 3–5 working sets (3–6 or 6–10 reps depending on focus), then add 2–4 sets of pullovers for 8–15 reps to target stretch and metabolic tension.

Which exercise is better for beginners?

The one-arm bent over row is typically better for beginners because it teaches the hip hinge and progressive loading and is easier to scale. Begin with light weight, a 45–60° torso angle, and focus on a stable, neutral spine before increasing load.

How do the muscle activation patterns differ?

Pullover activation favors a lengthened-lat stimulus via shoulder extension through a large arc, increasing end-range tension. The one-arm row shifts demand to elbow flexion plus scapular retraction, producing higher concentric force and greater biceps/forearm involvement while keeping lats active through mid-range.

Can Barbell One Arm Bent Over Row replace Barbell Decline Bent Arm Pullover?

It can replace the pullover if your aim is strength and heavy loading, but it won’t perfectly substitute the pullover's long-range stretch stimulus. If hypertrophy via stretch is the goal, keep the pullover or include a similar long-arc lat isolation movement.

Comparison Summary

Use the Barbell Decline Bent Arm Pullover when your goal is targeted lat hypertrophy and you can maintain shoulder mobility and control; place it as a mid-to-end workout isolation move in 8–15 rep ranges and focus on a 2–4 second eccentric to exploit stretch-mediated tension. Choose the Barbell One Arm Bent Over Row when you want strength, heavier loading, and unilateral control — program it for 3–6 reps for strength phases or 6–12 for size while prioritizing a neutral spine and braced core. Be decisive: pick the pullover for lengthened lat stimulus, pick the row for loading and functional strength.

Exercise instructions

Steps from the exercise catalogue. Read the full sequence before starting.

Barbell Decline Bent Arm Pullover

  1. Lie down on a decline bench with your head lower than your hips and your feet secured.
  2. Hold a barbell with a pronated grip (palms facing away from you) and extend your arms straight above your chest.
  3. Lower the barbell behind your head in a controlled manner, keeping your arms slightly bent.
Read remaining steps for Barbell Decline Bent Arm Pullover
  1. Pause for a moment, then raise the barbell back to the starting position by contracting your lats.
  2. Repeat for the desired number of repetitions.

Barbell One Arm Bent Over Row

  1. Stand with your feet shoulder-width apart, knees slightly bent, and hold a barbell with one hand using an overhand grip.
  2. Bend forward at the hips, keeping your back straight and your head in a neutral position.
  3. Pull the barbell up towards your chest, keeping your elbow close to your body and squeezing your shoulder blades together.
Read remaining steps for Barbell One Arm Bent Over Row
  1. Lower the barbell back down to the starting position in a controlled manner.
  2. Repeat for the desired number of repetitions, then switch to the other arm.

Also Compare

Compare another pair

Choose two exercises to see their differences side by side.

Compare Exercises