I’m sure you’re familiar with the question “how much can you bench?”. The bench press is seen as the ultimate test of upper body strength and power.
Unfortunately, while there is an array of deadlift and squat programs, there are few effective bench programs.
This article will provide detail on a bench-only pyramid program that has the potential to bring your strength to an entirely new level.
Components Of An Effective Bench Press Program
Before considering the pyramid program, let’s first consider five key components of an effective bench press program.
1) Weekly Periodization
Periodization refers to the training model used to gradually increase the demand on the body and cause optimal adaptation. There are a number of different models such as linear, undulating, and block periodization (1).
While periodization is now seen as an essential part of all lifters training programs, it wasn’t always this way.
Sports scientist Tudor Bompa devised periodized models after watching Russian athletes train. He noted that these athletes used different loads during the year rather than constantly maintaining a high intensity.
2) High Frequency and Low Volume
Typically, the muscles of the lower body respond well to low frequency and high volume. However, this doesn’t seem to be the same for the upper body.
Instead, the bench appears to develop most optimally by using a high frequency, low volume approach.
Consider the traditional five-day bodybuilder split that focuses on targeting specific muscle groups each day.
On chest day, by the time you reach the final chest exercises, your performance will be suboptimal as a result of fatigue.
Compare this approach to a pyramid approach that allows you to train the bench press multiple times per week.
By spreading out the volume throughout the week, fatigue becomes less of a factor and, therefore, the quality of each workout will vastly improve.
Let’s say that with the bodybuilder approach, you complete twenty-five sets of a chest exercise one day per week.
With the pyramid approach, you complete five sets of a chest exercise, five times per week.
With both approaches, you will complete a weekly total of twenty-five sets. However, with the pyramid approach, you will be able to lift a greater amount of total weight and maintain good movement quality throughout.
For this reason, pyramid training is likely to increase strength substantially more than traditional bodybuilder training.
It’s important to note that with the pyramid training, high frequency is maintained for the first few weeks.
The reason for this is to allow fatigue to accumulate and improve your work capacity. However, in order to peak your strength, the frequency gradually reduces as the weeks progress.
Unlike the lower body, the upper body can deal with a great amount of frequency. Exercises such as the bench are far less taxing on the nervous system than squats or deadlifts.
3) High Volume Accessory Work
When it comes to accessory work, it’s important that you understand the purpose of these exercises. Accessory exercises are tools that will help you improve your bench press.
Therefore, regularly evaluate the accessory work you do and ensure that it will directly transfer to improved performance on the bench.
In addition, there is great value to be found in regularly varying the accessory exercises that you perform.
Studies have shown that changing up resistance exercises regularly is an effective method of improving strength and avoiding plateaus (2).
Varying exercises can also prevent overuse injuries. Let’s say you perform the same exercise every day and continuously add weight with each session.
The extreme volume combined with the increased load may increase the chances of sustaining or developing an injury.
However, by varying the exercises regularly, performing a range of movements, and focusing more on muscular activation rather than strength, this risk is substantially reduced.
4) Pyramid and RPE-Based Training
While most training programs are focused on percentages, RPE-based training is gradually becoming more and more popular.
RPE stands for Rate of Perceived Exertion and involves grading the difficulty of an exercise.
RPE Chart:
| 6 | Warm-Up Weight |
| 6.5 | “Heavy” Warm-Up |
| 7 | Can complete three reps or more |
| 7.5 | Could maybe complete three more reps |
| 8 | Can complete two reps |
| 8.5 | Could maybe complete two more reps |
| 9 | Can complete one more rep |
| 9.5 | Could maybe complete one more rep |
| 10 | Maximal effort / Muscular failure |
This auto regulation allows you to push a little harder on days where you feel strong and energetic to maximize gains.
Conversely, on days where you feel fatigued and lethargic, it also allows you to reduce some of the demand where appropriate.
However, even on the days where you feel tired, it is still important that you are lifting heavy enough to bring about change.
By combining RPE and percentages, you can ensure that you’re training at the right intensity.
Focus on percentages on the days where training feels hard and use RPE on the days where you feel great. This will ensure that the most optimal progress is made.
Pyramid training is the simplest way of combining percentages and RPE. The following table may be useful for understanding the relationship between percentages and RPE.
5) Overloading With The Slingshot
In order to maximize improvements, overloading is vital. Without progressive overload, the body will become accustomed to the training stimulus and will fail to adapt.
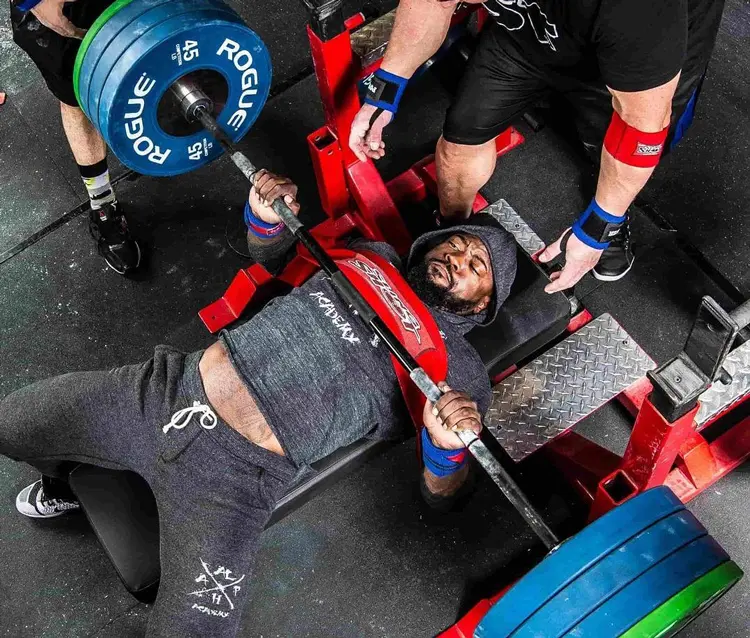
As you will likely be aware, lifting heavy weight is best for developing serious strength (3).
Strength training primarily causes the neuromuscular system to adapt. By lifting heavy weight, neural pathways are strengthened and more force can be generated as a consequence.
The slingshot is a commonly utilized piece of benching equipment that allows you to handle heavier weights.
As a result, the muscles are exposed to a larger amount of stress which will cause a greater neuromuscular adaptation.
Some individuals are of the opinion that using the slingshot is cheating.
However, when used properly, it is undoubtedly a key piece of equipment that can help you make significant progress with your bench press.
Bench Press Powerlifting Technique
Improving your benching technique is one of the simplest things you can do to improve your performance with the bench press.
In this section, we will break down the bench press technique and provide direction to ensure that you are performing the exercise most optimally.
Before doing so, we must address the idea that arching the spine during the bench press is dangerous and should be avoided.
This is wholly untrue. By arching the back the shoulder blades retract which places the shoulders in a safer and more effective position for the bench press.
In addition, arching the back will shorten the range of motion and allows you to lift more weight.
Positioning
One of the most influential factors in the bench press is the amount of tightness you can generate.
By assuming a tucked and tight position on the bench, you create a solid platform to press from and promote stability and leverage.
Generating tension through the lats, glutes, and legs, will most certainly allow you to lift a greater load.
Conversely, being “loose” will detrimentally impact the maximum amount of weight that you can successfully press.
In order to create the most solid position, apply the following coaching points:
- Lie back on the bench and pull the feet in until they are directly under the hips
- Push the feet into the floor
- Drive the chest upwards
- Pull the shoulder blades back and down
- Grasp the bar firmly to activate the muscles in the arms
- Avoid pressing the bar out of the rack as this will reduce tightness
- When the bar is over the chest, lockout the elbows to generate tightness in the traps and upper back
- Keep the elbows, forearms, and wrists aligned at all times
A useful method of checking whether or not you are tight enough is to have someone nudge you while on the bench.
If you move when nudged, you are simply not creating enough tension. Ideally, no movement should occur and you should feel grounded to the bench.
Finally, let’s consider the best grip to use.
While many lifters opt for the reverse or suicide grip, they are not recommended. Ideally, the bar should sit in the meaty part of the hand with the fingers tightly gripping the bar.
You may need to slightly internally rotate the hands to ensure that the bar sits in the correct position.
For a more detailed breakdown of the bench press, check out this informative video by Calgary Barbell:
Lowering Phase
Evidently, the set-up is critical, however, the lowering and drive phases will ultimately dictate whether or not you are successful in lifting the weight.
When lowering the bar to the body, focus on the following coaching points:
- Ensure that you hinge the elbows to drop the bar rather than retract the shoulders
- Keep the elbows tucked in and avoid letting them flare out – this can lead to injury
- Upon making contact with the chest, squeeze the upper back and contract the lats powerfully to start the ascent
- Look to drop the bar to the same point on the chest with each rep
A useful tip to ensure that you are lowering the bar to the same point each time is to add chalk to the middle of the bar. This will mark the bar position on your shirt.
Drive Phase
The press is undoubtedly the most technically challenging portion of the lift.
Ideally, when performing the bench press, it should feel like you are pressing the body away from the bar and into the bench.
The bar path will have a big impact on the feel of the movement. Be aware that the path the bar takes on the way down to the chest is different from the bar path during the press.
When comparing the difference between a novice lifter and an athlete, the upward bar path phases look incredibly different.
With both the beginner and the athlete, the bar path is very similar during a descent. However, as they move into the drive phase, the bar paths are very dissimilar.
With the novice, the bar is pushed in a vertical fashion. The athlete, however, the bar is pushed backward while simultaneously being pressed vertically.
This bar path is much more effective and leads to a greater engagement of the triceps and deltoids.
While this technique takes time to learn, it is worthwhile doing so and can lead to a significant improvement in benching performance.
Elbow and Shoulder Position
It is important to draw attention to the proper position of the elbow and shoulder during the bench press as some individuals experience pain here when benching.
For those who experience pain in the shoulders, it is possible that you are not tucking enough and are potentially letting the elbows flare excessively.
By allowing the elbows to flare, the stress is taken from the chest and the back and placed entirely on the shoulders.
To rectify this, really focus on pulling the shoulder blades back and down. If you are unsure if your elbows are tucked enough, video yourself performing a rep and watch it back.
If you experience elbow pain when performing the bench press, it is likely that your joints are not aligned. Ideally, the elbow and wrist joints should be stacked on top of each other.
Not only does stacking the joints prevent pain and reduce injury risk, but it also gives you a biomechanical advantage.
Letting the elbows drift in front of the wrists will place a great amount of stress on the triceps and elbow extensors.
Therefore, to optimize performance, you should look to keep the elbows tucked and in line with the wrists.
Bench Press Pyramid Programs
Each of the following programs follows the same methodology but differ in length to allow you to select the plan that is most suitable.
There are five to choose from – a four, six, eight, ten, and twelve-week training program.
As an intermediate or advanced lifter, you will not be able to make the same kind of progress as you made as a beginner.
While adding five to ten pounds to each exercise every week is not likely, you still need to gradually add load. To do this most effectively, you will have to use microplates.
Note that this program is entirely focused on developing your bench press and upper body strength. There are no lower body exercises programmed into the plans.
Before beginning the program, it is imperative that you assess your one-rep max for bench. This can be done either by completing a one-rep max test or through an estimation.
To estimate your one-rep max use a weight that allows you to complete three to five reps and then use the following equation:
One Rep Max = (Weight x Repetitions) / 30 + Weight
For example, if you perform five reps at 200 pounds, your estimated one-rep max will be 233 pounds.
1RM = (200 x 5) / 30 + 200
= 233
Finally, note that the percentages used in the programs will correspond with an RPE. Check the chart outlined in the previous section.
4, 6, 8 and 10-Week Program Spreadsheet
Each program can be found in the following spreadsheet:
You can download the 4, 6, 8 and 10-Week program using the buttons above.
12-Week Program
For the twelve-week program, simply perform two cycles of the six-week program.
Isolation Exercises
Specific accessory exercises are not included in the programs. Therefore, you should select isolation movements that align with your goals, needs, limitations, and preferences.
As highlighted earlier, look to vary the accessory work that you perform and select exercises that target key benching muscles in the chest, back, and shoulders.
If you find that the primary exercises have depleted your energy levels, focus on light weight, and treat these isolations as active recovery.
FAQ’s
Q1) Why do the programs not contain percentages and RPE’s for accessory exercises?
A) The purpose of all accessories is to eliminate any weakness and facilitate improvement in bench press performance.
All accessory exercises should be challenging, however, should not surpass an RPE of nine.
These exercises tend to place a demand on many smaller muscles and, therefore, heavy weight is not typically required.
Q2) What does AMRAP refer to?
A) As Many Reps As Possible. For these sets, keep going until you reach an RPE of 10. The final rep should not cause muscular failure, however, it should be a real grind.
Q3) What does 5RM stand for?
A) Five Rep Max. This involves using a weight that allows you to complete a maximum of five repetitions.
Q4) What’s the difference between the high and low pin presses?
A) As the names suggest, for the high press set the pins just below lockout whereas for the low press set the pins slightly above chest height.
Q5) What if I don’t have a slingshot?
A) While you won’t experience the benefits of overloading the muscles, exercises can still be performed without a slingshot to add volume.
Final Word
Whether you are a powerlifter or not, developing your bench press will have a considerable impact on strength and movement.
By running the above bench press pyramid programs, you will experience substantial improvements in upper body strength and bench performance.
References:
1. Lorenz, Daniel S.; Reiman, Michael P.; Walker, John C. (2010-11). “Periodization”. Sports Health.
2. Fonseca, Rodrigo M.; Roschel, Hamilton; Tricoli, Valmor; de Souza, Eduardo O.; Wilson, Jacob M.; Laurentino, Gilberto C.; Aihara, André Y.; de Souza Leão, Alberto R.; Ugrinowitsch, Carlos (2014-11). “Changes in exercises are more effective than in loading schemes to improve muscle strength”. Journal of Strength and Conditioning Research.
3. Schoenfeld, Brad J.; Contreras, Bret; Vigotsky, Andrew D.; Peterson, Mark (2016-12-01). “Differential Effects of Heavy Versus Moderate Loads on Measures of Strength and Hypertrophy in Resistance-Trained Men”. Journal of Sports Science & Medicine.
Tip: If you're signed in to Google, tap Follow.





On the sling shot sets it states rep range but what weight etc. same with AMRAP
What weight is required for sling shot rep range