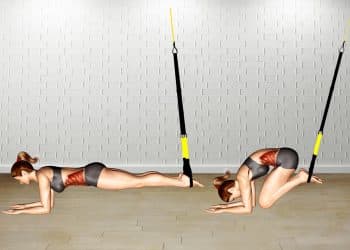
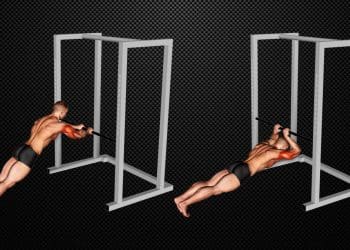
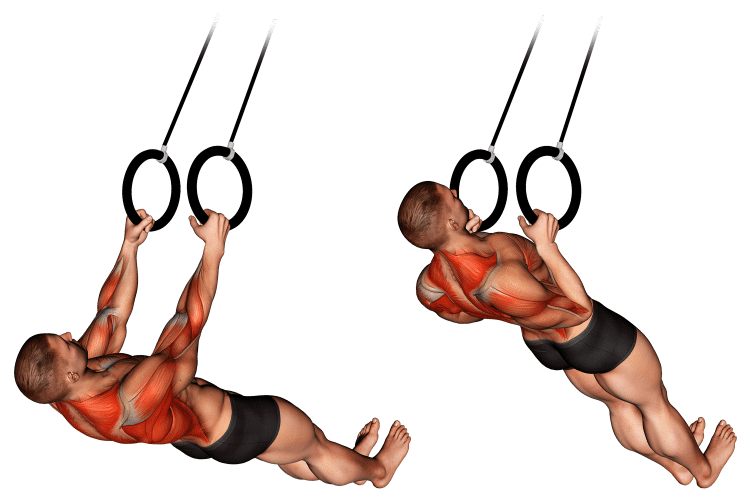
While called suspended rows, this uber-effective movement is more similar to bodyweight pull-ups. Although it’s much easier to do a suspended row than a conventional pull-up. Plus there are also many other advantages of suspended rows like a more muscular back, stronger arms, and better joint integrity and stability.
In this guide, we explain why suspended rows are awesome, detailed exercise instructions, and the best variations.
What is Suspension Training/Suspended Rows?
The concept of suspension training has been around for hundreds of years. However, it exploded in popularity with the invention of the TRX (Total resistance exercise) system, developed by former Navy Seal Randy Hetrick in the 1990s, and marketed in 2005.
The main benefit and selling point of suspension training is the instability of free swinging straps and webbing. This challenges the exerciser to engage more assisting muscle groups while allowing you to perform a variety of exercises and workouts.
However, it can be more dangerous for the joints than conventional bodyweight training for the very same reason.
But suspended rows are one of the safer suspension exercises because the direction of the exercise keeps the shoulders in a safer position (arms in front of the body). Not to mention, it’s a very effective variation of one of the best upper posterior chain movements, being the row.
Level Up Your Fitness: Join our 💪 strong community in Fitness Volt Newsletter. Get daily inspiration, expert-backed workouts, nutrition tips, the latest in strength sports, and the support you need to reach your goals. Subscribe for free!
Suspended Row Muscles Worked
While rows are often labeled as a back-focused exercise, the benefits go well beyond, like the entire upper body including the arms, shoulders, and even the chest muscles.
Below are short and detailed descriptions of the muscles involved and that benefit from suspended rows.
Infraspinatus
The infraspinatus plays its part in forming the glenohumeral joint that contributes to moving and stabilizing the shoulder. Its specific role is to externally rotate the delts. This occurs when pulling the arms behind you during suspended rows.
Latissimus Dorsi
Latissimus Dorsi commonly called lats for short, these large wing like muscles are also the largest muscle in the back. The lats, while a back muscle, move the arms, and push the trunk forward and pull it up (e.g, during a pullup).
Teres Major
The teres major muscle extends from the shoulder blade to the arm. Anatomically, it teams up with the lats to extend, adduct (move inward), and medially rotate the arm.
Teres Minor
Like the teres major, the teres minor spans from the scapula to the upper arm and it sits deep to the delts. However, it’s part of the rotator cuff group that promotes stabilization of the ball and socket area. This allows the shoulders and arms to move comfortably in various directions.
Trapezius muscles
The traps form the muscles above the shoulders and on either side of the neck muscles. There are three segments of trapezius muscle fibers – upper, middle and lower.
Each section has a unique function. The upper traps elevate the scapula, middle traps retract the scapula and the lower fibers pull it downward. Every type of pull day exercise will activate all three trapezius muscles to a degree.
Biceps Brachii
Pulling the elbows back behind the body is a great activator of the biceps muscles. Formed with two heads on the upper anterior arm between the elbow and shoulder, the biceps, cross both joints and therefore contribute to movement at both ends.
Besides elbow flexion, the biceps supinate (rotate the palm up) and pronate the forearm (rotate the palm down).
Brachialis
Underlying the outer biceps, the brachialis extends down past the elbow joint. It’s a powerful elbow flexor and most people agree that it works best when performing exercises using a neutral grip. However, every pull motion will recruit the brachialis muscles.
Brachioradialis
Like the biceps and brachialis, the brachioradialis crosses the elbow joint and flexes the arm. However, it is considered a forearm muscle of which its role is to rotate the lower arm.
Deltoid Posterior
Positioned on the backside of the body, deltoid posterior or rear delts actively pull the arms back. It is one of the three heads that make up the ball and socket shoulder joint that attach to the flat area of the shoulder blades.
Pectoralis Major Sternal Head
Rows are a back exercise, however, the chest muscles still get some involvement. The pectoral major sternal head is another word for the lower chest fibers near the nipple area. Consequently, the lower chest is most active when the arms are positioned down and in front of the lower pecs.
How To Do Suspended Rows
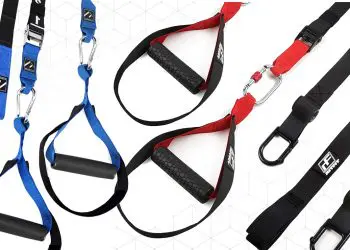
Before you can perform suspended rows, you’ll need, well, a suspension device. These come in many different variations and price points. While we do recommend buying proper suspension straps or using the ones provided at a gym, some people go the makeshift route.
Some options include a towel, resistance bands, some rope, clothing, bed sheets, or similar. It’s up to you but safety should be a priority.
Here are some cheaper TRX alternatives.
The Setup
Some gyms have suspension straps already set up. All you need to do is adjust them to your preference and ability level. The good thing about using them at a gym is you can ask gym personnel for assistance, if needed.
If using suspension straps at home or a park, make sure to read the manual to ensure a safe and proper set up.
Typically, you want to anchor one end of the suspension bands several inches above your head or 7-9 feet above the floor. Of course, the more advanced you are, you can play with the attachment point.
For most people, the suspension straps should hang a few (roughly 3-4) inches above your knees. That way the straps are not too high or low but right in that sweet spot. From there, you can comfortably adjust your foot position.
Suspended rows exercise steps:
Below we’ve explained how to do suspended rows in detail with step-by-step instructions and video tutorials.
Step 1 – Strong grip
If your suspension straps are set up properly, grab the handles using a neutral grip and squeeze them tight to activate the back muscles.
Step 2 – Hip width stance and lean back
Now place your feet roughly hip width apart, and allow your body to lean back so that your arms are fully extended.
Step 3 – Foot placement
From here, you’ll need to determine appropriate foot placement.
The more upright or vertical your body, the easier the exercise will be. However, most people will get the most benefit with their feet positioned several feet forward toward the anchor point.
Step 4 – Shoulders and core
The next step is to keep your body strong and properly aligned to maximize your pulling strength and prevent energy leaks.
Here’s a form checklist before you begin each set:
- Retract your shoulder blades
- engage your core muscles
- keep your head straight
- Tuck your chin
Step 5 – Pull and squeeze
The last step is to use your back muscles to pull your chest towards the straps. Use a full range of motion, pulling all the way up and slowly lowering yourself back to the starting position. Make sure to squeeze and contract your back and scapula.
Level Up Your Fitness: Join our 💪 strong community in Fitness Volt Newsletter. Get daily inspiration, expert-backed workouts, nutrition tips, the latest in strength sports, and the support you need to reach your goals. Subscribe for free!
If you prefer visual instruction, we recommend watching the 4:39 minute suspended row video tutorial below.
Suspended Row Tips
Here are a few technique tips to get the most out of suspended rows.
- You can experiment with different grip positions to see what works for you. For example, start with an overhand grip and transition to an underhand grip as you performed the row.
- Don’t rush the process. Master a set of 8-12 reps with good form before trying to make the exercise more challenging.
- Always inspect your straps for broken pieces or rips.
- Make sure your device is secure before performing your exercises.
This Exercise:
- Target Muscle Group: Back
- Secondary Muscles: Shoulders, Biceps, and Forearms
- Type: Hypertrophy, strength, and function
- Mechanics: Compound
- Equipment: Suspension straps
- Difficulty: Beginner/Intermediate
- Best Rep Range:
- Hypertrophy: 8-12
- Muscle endurance: 15+ reps
Common Mistakes While Performing Suspended Rows
Try to avoid these form mistakes to ensure you maximize the movement and minimize potential for injury.
Doing reps too fast
We’ve all done it and many of us still do sometimes. Ego lifting doesn’t just apply to bench press and squats. Bodyweight rows can be challenging and you can burnout quickly. As a result, many lifters will use too much momentum to get their chest to the bar and they don’t even realize it.
Not only does this force other, non-target muscles to take over, you can create muscle imbalances when one side is stronger than the other.
Slow your reps down and focus on using your back muscles to pull up with the same, equal force on both sides, even if the reps are a little shorter.
Sagging your body
Many unexperienced exercisers or first time users of suspension straps fail to train with proper form. With suspended rows this will often look like a curved back and sagging hips.
This makes for a less efficient exercise and can be dangerous for your joints and muscles.
Not progressing
If your goal is to get stronger and gain muscle, then you need to find a way to make an exercise more challenging. You can do this by increasing the resistance and reps, although not necessarily at the same time.
For example, one day you can do higher reps, and the next day you can add more weight and do lower reps. You should train using a variety of reps ranges, so both are recommended.
Suspended Rows Benefits
Below are the reasons we personally like suspended rows, and if you can do them safely, it’ll be one of the best movements in your back rotation.
Increased back gains
If you take your training seriously, suspended rows will reward you with better back development. They are also a fantastic way to maintain size and strength in your upper body.
If you use the methods of progression with suspended rows, you can continue to see great progress.
Related: Suspension Trainer Bodybuilding Workout Plan
It’s functional
Tools like the TRX are effective not just because they allow you to use your bodyweight as resistance. It also strengthens the stabilizer muscles, joints, and core, and improves balance and flexibility. There’s also supporting evidence for the effectiveness of suspension training in upper body muscle activation and core engagement (1).
An affordable, versatile, and fun upper body workout
If you prefer home or park workouts, a suspension trainer can be all that you need to build an impressive and functional physique.
You can perform so many different exercisers with a suspension tool and you don’t have to break the pocket as there are many cheaper alternatives.
Suspension training is also a fun way to challenge yourself and break up the monotony of conventional back exercises.
Drawbacks
Every type of training tool has a few disadvantages and suspension trainers are no different. With that said, here are some drawbacks of suspended rows.
Unstable
Part of the appeal of suspension training is that it requires more stability. This is also one of the cons too because it can cause an unexperienced person to shift their weight in a way that can place the joints in a dangerous position.
While there are ways to minimize this, we don’t recommend absolute beginners attempt suspension type exercises without a little experience or guidance.
Not the best tool for building max strength
While there are ways to make suspension rows harder, it’s typically not the best choice for building max strength. You need a way to consistently overload your muscles for them to get bigger and stronger. This is where freeweights, machines, etc, and weighted pull-ups will be superior choices.
You could modify your body position and even wear a weighted vest or backpack for suspended rows, but it’s not always practical.
If you’re aiming for higher reps (great for building muscles), suspended rows are a great choice. Plus, they are functional as explained previously.
Not as accessible
Compared to pull-ups or other back exercises, you need to have a suspension training tool and somewhere to attach it to. Some gyms have suspension trainers and others don’t.
Suspended Row Variations
Let’s look at some of the similar exercises and alternative techniques that work the back muscles like suspended rows.
1. One-arm suspended row
One of the easiest and most convenient ways to make a bodyweight exercise more difficult is to do it using one limb at a time. This is also called unilateral training and it comes with several benefits such as more overall resistance, increased functional ability, better stabilization and identifying and correcting left and right side muscles imbalances.
Also check out the Best TRX Back Exercises For a Thick Rock-Solid Back
2. Feet elevated suspension rows
The taller you stand during suspended rows, the easier they’ll be. So to increase the resistance, walk your feet forward and lean back. You want to do this in short increments according to your strength and goals.
Then, when you become more advanced, you can raise your feet off the floor. This will shift more of the load onto the working muscles. You can use a bench, chair, or similar object.
3. Straight bar inverted row
A personal favorite, straight bar inverted rows may be even more beginner friendly than suspended rows. That’s because you’re using a stable and unmovable bar (e.g., Smith machine, power rack, park rails, etc) rather than an unstable suspension tool.
That also makes it a little safer as it prevents too much accidental force on the joints. You’re also more likely to find a place to perform inverted rows.
Frequently Asked Questions
Are suspended rows a good beginner exercise?
Suspended rows are a safer exercise than variations like suspension chest flys because the shoulders are in a safer position in front of the body. So they can be beginner-friendly, if performed with proper technique.
How can I add weight to suspended rows?
You can progress suspended rows by wearing a weighted vest or loaded backpack, or wrapping a looped resistance band around your body and securing it to an object.
Wrapping Up
Suspension rows are a beast of an exercise that we would throw into your back rotation, if you have a decent base level of training experience. It offers all-around benefits of resistance and functional training and is a nice change up from a boring back row routine.
But while suspended rows are a powerful upper body movement, they also require extra attention to safety due to the instability but that’s always why its so beneficial.
Interested in measuring your progress? Check out our strength standards for Bench Press, Pull Ups, Squat, and more.


