Poor posture is a typical problem for people who spend their days hunched over a keyboard. A lot of us not only earn our livings sitting in front of a screen but also spend much of our leisure time in the same position.
Slouch long and often enough, and your body will begin to adopt that posture even when you’re standing.
Poor posture can have a significant impact on many aspects of your life. In no particular order, a perma-slouch can:
- Cause neck pain
- Cause headaches
- Reduce your lung capacity
- Affect your shoulder mobility
- Cause shoulder pain
- Cause upper back pain
- Make you look older
- Make you look less confident

Exercise can help, but you need to do anti-slouching exercises regularly to have much of an impact. After all, what effect will a few sets of something like face pulls have when you spend 12 hours a day with a rounded upper back?
The key to improving your posture is working on it frequently. That means whatever exercises you use must be straightforward and convenient to do. The simpler and more accessible the movement is, the more likely you are to perform it often enough for it to work.
And that’s where YTAs come in.
Level Up Your Fitness: Join our 💪 strong community in Fitness Volt Newsletter. Get daily inspiration, expert-backed workouts, nutrition tips, the latest in strength sports, and the support you need to reach your goals. Subscribe for free!
This simple but effective exercise requires no equipment, so you can do it almost anywhere and anytime. Habitual slouchers would do well if they performed this exercise several times a day, say every couple of hours.
So, in this guide, we reveal why and how to do YTAs, and provide you with a few variations and alternatives to try.
YTAs – Muscles Worked
YTAs are an upper-body isolation exercise. This means they involve movement at just one joint – the shoulders. Unlike most upper back and shoulder exercises, YTAs do NOT engage the biceps or triceps.
The main muscles worked during YTAs are:
Posterior deltoids
The deltoids are your shoulder muscles, and they’re comprised of three sets of fibers called heads: Anterior (front), medial (middle), and posterior (rear). While all three heads are working during YTAs, it’s the posterior head that’s working the hardest.
That’s good news because the posterior deltoid is often weak and under-developed, contributing to poor posture and inwardly-rotated upper arms.
Trapezius
Known as the traps for short, this is the large diamond-shaped muscle that covers much of your upper back. Like the deltoids, the traps consist of three groups of fibers: Upper, middle, and lower.
The trap fibers most active during YTAs are the middle fibers, located between and across the scapulae or shoulder blades. The middle fibers of the trapezius, aka the mid-traps, pull your scapulae back and together.
Rhomboids
The rhomboids are two small muscles that bridge the gap between your scapulae and your thoracic spine. They work with the mid-traps to pull your shoulder blades back and together.
Erector spinae
The erector spinae is the collective name for the muscles of your lower back. Like the upper back, these muscles are often weak because of prolonged sitting and hunching. YTAs use these muscles indirectly to hold you in the correct position to move your arms
Gluteus maximus
Like the erector spinae, the gluteus maximus or glutes get an indirect workout during YTAs. You’ll need to use your glutes to lift your upper body, so your arms are free to move.
How to Do YTAs
Get more from YTAs while keeping your risk of injury to a minimum by following these guidelines:
- Lay on your stomach with your legs together and your forehead resting on the floor.
- Extend and open your arms overhead, so they form a Y shape. Point your thumbs up toward the ceiling, palms facing inward. Brace your core.
- Lift your chest a couple of inches off the floor, taking care not to hyperextend your lower back.
- Lift your hands a few inches off the floor and hold for 2-3 seconds.
- Next, without lowering your arms, sweep them back, so they’re perpendicular to your body and form a T-shape. Again, hold for 2-3 seconds.
- Bring your arms down toward your hips to form an A-shape. Keep your hands off the floor, and your shoulders pulled down and back.
- Sweep your arms forward and return to the Y-position.
https://youtu.be/NaCIvvBmxpU
Tips:
- Lower your hands to the floor between reps if you need a rest, or keep them off the floor for a more intense workout.
- Lie on a mat for comfort. Consider putting a folded mat under your hips for extra padding.
- Make this exercise more challenging by holding dumbbells or weight plates.
YTAs Benefits
Not sure if YTAs are the best way to fix your posture and strengthen your shoulders and upper back? Consider these benefits and then decide!
Anywhere, anytime
You don’t need any equipment for bodyweight YTAs, although a mat may make them more comfortable. Because of this, you can do YTAs almost anywhere and anytime, making them the perfect excuse-free posture exercise. Use them to break up long periods of sitting at your computer. So, go on – do a set now…
A great way to mobilize your shoulders and stretch your pecs
YTAs are an exercise twofer. They not only strengthen the muscles on the back of your body, but they also stretch the muscles on the front. This addresses the two things you need for better posture in one simple exercise.
Easy to learn
YTAs are a straightforward exercise, so they’re perfect for beginners. Other well-known postural exercises are more challenging and complicated, making them less useful for workout newbies. However, while this is a simple exercise, it’s still very effective, and more experienced lifters will also benefit from it.
Not too taxing
The weight of your arms and the tension in your chest are the only sources of overload during YTAs. As such, they’re not overly taxing and won’t wear you out. Because of this, you should be able to do YTAs daily, if not several times a day. This is very useful when fixing poor posture, as you need to reeducate your muscles, which takes time and plenty of repetitions.
Drawbacks
While YTAs are a mostly beneficial exercise, there are also a couple of drawbacks to consider:
Mobility issues
Overly tight pecs may mean you find it hard to lift your arms off the floor. Not being able to achieve the basic starting position of the Y-T-A exercise will mean you won’t be able to do it correctly. Tight pecs are a common problem that affects desk warriors and hardcore lifters alike.
Related: Mobility Training for Bodybuilders, Powerlifters, and Weightlifters
Limited overload
Beginners will probably find that the weight of their arms provides more than enough resistance to get a good workout from YTAs. However, this may no longer be the case as the mid-traps, rear delts, and rhomboids get stronger. As such, most exercisers will soon have to find more challenging exercises for their postural muscles.
Level Up Your Fitness: Join our 💪 strong community in Fitness Volt Newsletter. Get daily inspiration, expert-backed workouts, nutrition tips, the latest in strength sports, and the support you need to reach your goals. Subscribe for free!
7 YTA Variations and Alternatives
YTAs are a highly effective posture exercise, but that doesn’t mean you need to do them all the time. There are several variations and alternatives you can use to keep your workouts productive and interesting:
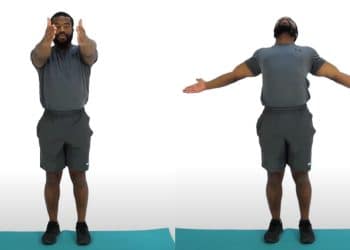
1. Standing YTAs
The biggest drawback of YTAs is that you need to lie prone on the ground to do them. Needless to say, this will probably raise some eyebrows if you work in a shared office! Standing YTAs will draw less of a crowd and are more comfortable because you don’t have to lay on your front to do them. However, there is less tension in the target muscles.
Steps:
- Stand in good posture with your arms by your sides, thumbs pointing forward. Bend your knees slightly for balance, brace your core, and pull your shoulders down and back.
- Raise your arms overhead to form a Y-shape and hold for 2-3 seconds.
- Next, lower your arms so they’re parallel to the floor, and point your thumbs outward. Open your arms to form a T-shape. Squeeze your shoulder blades together. Hold for 2-3 seconds.
- Finally, lower and open your arms to form a Y-shape. Make sure your thumbs are pointing behind you by rotating your arms outward. Hold for 2-3 seconds.
- Repeat for the desired number of YTA cycles.
Muscles Targeted:
- Primary: Trapezius, rhomboids, deltoids.
- Secondary: N/A.
Benefits:
- More convenient than prone YTAs.
- Less resistance, so a good exercise for unfit beginners.
- A good move for warming up and preparing your upper back and shoulders for your coming workout.
Tips:
- Keep your knees slightly bent, and core braced throughout.
- Pull your shoulders back at the start of each movement.
- You can also do this exercise seated.
- Do this exercise to break up long periods of sitting.
2. Stability ball YTAs
Floor YTAs are great for your upper back but don’t do that much for your lower back and glutes. After all, you only have to lift your chest a couple of inches off the floor, which requires minimal muscle activation. Doing YTAs on a stability ball provides a more effective workout for your lower back and glutes. Your glutes and lower back are just as important as your upper back for good posture.
Steps:
- Put your stability ball on the floor and kneel behind it. Place your hips on the ball and your hands on the floor. Extend your legs out behind you and press your toes into the floor. Shift your weight on the ball to find your balance.
- Extend your arms in front of you and open them to form a Y-shape. Point your thumbs upward. Hold for 2-3 seconds.
- Then, sweep your arms down and back to form a T-shape. Hold for 2-3 seconds.
- Next, bring your arms down toward your hips to form a Y-shape. Hold for 2-3 seconds.
- Return to the starting position and repeat.
Muscles Targeted:
- Primary: Trapezius, deltoids, rhomboids.
- Secondary: Erector spinae, gluteus maximus.
Benefits:
- A more challenging way to do YTAs.
- A comfortable exercise.
- Works your upper and lower body posterior chain muscles at the same time.
Tips:
- Use a larger stability ball to make this exercise easier.
- The more horizontal your body, the more challenging this exercise becomes.
- You can also do this exercise with weights, like this:
3. Incline YTAs
While regular YTAs are a great exercise, you’ll need to progress to a more challenging movement as you get stronger. The incline YTA uses dumbbells, so you can use progressive overload to continue developing your muscles. This is a good exercise for people who train in gyms.
Steps:
- Set your bench to a 45-degree incline. Lie face down with a light dumbbell or weight plate in each hand. Let your arms hang down from your shoulders. Turn your palms inward to a neutral grip.
- Lift your arms forward and out to form a Y-shape.
- Lower your arms and then raise them to the side to form a T-shape.
- Finally, lower your arms and then sweep them back to form an A-shape.
- Repeat for the desired number of cycles.
Muscles Targeted:
- Primary: Primary: Trapezius, deltoids, rhomboids.
- Secondary: N/A.
Benefits:
- You can increase the weight as you get stronger.
- A bigger range of motion than the floor-based YTA variations.
- Adjust the slope of the bench to work your muscles from different angles.
Tips:
- Raise your bench on blocks if your hands touch the floor.
- Go light – this exercise is far more challenging than it looks.
- You can also do this exercise on a horizontal bench.
4. Banded YTAs
Another way to make YTAs more challenging is to use a lightweight resistance band. Bands are easy on your joints, and you can adjust the difficulty of your workout by moving closer or further away from your anchor point. This is a great way to warm up your shoulders before heavy lifting.
Steps:
- Attach two light resistance bands to a chest-high anchor, such as a power rack. Hold one in each hand and step back to tension the bands. Extend your arms in front of you.
- Raise your arms up and out to form Y-shape.
- Next, open your arms to form a T-shape.
- Finally, sweep your arms down and out to make an A-shape.
- Return to the Y position and repeat.
Muscles Targeted:
- Primary: Primary: Trapezius, deltoids, rhomboids.
- Secondary: N/A.
Benefits:
- A simple way to make YTAs more challenging.
- A joint-friendly exercise.
- A great way to warm up your shoulders and improve scapular stability before heavy lifting, e.g., bench presses, shoulder presses, or deadlifts.
Tips:
- Use a thin, light resistance band, as this exercise is more strenuous than it looks.
- Pause in each position for 2-3 seconds to increase exercise intensity.
- Step further away from your anchor to stretch the band more and increase the tension on your muscles. Step closer to make it easier.
5. Standing wall angel
This exercise is so-called because doing it looks a little like when you make snow angels. Like prone YTAs, this exercise requires no equipment. However, because it’s performed standing, it may be more convenient. Use this exercise to break up long periods of sitting.
Steps:
- Stand with your back against a smooth wall. Your feet should be about 12-18 inches away from the wall. Press your shoulders, head, and butt against the wall.
- Raise your arms and bend your elbows to 90 degrees. Put your arms, forearm, and the backs of your hands flat against the wall.
- Maintaining contact with the wall, slide your arms as far up as possible.
- Slide your arms down the wall and repeat.
Muscles Targeted:
- Primary: Primary: Trapezius, deltoids, rhomboids.
- Secondary: N/A.
Benefits:
- No equipment is required, so you can do this exercise anywhere you can find a smooth, flat wall.
- A very effective posture and shoulder health exercise.
- An excellent way to stretch your pecs and lats for an increased range of motion.
Tips:
- Keep the backs of your hands and forearms pressed against the wall throughout this exercise.
- If standing wall angels are too challenging, try doing them while lying on the floor.
- You can also do wall angels while seated, like this:
6. Dumbbell victory raises
Dumbbell victory raises combine elements of YTAs with a standard lateral raise. However, this combination of movements is good for your posture and shoulder health. It could even help you build bigger, more muscular shoulders. Be warned; this exercise is more demanding than it looks, so don’t go too heavy too soon.
Steps:
- Place a small resistance band (mini-band) around your wrists and hold a dumbbell in each hand. Your palms should face inward, i.e., a neutral grip.
- Stand with your feet shoulder-width apart, knees slightly bent, core braced, and shoulders down and back.
- Press your arms outward against the resistance of the bands and raise them forward and upward to form a Y-shape above your head.
- Lower your arms, and bring your hands back in.
- That’s one rep – keep going!
Muscles Targeted:
- Primary: Primary: Trapezius, deltoids, rhomboids.
- Secondary: N/A.
Benefits:
- A very joint-friendly shoulder exercise.
- An excellent way to get an intense workout from light dumbbells.
- This exercise hits all three deltoid heads at the same time.
Tips:
- Move slowly and deliberately to maximize muscle tension.
- Pause with your arms raised to increase the work on the target muscles.
- Do not release the tension from the band; keep pushing your hands outward to keep your muscles engaged the entire time.
7. Band pull-aparts
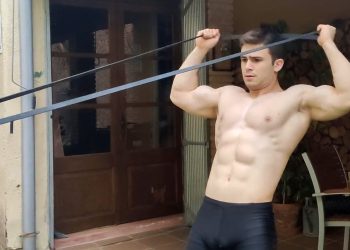
The resistance band pull-apart is an excellent shoulder and upper-back exercise. Like YTAs, it hits all the upper body muscles that tend to be weak when your posture is poor. Try doing 50-100 reps every day to cure your slouch, or do a few reps between sets of bench presses to increase shoulder stability and upper back engagement.
Steps:
- Hold a resistance band with an overhand or underhand grip. Raise your arms forward, so your hands are level with your shoulders. Your arms should be straight but not locked. Pull your shoulders down and back.
- Open your arms and stretch the band out across your chest. Pause for 2-3 seconds.
- Return to the starting position and repeat.
Muscles Targeted:
- Primary: Primary: Trapezius, deltoids, rhomboids.
- Secondary: N/A.
Benefits:
- A very convenient exercise as all you need to do them is a light resistance band.
- A handy exercise for warming up your shoulders before heavy lifting.
- Do this exercise daily to fix your posture and improve your shoulder health.
Tips:
- Keep a resistance band in your drawer so you can do a set of pull-aparts to break up long periods of sitting.
- Try stretching the band diagonally across your chest to hit different parts of your back and shoulders.
- You can also do band pull-aparts while seated, or leaning against a wall or lying on the floor, like this:
YTA – FAQs
Do you have a question about YTAs or posture and shoulder health in general? No sweat because we’ve got the answers!
1. How often should I do YTAs?
YTAs are more of a posture than a strength or bodybuilding exercise. They’re pretty low-intensity, so they’re not very tiring. As such, you can probably do YTAs almost every day. That’s good news if you have bad posture because if it took you years to develop a slouch, and it’s going to take a lot of reps and sets to reverse it.
That said, doing the same exercise every day can become boring, so use the variations and alternatives in this article to hit your postural muscles in a few different ways.
2. How many reps of YTAs should I do?
Unfortunately, this is one of the YTA questions we cannot answer! The number of reps you need to perform depends on several factors, including the weight and length of your arms, how tight your pecs are, and your strength.
Because we have no way of knowing this information, you should just do as many reps as it takes to feel your muscles working. Continue your set to within a couple of reps of failure, rest a moment, and then repeat if necessary.
Try to do more reps as you get stronger to maintain your progress.
3. I have tight pecs and find YTAs very uncomfortable. Got any good chest stretches?
Sure do! One of the best stretches for the chest is the doorway pec stretch. It’s easy but provides a deep stretch for those overly-tight pecs. Do this stretch a couple of times a day for a month, and you should find YTAs much easier.
- Stand in an open doorway and place your forearms on the vertical frames, so your elbows are level with your shoulders. Adopt a staggered stance.
- Gently push your chest between your arms to get a stretch in your chest and shoulders.
- Hold for 15-20 seconds, and as your muscles relax, stretch a little deeper.
- Repeat this cycle 2-3 more times or until you feel you’ve reached the limit of your flexibility.
4. Do bench presses make your posture worse?
It’s not only bench presses that can hurt your posture – all chest exercises can contribute to slouching. That’s because training any muscle can cause it to get tighter, which is something called adaptive shortening. This is especially true for exercises with a short range of motion.
Don’t worry, though; you can reduce the risk of adaptive shortening by stretching your chest after your workouts, stretching between workouts, and avoiding exercises with a short range of motion, e.g., half-rep bench presses.
Finally, keep the opposing muscles strong, i.e., your upper back and posterior deltoids, by doing an equal number of sets for both the front and the back of your body.
Related: The 11 Best Chest Stretches for More Flexible Pecs and Healthier Shoulders.
5. My upper back feels tight and immobile. How can I fix that?
Pec tightness and mid-trap and rhomboid weakness are not the only causes of poor posture. Another common issue is thoracic spine or upper back immobility.
The thoracic spine comprises 12 vertebrae and has a natural kyphotic or outward curve. However, when you slouch, that curve is exaggerated and can become a condition called hyperkyphosis. Hyperkyphosis can lead to a hunched upper back. Left untreated, this slouch can become fixed and permanent, which is known as a dowager’s hump.
The good news is that you can mobilize and stretch your thoracic spine, improving your posture and enhancing upper back function. Your neck and shoulders will undoubtedly feel better, too.
So, combine thoracic spine stretches and chest stretches with upper back strengthening exercises to fight off the effects of prolonged sitting and gravity and fix your posture for good.
Wrapping Up
Poor posture is a modern-day plague caused by sedentarism and spending too much time hunched over a keyboard or screen. It’s not just unattractive; bad posture can also affect your neck and shoulder function.
If exercises like push-ups and bench presses hurt your shoulders, your posture could be the reason.
YTAs address the muscles responsible for holding you in good posture – your posterior deltoids, mid-traps, and rhomboids. Because YTAs require no equipment, they’re the perfect excuse-free posture exercise, and you can do them almost anywhere, anytime.
So, if you are fed up with hunching and slouching, you know what to do; start doing a few sets of YTAs every day. It’ll take time, but gradually your posture will improve, and you’ll start to look and feel a whole lot better.
Interested in measuring your progress? Check out our strength standards for Bench Press, Push Ups, Face Pull, and more.


