

A movement screen can show how you squat, hinge, reach, and balance today. That makes it useful for choosing a starting exercise, filming a baseline, and checking whether practice changes anything. It cannot diagnose a tight muscle, identify a weak tissue, or tell you whether you will get injured.
That distinction matters. A heel that lifts in a squat may reflect ankle range, stance, balance, footwear, proportions, or unfamiliarity with the task. Rounded shoulders do not prove that one muscle is short and another is weak. Treat each result as an observation that earns a second check, not a verdict about your body.
Evaluation basis: This guide draws on published screening research, current referral guidance, and FitnessVolt’s movement archive. This update reports no hands-on testing.
Use a screen as a baseline, not a diagnosis
The best use of a self-screen is simple: record a few repeatable movements, note pain and side-to-side differences, then choose a low-risk practice option. Run the same checks after a short training block. A useful result helps you make a training decision.
Researchers have reached two findings that sound contradictory until you separate them. Trained raters can score some standardized movement screens with acceptable reliability. Yet a reliable score can still be a poor injury predictor or a weak measure of a specific joint’s mobility. Reliability means the observer can repeat the rating. It does not prove the rating identifies a tissue problem or forecasts an injury.
A 2017 systematic review found that the Functional Movement Screen composite score did not support individual injury prediction. A broader critical review reached the same practical point: athletes who later get hurt overlap too much with those who stay healthy for one cutoff to classify them with useful precision. Use screens to describe current options and symptoms, not to label yourself “high risk.”
| A screen can help you | A screen cannot establish |
|---|---|
| Record a repeatable starting point | Which muscle or tissue caused the result |
| Notice pain, hesitation, or a clear side difference | A medical diagnosis |
| Choose a simpler exercise or range for practice | Your future injury status |
| Compare the same movement after training | Whether one posture is good or bad for every person |
If you want a deeper explanation of size, strength, and side-to-side differences, use FitnessVolt’s muscle imbalance guide. The checks below answer a narrower question: what can you observe and retest without pretending to diagnose the cause?
A five-check movement screen for lifters
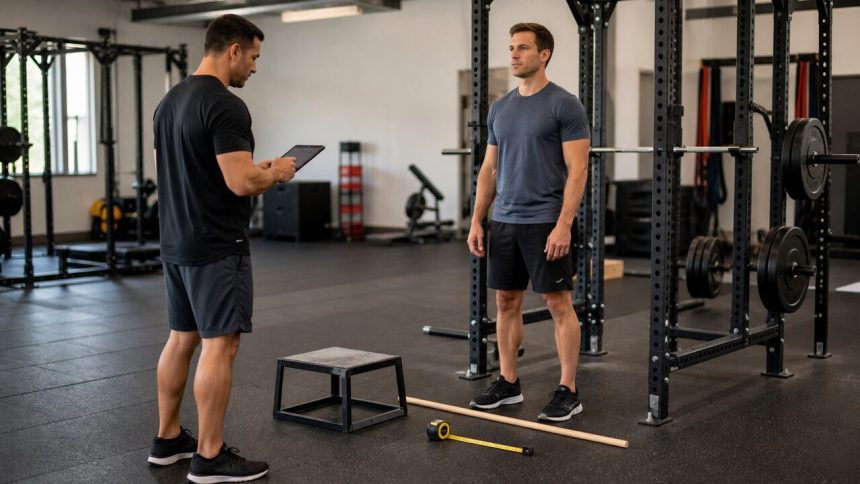
You need a phone, a wall, a dowel or broom handle, a tape measure, and a low box or step. Wear the same shoes you use for the relevant lift. Film the squat and hinge from the side, then repeat from the front. Use a stable surface for support during the single-leg check.
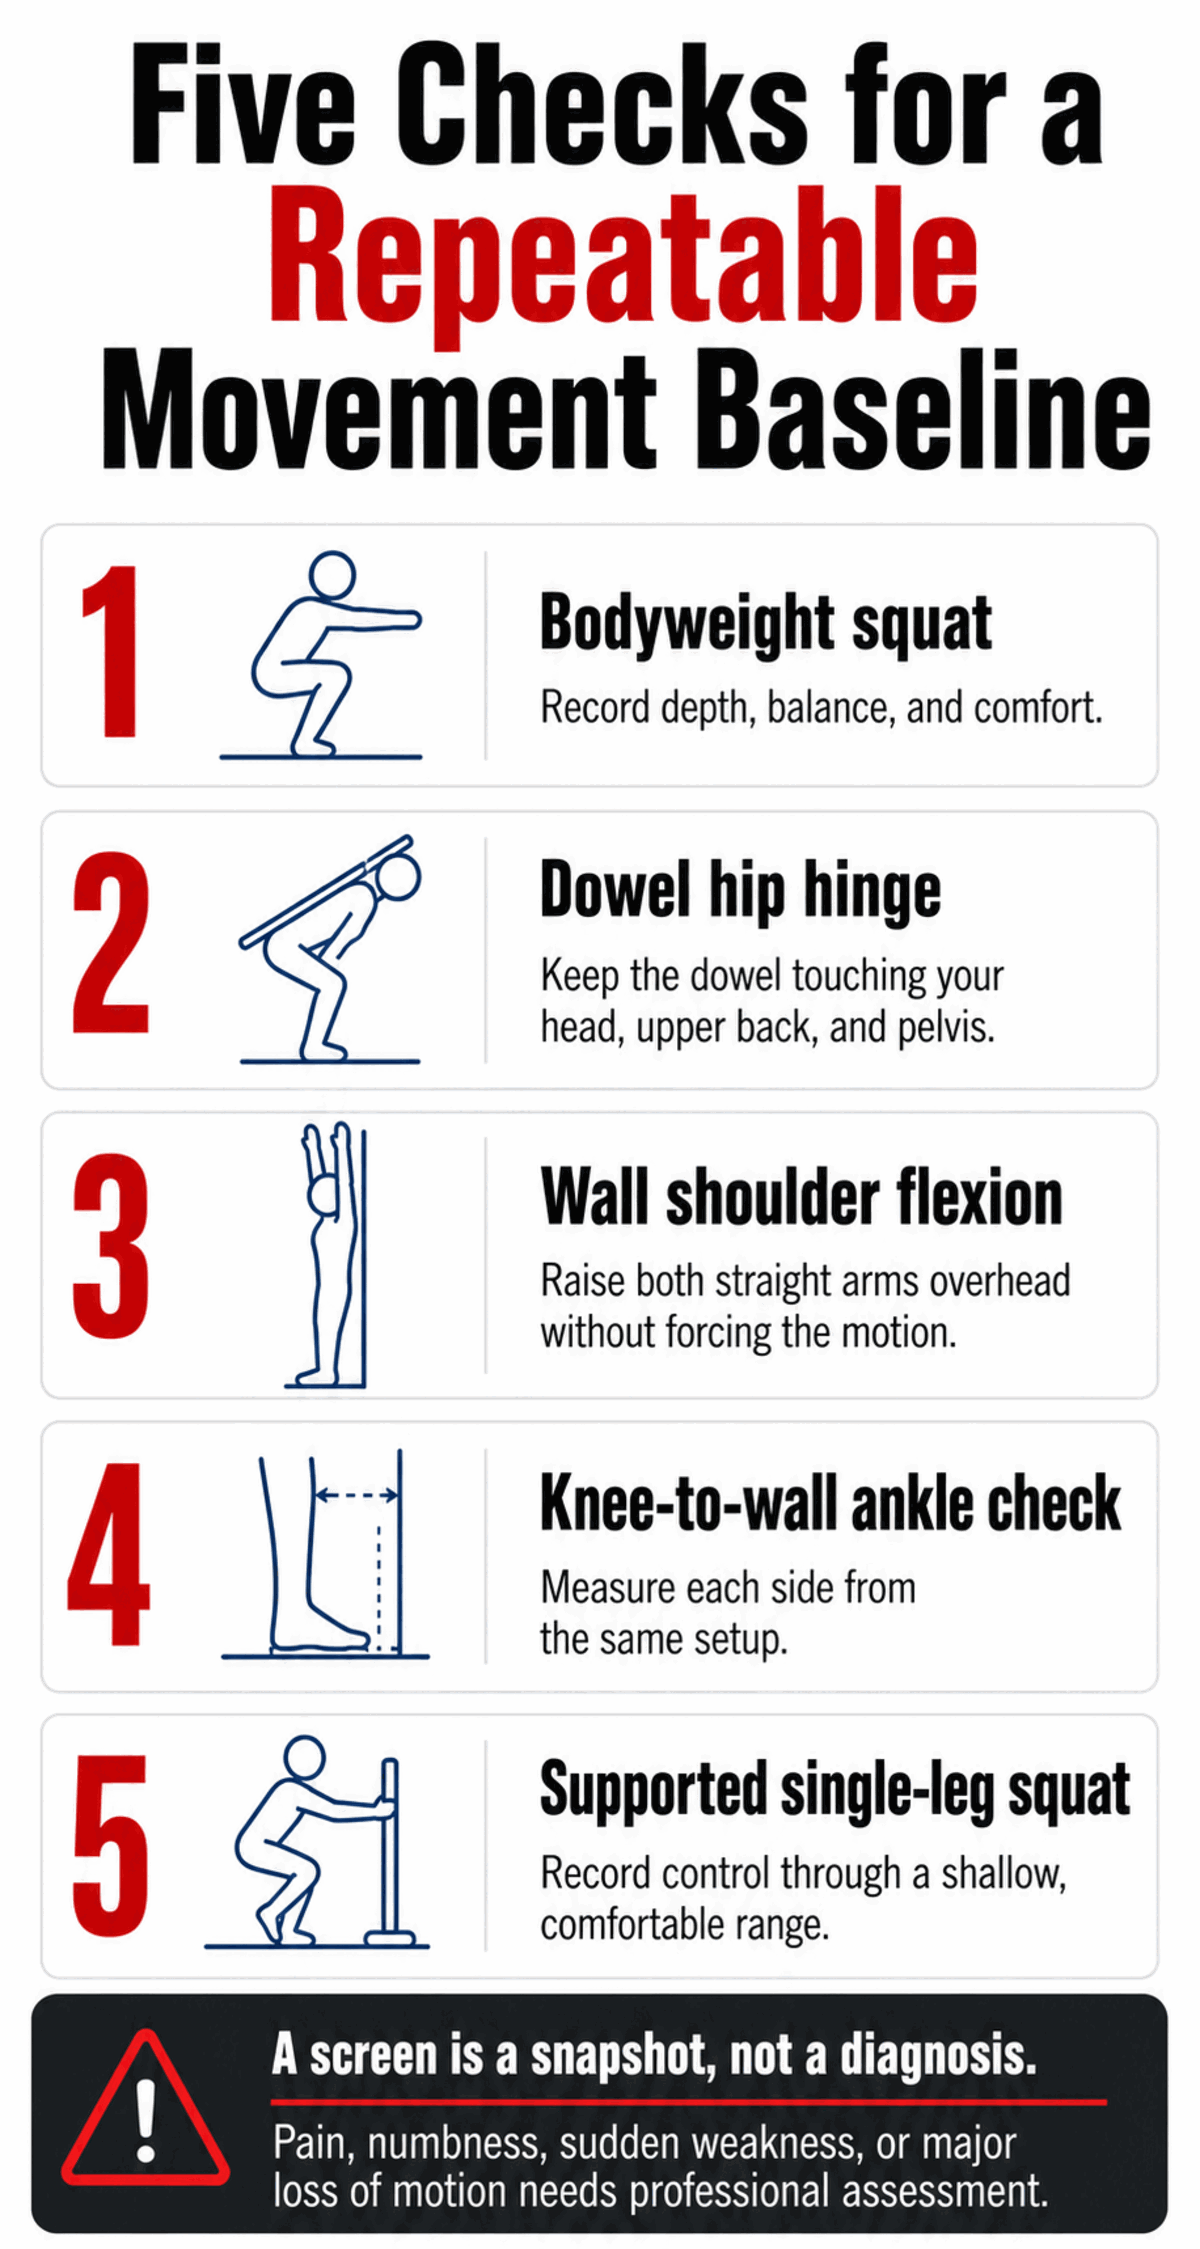
| Check | What to record | Useful follow-up |
|---|---|---|
| Bodyweight squat | Depth, foot pressure, knee path, torso control, symptoms | Compare stance or heel elevation |
| Dowel hip hinge | Three-point contact, hip travel, knee motion, symptoms | Use a wall target or shorter range |
| Wall shoulder flexion | Arm range, rib flare, elbow bend, left-right feel | Compare floor and wall positions |
| Knee-to-wall ankle check | Toe distance, heel contact, arch position, side difference | Retest after a short warm-up |
| Supported single-leg squat | Balance, knee control, pelvic shift, depth, symptoms | Use less depth or more hand support |
1. Bodyweight squat: your whole-pattern snapshot
Stand in your normal squat stance with your arms reaching forward. Perform five controlled reps to a comfortable depth. Keep the whole foot on the floor and move at the pace you would use for a light warm-up set.
From the side, watch whether the heel stays down, the foot remains planted, and the torso angle repeats. From the front, note whether the knees move with control in the same general direction as the toes. Your knees can travel forward, and your torso does not need to stay vertical. Limb lengths and stance change how a sound squat looks.
Record the deepest comfortable, repeatable position. A shift on one rep matters less than a pattern that appears across four or five reps. For stance, depth, and bar-path decisions, the squat biomechanics guide owns the detailed mechanics.
2. Dowel hip hinge: can you separate hips from knees?
Hold a dowel along your spine so it touches the back of your head, upper back, and pelvis. Unlock the knees, push the hips toward a wall behind you, and stop before any contact point leaves the dowel. Perform five slow reps.
Look for the hips moving back while the shins stay close to vertical. If the knees keep bending and the hips drop, you turned the task into a squat. If the dowel loses contact, shorten the range and try again. The result may reflect coordination, instructions, range, or confidence. It does not prove that your hamstrings are tight or your core is weak.
For practice, stand about 6 to 10 inches from a wall and tap it with your hips for two sets of eight. Then apply the same motion to an unloaded or light hinge. FitnessVolt’s stiff-leg deadlift exercise guide shows how a loaded hinge changes the task.
3. Wall shoulder flexion: overhead range without hiding it
Stand with your upper back and pelvis against a wall, feet a few inches forward, and ribs relaxed. Raise both straight arms overhead with thumbs pointing toward the wall. Stop before pain, a large back arch, or forced range. Repeat three times.
Record whether both arms reach a similar position and whether the ribs lift before the arms finish. Do not force your lower back flat. You only need a repeatable setup that makes the next comparison fair.
A limited reach can involve the shoulder, upper back, rib position, motor control, or the way you understood the test. One wall check cannot separate those contributors. If the motion feels stiff but pain-free, choose one gentle drill from FitnessVolt’s shoulder stretching guide and retest. Sharp pain, catching, instability, or clear weakness belongs with a qualified clinician.
4. Knee-to-wall ankle check: the most measurable test here
Face a wall in a half-kneeling or standing lunge. Keep the test foot flat, with the heel and base of the big toe down. Drive the knee toward the wall in line with the toes. Move the foot back until the knee can just touch without the heel lifting or the arch collapsing.
Measure the toe-to-wall distance and take three trials per side. Record the best controlled result, plus any front-of-ankle pinch or calf stretch. A systematic review found good reliability for the weight-bearing lunge test. It also found that changes smaller than about 1.6 to 1.9 centimeters may fall within measurement error, depending on who tests and how.
That makes a tiny daily change poor evidence of progress. Compare the same setup after two to four weeks. FitnessVolt’s dedicated ankle mobility test covers warm-up drills, footwear, and squat carryover without blaming every squat issue on the ankle.
5. Supported single-leg squat: control with less guessing
Stand beside a rack or wall and use one or two fingers for balance. Lift one foot, then perform three shallow single-leg squats on each side. Use the same depth and tempo. A low step-down also works if that setup feels more stable.
Watch whether you can keep the foot planted, control the knee, and return without a sudden pelvic shift. Hand support removes some balance noise, which helps you compare legs. Stop the descent before the rep becomes a fall.
A wobble does not identify a weak glute, and a knee moving inward on one rep does not diagnose an injury. Fatigue, task familiarity, foot position, strength, and confidence all shape the result. If one side stays less controlled across all three reps, begin unilateral practice on that side and match the same reps on the other side.
Turn observations into usable results
Skip a total score. A single number hides the difference between pain, unfamiliarity, and a small range limit. Classify each pattern as clear, variable, or stop, then write one sentence about what happened.
| Result | What you saw | What to do next |
|---|---|---|
| Clear | Comfortable, repeatable reps with no meaningful side difference | Train the pattern and monitor it under sensible load |
| Variable | A range, control, or side difference repeats without pain | Change one setup variable or practice one regression |
| Stop | Pain, catching, instability, neurological symptoms, or a recent injury changes the task | End the screen and choose the appropriate clinical assessment |
Useful notes stay descriptive: “right heel lifted on reps four and five” or “left knee-to-wall distance was 2 centimeters shorter.” Avoid notes such as “tight calf” or “weak glute.” Those labels jump from an observation to a tissue diagnosis without enough evidence.
Retest without moving the goalposts
Movement-screen results change with warm-up, fatigue, instructions, camera angle, and the observer. A 2024 clinical commentary recommends consistent cues and testing conditions because small setup changes can alter performance. Make your retest boring on purpose.
The schedule below is a FitnessVolt coaching rule of thumb, not a validated screening threshold. Its purpose is to give practice enough time to matter while keeping the comparison repeatable.
- Test at the same point in your training week, away from a hard lower-body session when possible.
- Use the same warm-up status, shoes, stance marks, camera height, and instructions.
- Repeat the same number of trials and keep the best controlled rep only if you used that rule at baseline.
- Retest after two to four weeks, not after every mobility session.
- Require the change to appear in two sessions or in the lift you care about before calling it progress.
Track symptoms and training carryover beside the screen. An extra inch of ankle travel matters more if your squat also feels steadier. A prettier wall reach means little if overhead pressing still hurts. The screen supports the training log; it does not replace it.
Use low-risk practice, then return to the lift
A practical FitnessVolt starting point is to choose one variable for a two-week block and practice it two to four times per week for 5 to 10 minutes. This is a coaching heuristic, not a research-derived dose. Use the new position in a light version of the lift. Extra corrective work does not guarantee a better result.
- Heels lift in the squat: use controlled knee-to-wall rocks, then goblet squats to a box. Change stance before assuming you need more mobility.
- The hinge turns into a squat: use wall taps and an empty-bar Romanian deadlift. Stop the range before spinal position changes.
- Shoulder flexion brings a large rib flare: try a wall slide or supported overhead reach, then test a light press with the range you own.
- Single-leg control varies: use a supported split squat or low step-down for two sets of six per side. Keep the support until the reps repeat.
Retest the observation, then test the lift. Keep the practice if both improve and symptoms stay quiet. If the screen changes but the lift does not, the screen result may not matter for your goal. If the lift feels better without a screen change, keep the useful training change.
Pain and red flags change the job
Do not use a self-screen to investigate pain. Stop any check that causes pain, and seek qualified assessment when symptoms persist, worsen, or follow serious trauma.
Seek urgent medical care for new or worsening weakness or numbness in both legs, numbness around the groin or saddle area, or changes in bladder or bowel control. Fever or feeling unwell with severe pain also needs prompt medical advice. The NHS lists these as urgent or emergency back-pain symptoms.
Persistent symptoms deserve an examination even when no emergency sign appears. FitnessVolt’s lower-back-pain squat guide can help you understand exercise regressions and referral boundaries, but it cannot replace an individual assessment.
Bottom line
Use movement screening to build a repeatable record of what you can do today. Observe squat, hinge, overhead range, ankle motion, and single-leg control without assigning a diagnosis. Change one training variable, practice for two to four weeks, and retest under the same conditions. Pain and neurological signs call for assessment, while a painless imperfect rep often calls for calmer practice and better data.
Sources
- Bahr, R. (2016). Why screening tests to predict injury do not work, and probably never will: a critical review. British Journal of Sports Medicine. DOI: 10.1136/bjsports-2016-096256. PMID: 27095747.
- Moran, R. W., Schneiders, A. G., Mason, J., and Sullivan, S. J. (2017). Do Functional Movement Screen composite scores predict subsequent injury? A systematic review with meta-analysis. British Journal of Sports Medicine. DOI: 10.1136/bjsports-2016-096938. PMID: 28360142.
- Moran, R. W., Schneiders, A. G., Major, K. M., and Sullivan, S. J. (2016). How reliable are Functional Movement Screening scores? A systematic review of rater reliability. British Journal of Sports Medicine. DOI: 10.1136/bjsports-2015-094913. PMID: 26316583.
- Bhudarally, M., Martins, R., Atalaia, T., Abrantes, J., and Aleixo, P. (2025). Convergent validity of the Functional Movement Screen regarding stability and joint mobility: a systematic review. Journal of Bodywork and Movement Therapies. DOI: 10.1016/j.jbmt.2025.02.014. PMID: 40325772.
- Powden, C. J., Hoch, J. M., and Hoch, M. C. (2015). Reliability and minimal detectable change of the weight-bearing lunge test: a systematic review. Manual Therapy. DOI: 10.1016/j.math.2015.01.004. PMID: 25704110.
- Skibski, A., Onate, J., and Mangum, L. C. (2024). Suggestions and considerations for application of movement screens to clinical practice. International Journal of Sports Physical Therapy. DOI: 10.26603/001c.92906. PMID: 38439769.
- National Health Service. (2026). Back pain. Accessed August 6, 2026.