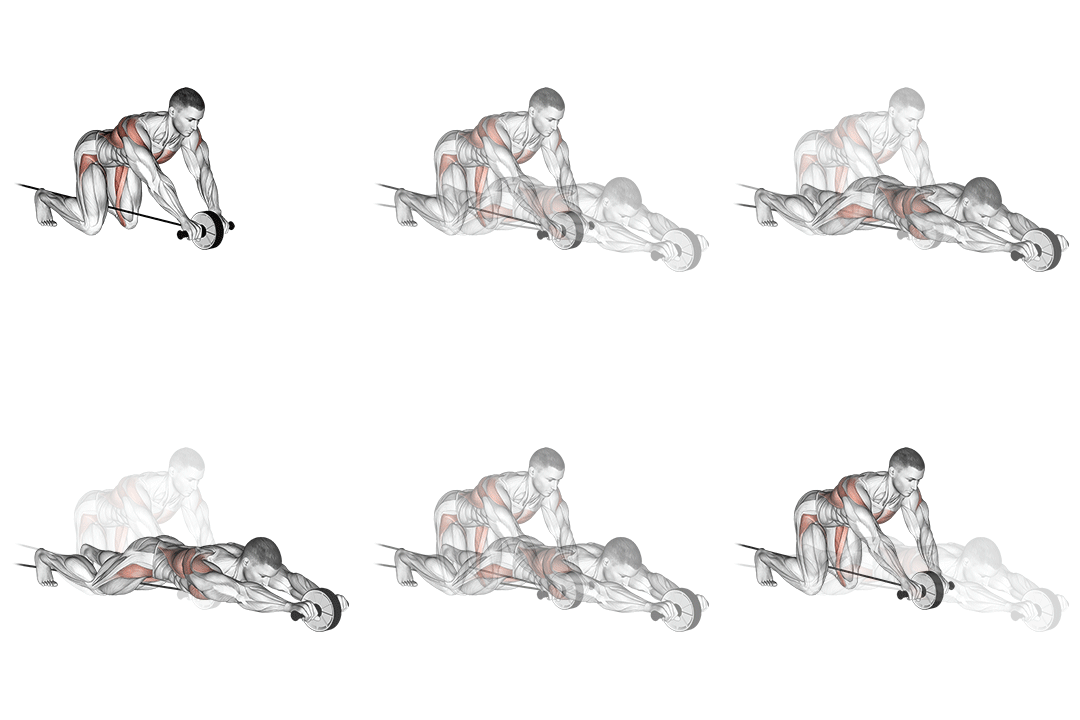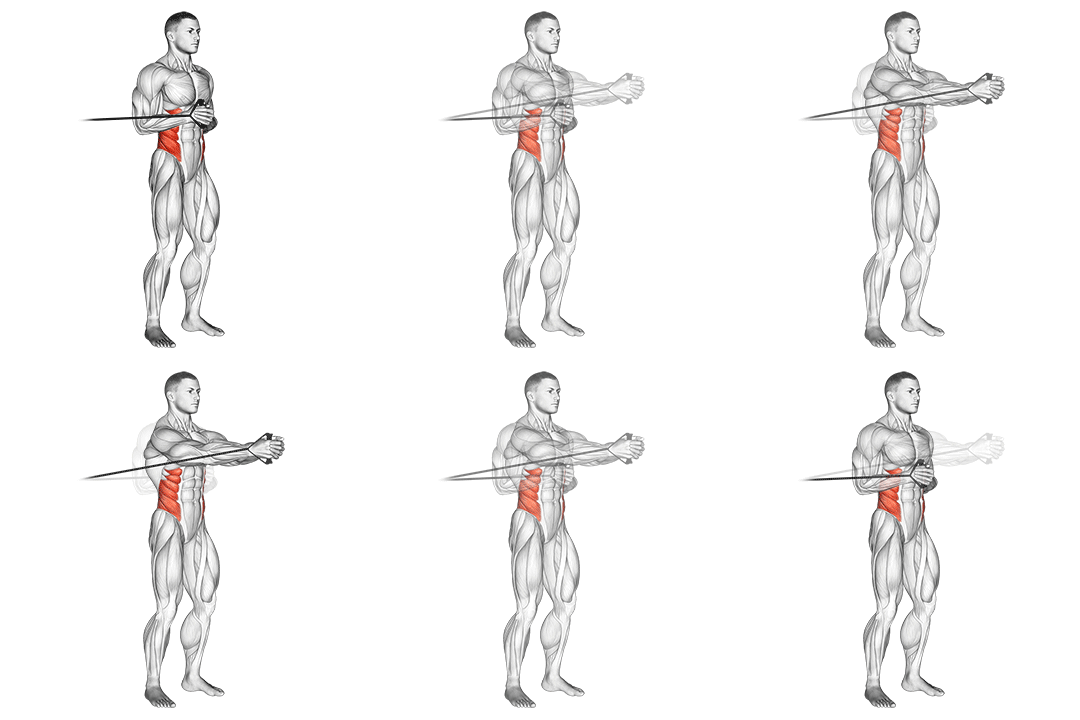

Band Bicycle Crunch vs Band Kneeling Twisting Crunch

Compare target muscles, equipment, difficulty, movement type, and secondary muscles for Band Bicycle Crunch and Band Kneeling Twisting Crunch.

Change comparison Share

Get comparison link

Select the link and use your device's Copy command.

Comparison overview

AI-generated
Band Bicycle Crunch vs Band Kneeling Twisting Crunch — two banded isolation moves that both target your abs but load them differently. You’ll get a clear side-by-side look at muscle emphasis, setup and equipment, difficulty and injury risk, plus practical cues so you can pick the one that matches your goals. I’ll cover biomechanics (force vectors, length-tension), exact technique cues for safer reps, rep ranges for hypertrophy and strength, and programming advice so you can use one or both efficiently in your workouts.

Exercise Comparison

Exercise A
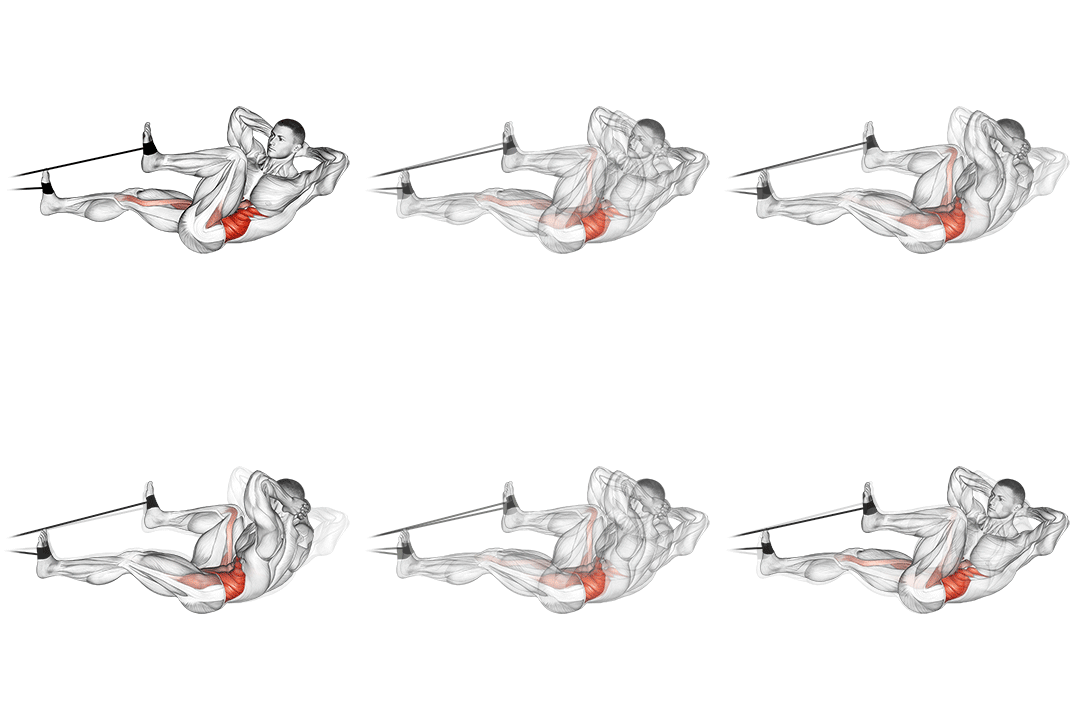
Band Bicycle Crunch demonstration

Band Bicycle Crunch

Target Abs
Equipment Band
Body Part Waist
Difficulty Intermediate
Movement Isolation
Secondary Muscles
Hip Flexors Obliques
VS
Exercise B
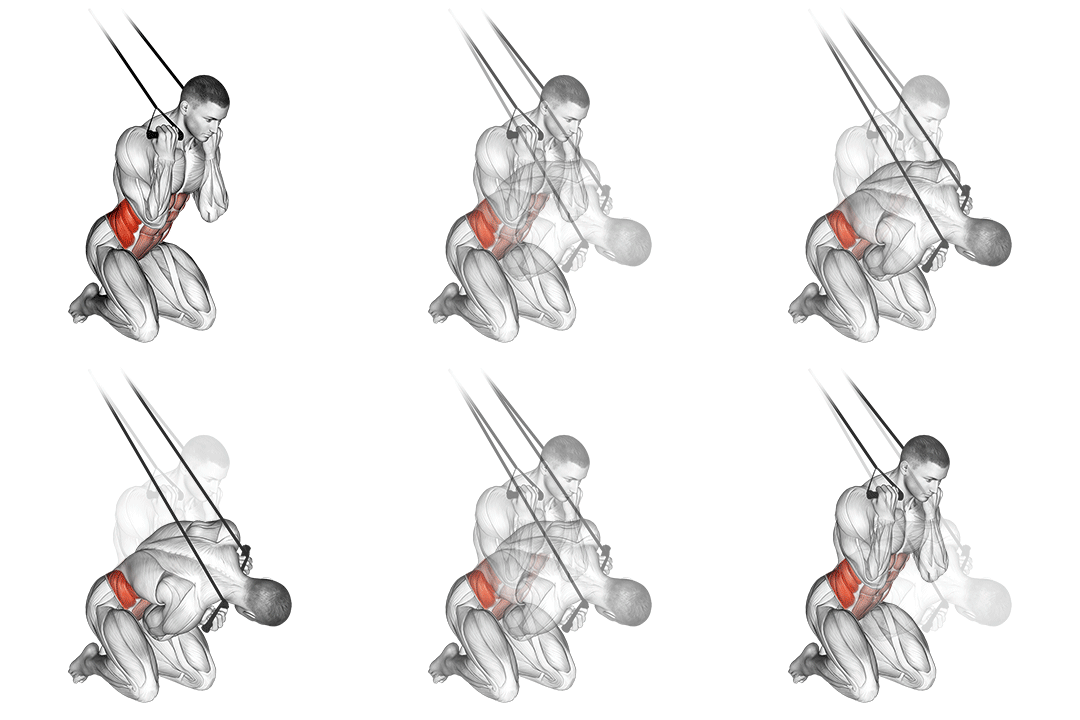
Band Kneeling Twisting Crunch demonstration

Band Kneeling Twisting Crunch

Target Abs
Equipment Band
Body Part Waist
Difficulty Intermediate
Movement Isolation
Secondary Muscles
Obliques

Head-to-Head Comparison

Different values are marked. These are catalogue attributes, not performance scores.

Muscles used

Listed target and secondary muscles, shown on the body. Locations, not activation or strength scores.

  • Target
  • Secondary
  • Not highlighted

Band Bicycle Crunch

Front
Band Bicycle Crunch: front muscle locationsSolid: listed target. Striped: listed secondary. Grey: not highlighted. Locations, not activation or strength scores. See the muscle names below.
Back
Band Bicycle Crunch: back muscle locationsSolid: listed target. Striped: listed secondary. Grey: not highlighted. Locations, not activation or strength scores. See the muscle names below.
Target
Abs
Secondary
Hip Flexors, Obliques

Not shown on diagram: Hip Flexors. These labels do not identify a precise region on this map.

Band Kneeling Twisting Crunch

Front
Band Kneeling Twisting Crunch: front muscle locationsSolid: listed target. Striped: listed secondary. Grey: not highlighted. Locations, not activation or strength scores. See the muscle names below.
Back
Band Kneeling Twisting Crunch: back muscle locationsSolid: listed target. Striped: listed secondary. Grey: not highlighted. Locations, not activation or strength scores. See the muscle names below.
Target
Abs
Secondary
Obliques

Grey does not mean a muscle is unused. The diagrams show only the mapped catalogue labels.

Attribute Band Bicycle Crunch Band Kneeling Twisting Crunch
Target Muscle
Abs
Abs
Body Part
Waist
Waist
Equipment
Band
Band
Difficulty
Intermediate
Intermediate
Movement Type
Isolation
Isolation
Secondary Muscles Different
Hip Flexors, Obliques
Obliques

Visual Comparison

An illustrative 1–10 profile derived from catalog difficulty, equipment, and listed-muscle fields—not measured performance or muscle activation.

Key Differences

  • Both exercises target the Abs using Band. The catalogue does not establish which exercise is better for an individual goal.

Muscle comparison

Shared target muscles

Both exercises primarily target the rectus abdominis by producing trunk flexion and increasing intra-abdominal pressure. Each move produces concentric shortening of the rectus at the top of the crunch and eccentric control on the return, so peak activation occurs across the same midline muscles. Expect similar rectus activation if band tension and range of motion are matched and you use 8–20 rep sets.

Secondary muscle differences

Band Bicycle Crunch recruits hip flexors (iliopsoas, rectus femoris) more because of alternating active hip flexion and leg drive. In contrast, Band Kneeling Twisting Crunch loads the obliques harder—external and internal obliques—because it emphasizes transverse-plane rotation and anti-rotation torque against the band.

Muscle involvement analysis

During the bicycle crunch the rectus and hip flexors alternate under dynamic length changes: hip flexion approaches ~60–90° repeatedly, increasing work by shortening the hip flexors and placing the rectus at a favorable length-tension for mid-range torque. The kneeling twist generates higher rotational torque (approximately 30–45° of trunk rotation) and longer isometric tension on the obliques through the top range, meaning more sustained oblique activation and less repetitive hip flexor work.

Equipment and setup

Band Bicycle Crunch: setup

Band Bicycle Crunch: a medium loop or long band and a flat surface. You can loop the band around your feet or anchor behind your head; no fixed wall anchor is required if you use a loop band around the feet. Optional mat for comfort.

Band Kneeling Twisting Crunch: setup

Band Kneeling Twisting Crunch: a medium to heavy band and a secure anchor at chest/shoulder height (door anchor or pole). A knee pad and a single-handle setup or band loop are useful to keep the line of pull aligned with the torso.

Access and practicality

Band Kneeling Twisting Crunch wins for setup simplicity and consistency of resistance because an anchored band creates a stable force vector and easier coaching cues. It’s slightly simpler to teach and scale quickly with band tension and angle adjustments.

Learning and progression

Learning the movements

Band Kneeling Twisting Crunch is easier to learn: you start from a stable kneeling base and perform a single-plane rotation with clear end-range cues. Band Bicycle Crunch adds coordination of alternating leg drives, which raises the motor-skill demand.

Progression considerations

Band Bicycle Crunch offers more progression options via tempo (3–4 second eccentrics), single-leg holds, and higher-rep metabolic sets (12–20+). You can also vary band placement to change resistance curves. Kneeling twists progress primarily by increasing band tension or adding holds at end range.

Limitations and precautions

Band Bicycle Crunch carries a higher hip-flexor overload and lumbar flexion risk if you let the lower back round repeatedly under tension—monitor fatigue and keep neutral pelvis. Kneeling Twisting Crunch poses greater rotational shear risk if you rotate through the lumbar spine without bracing; control rotation to ~30–45° and brace the core to protect the spine.

Pros & Cons

Band Bicycle Crunch

+ Pros

  • Dynamic rectus activation plus hip-flexor engagement for total anterior chain work
  • No fixed anchor required if using a loop band around feet
  • Multiple progression options: tempo, single-leg, higher reps (12–20+)
  • Good for metabolic core circuits and unilateral coordination

− Cons

  • Higher demand on hip flexors, which may fatigue before abs
  • Greater coordination required — steeper learning curve
  • Risk of repetitive lumbar flexion if hips drop or pelvis isn’t braced

Band Kneeling Twisting Crunch

+ Pros

  • Stronger oblique emphasis via sustained rotational torque
  • Stable setup with anchored band gives a predictable force vector
  • Easier to coach and scale load quickly by changing band tension
  • Lower demand on hip flexors, so abs and obliques can be targeted more directly

− Cons

  • Requires a secure anchor or door attachment
  • Rotation can stress lumbar segments if not braced properly
  • Less dynamic hip involvement — fewer options for unilateral leg work

When Each Exercise Wins

1
For muscle hypertrophy: Band Bicycle Crunch

The alternating leg drive and continuous concentric-eccentric cycles increase time under tension for the rectus abdominis and hip flexors. Use 8–20 rep ranges, 3–4 second eccentrics, or controlled pauses to maximize hypertrophy.

2
For strength gains: Band Kneeling Twisting Crunch

An anchored band lets you apply higher peak tension and train oblique strength against a consistent rotational force vector. Heavy-band sets of 6–12 controlled reps build torque capacity and anti-rotation strength.

3
For beginners: Band Kneeling Twisting Crunch

The kneeling position reduces coordination demands and provides a stable base to learn core bracing, making it easier to cue neutral pelvis and controlled rotation before adding complexity.

4
For home workouts: Band Bicycle Crunch

A loop band plus floor space is often all you need—no door anchor required—so you can perform effective ab-focused sessions anywhere with minimal gear.

Frequently Asked Questions

Can I do both Band Bicycle Crunch and Band Kneeling Twisting Crunch in the same workout?

Yes. Pair them by doing 2–3 sets of one for 8–15 reps and the other for 10–20 reps. Sequence them so the exercise you want to emphasize receives fresh effort (e.g., kneeling twists first for oblique strength, then bicycles for hypertrophy/metabolic work).

Which exercise is better for beginners?

Band Kneeling Twisting Crunch is better for beginners because the stable kneeling base reduces coordination demands and makes it easier to learn bracing and rotation control before progressing to dynamic leg-driven crunches.

How do the muscle activation patterns differ?

Bicycle crunches produce alternating hip flexion and concentric rectus work, so hip flexors and rectus see cyclic length changes. Kneeling twisting crunches generate sustained oblique tension from transverse-plane rotation and an isometric component in the rectus, increasing oblique recruitment.

Can Band Kneeling Twisting Crunch replace Band Bicycle Crunch?

It can replace it if your goal is oblique strength or limited equipment allows only an anchor. However, for rectus hypertrophy and unilateral leg coordination you’ll lose the hip-flexor-driven stimulus that the bicycle provides, so rotating both into your program is usually best.

Comparison Summary

Use Band Bicycle Crunch when your priority is rectus-focused hypertrophy, unilateral coordination, and metabolic core work. It gives you more tempo and leg-driven progression options but requires strict pelvic control to protect the lumbar spine. Choose 8–20 reps with 2–4 second eccentrics and single-leg variations as you progress. Use Band Kneeling Twisting Crunch when you need targeted oblique strength, higher peak tension, and an easier learning curve. Anchor the band at chest height, rotate 30–45°, and brace the ribcage to avoid lumbar shear. Both exercises complement each other: pair them in a program to cover rectus shortening and transverse-plane torque.

Exercise instructions

Steps from the exercise catalogue. Read the full sequence before starting.

Band Bicycle Crunch

  1. Lie flat on your back with your hands behind your head and your knees bent.
  2. Lift your feet off the ground and bring your right knee towards your chest while simultaneously twisting your torso to bring your left elbow towards your right knee.
  3. Straighten your right leg while bringing your left knee towards your chest and twisting your torso to bring your right elbow towards your left knee.
Read remaining steps for Band Bicycle Crunch
  1. Continue alternating the twisting motion, as if you are pedaling a bicycle, while keeping your core engaged throughout the movement.
  2. Repeat for the desired number of repetitions.

Band Kneeling Twisting Crunch

  1. Attach the band to a sturdy anchor point at waist height.
  2. Kneel down facing away from the anchor point and hold the band with both hands, keeping your elbows bent and close to your sides.
  3. Engage your abs and slowly twist your torso to one side, bringing your hands towards your opposite hip.
Read remaining steps for Band Kneeling Twisting Crunch
  1. Pause for a moment, then slowly return to the starting position.
  2. Repeat on the other side.
  3. Continue alternating sides for the desired number of repetitions.

Also Compare

Compare another pair

Choose two exercises to see their differences side by side.

Compare Exercises