
Band Assisted Wheel Rollerout vs Band Bicycle Crunch

Compare target muscles, equipment, difficulty, movement type, and secondary muscles for Band Assisted Wheel Rollerout and Band Bicycle Crunch.

Change comparison Share

Get comparison link

Select the link and use your device's Copy command.

Comparison overview

AI-generated
Band Assisted Wheel Rollerout vs Band Bicycle Crunch — if you want a targeted core session, you need to know which exercise fits your goal. This comparison walks you through how each movement loads the rectus abdominis and surrounding stabilizers, the secondary muscles involved, the equipment and setup, and clear progression and safety cues. You'll get biomechanics-based technique tips, rep and set ranges, and scenario-based recommendations so you can choose the exercise that best supports your strength, hypertrophy, or home training goals.

Exercise Comparison

Exercise A
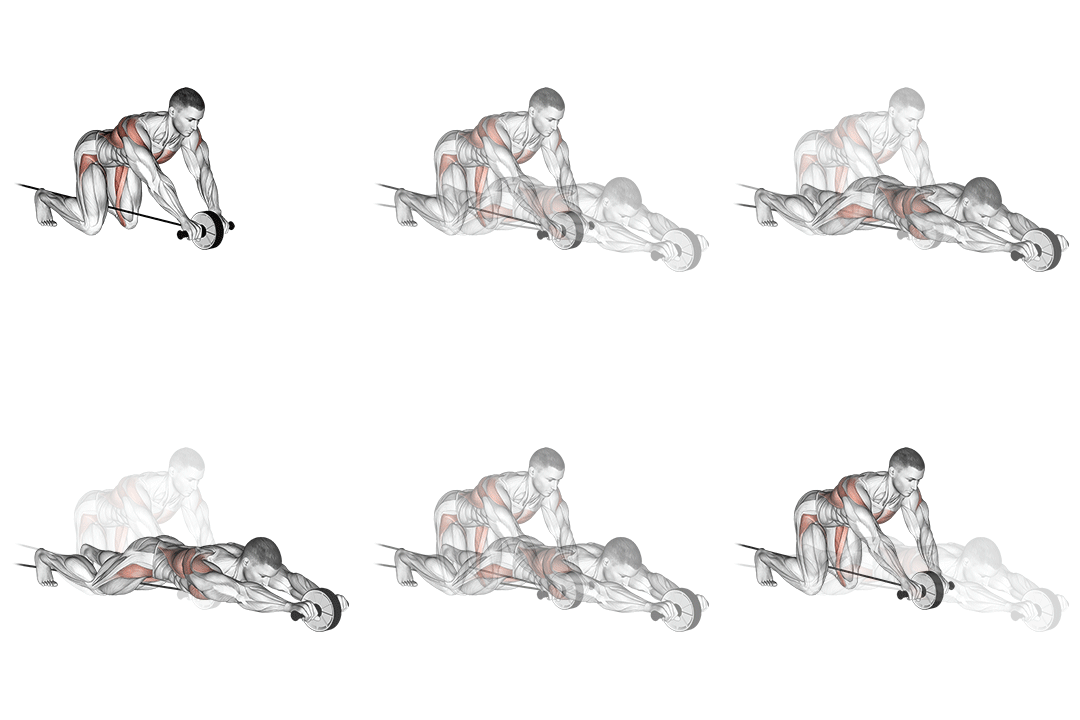
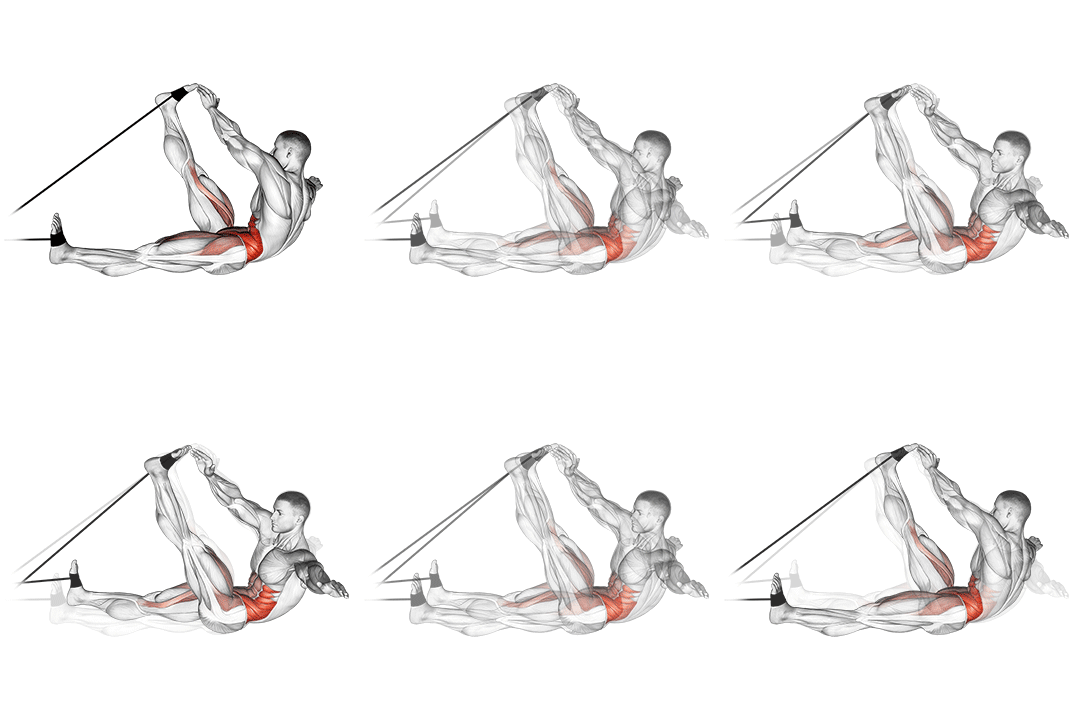
Band Assisted Wheel Rollerout demonstration

Band Assisted Wheel Rollerout

Target Abs
Equipment Band
Body Part Waist
Difficulty Intermediate
Movement Isolation
Secondary Muscles
Lower Back
VS
Exercise B
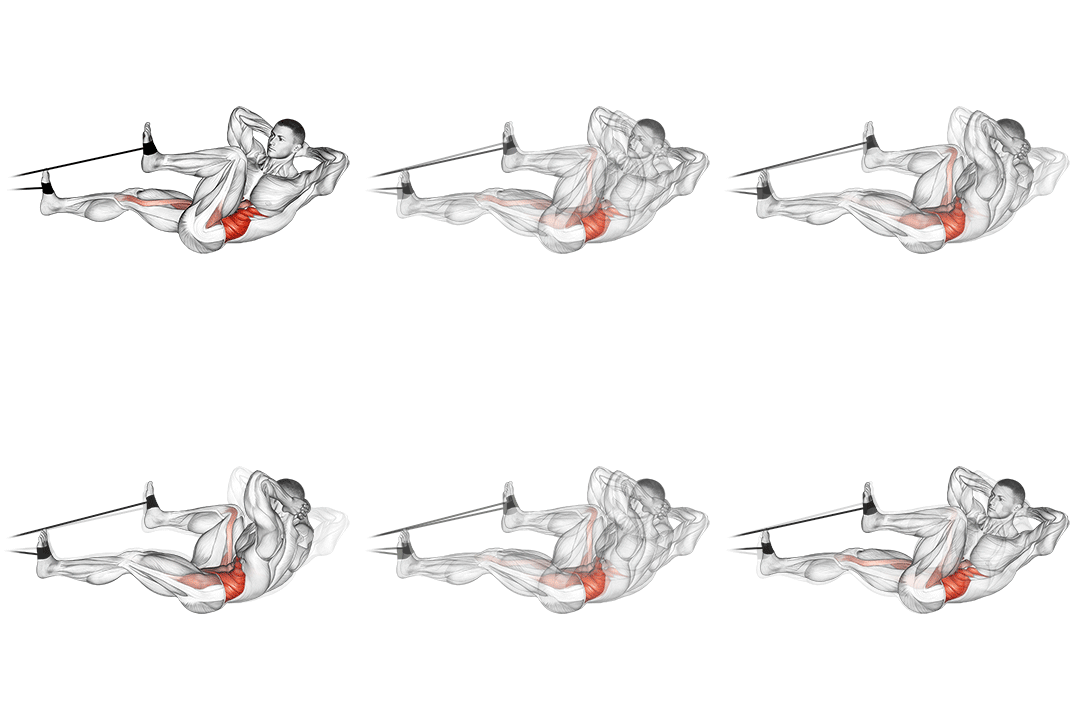
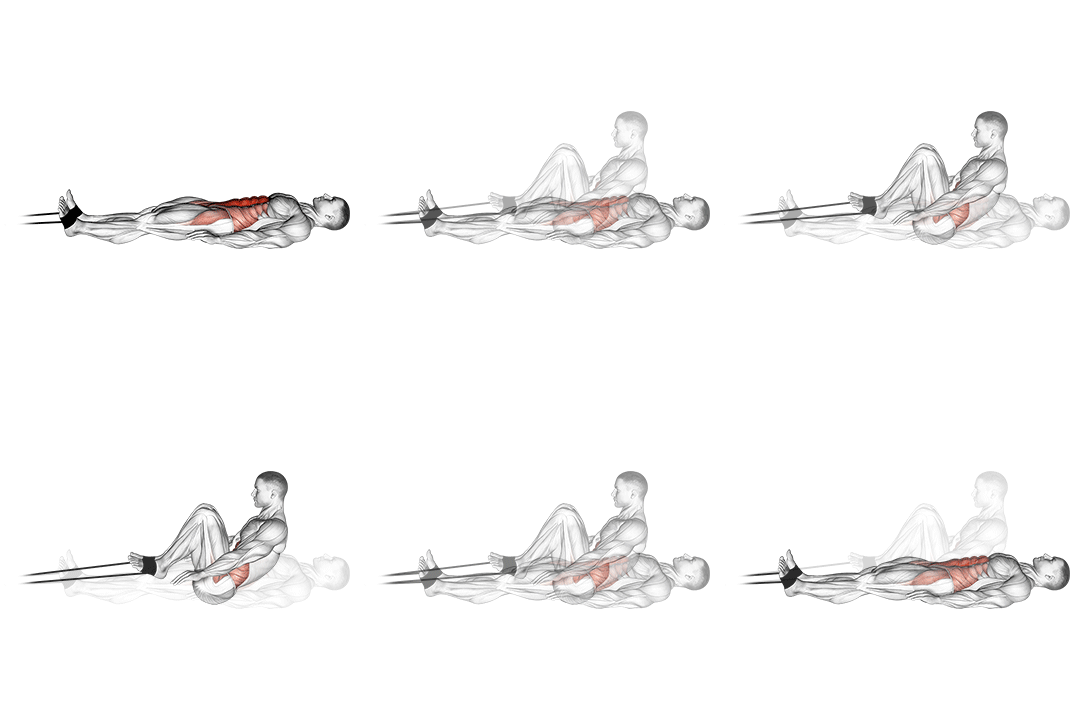
Band Bicycle Crunch demonstration

Band Bicycle Crunch

Target Abs
Equipment Band
Body Part Waist
Difficulty Intermediate
Movement Isolation
Secondary Muscles
Hip Flexors Obliques

Head-to-Head Comparison

Different values are marked. These are catalogue attributes, not performance scores.

Muscles used

Listed target and secondary muscles, shown on the body. Locations, not activation or strength scores.

  • Target
  • Secondary
  • Not highlighted

Band Assisted Wheel Rollerout

Front
Band Assisted Wheel Rollerout: front muscle locationsSolid: listed target. Striped: listed secondary. Grey: not highlighted. Locations, not activation or strength scores. See the muscle names below.
Back
Band Assisted Wheel Rollerout: back muscle locationsSolid: listed target. Striped: listed secondary. Grey: not highlighted. Locations, not activation or strength scores. See the muscle names below.
Target
Abs
Secondary
Lower Back

Band Bicycle Crunch

Front
Band Bicycle Crunch: front muscle locationsSolid: listed target. Striped: listed secondary. Grey: not highlighted. Locations, not activation or strength scores. See the muscle names below.
Back
Band Bicycle Crunch: back muscle locationsSolid: listed target. Striped: listed secondary. Grey: not highlighted. Locations, not activation or strength scores. See the muscle names below.
Target
Abs
Secondary
Hip Flexors, Obliques

Not shown on diagram: Hip Flexors. These labels do not identify a precise region on this map.

Grey does not mean a muscle is unused. The diagrams show only the mapped catalogue labels.

Attribute Band Assisted Wheel Rollerout Band Bicycle Crunch
Target Muscle
Abs
Abs
Body Part
Waist
Waist
Equipment
Band
Band
Difficulty
Intermediate
Intermediate
Movement Type
Isolation
Isolation
Secondary Muscles Different
Lower Back
Hip Flexors, Obliques

Visual Comparison

An illustrative 1–10 profile derived from catalog difficulty, equipment, and listed-muscle fields—not measured performance or muscle activation.

Key Differences

  • Both exercises target the Abs using Band. The catalogue does not establish which exercise is better for an individual goal.

Muscle comparison

Shared target muscles

Both exercises target the rectus abdominis as the primary mover, emphasizing anti-extension and spinal flexion. The Band Assisted Wheel Rollerout places the rectus under long-axis tension through an extended range of motion—lengthening the abdominals near the end range and then demanding powerful concentric return. The Band Bicycle Crunch emphasizes repeated spinal flexion with rotation, producing shorter-range, higher-frequency contractions. Expect the rollerout to produce fewer reps with higher continuous tension per rep, while the bicycle crunch gives more reps and repeated concentric-flexion cycles.

Secondary muscle differences

Band Assisted Wheel Rollerout recruits the lower back (erector spinae) as an anti-flexion stabilizer and the lats/traps for scapular control, particularly during long holds or long rolls. Band Bicycle Crunch brings in hip flexors (iliopsoas) and obliques through alternating rotation and hip drive; the rectus and external obliques work synergistically to create rotational torque. In short: rollerout stresses anti-extension posterior chain stabilizers, bicycle crunch stresses hip flexors and rotational obliques.

Muscle involvement analysis

Rollerout activation follows a length-tension pattern: abdominals lengthen as you roll out (increasing passive tension) then generate high eccentric control before a concentric return; peak demand occurs near 70–90% of the roll distance. Bicycle crunch activation is phasic and alternating—shorter excursions with repeated concentric-dominant contractions and brief relaxation periods. Biomechanically, rollerout loads anti-extension torque across the midline; bicycle crunch produces rotational shear and repeated flexion–rotation cycles, increasing oblique EMG bursts per rep.

Equipment and setup

Band Assisted Wheel Rollerout: setup

Band Assisted Wheel Rollerout requires a sturdy resistance band anchored behind you or looped around a roller/wheel and a roller or ab wheel alternative (you can use a low-profile wheel or sliders). You also need a flat surface and enough clearance to roll out ~60–120 cm depending on height.

Band Bicycle Crunch: setup

Band Bicycle Crunch needs only a resistance band anchored behind the head or looped across the feet and a mat. No rolling device is necessary; you can perform it lying on the floor with a short band or long band depending on desired tension.

Access and practicality

Band Bicycle Crunch is more accessible because it needs only a band and mat, requires less setup space, and has fewer balance/skill prerequisites. Rollerout needs a wheel or equivalent and careful anchoring for safe progression.

Learning and progression

Learning the movements

Band Bicycle Crunch is easier to learn: the movement is supine, single-joint dominant, and you can scale tension easily by shortening the band or reducing range. Band Assisted Wheel Rollerout has a steeper learning curve because it demands anti-extension control, scapular stability, and coordinated hip and shoulder positioning.

Progression considerations

Band Assisted Wheel Rollerout offers larger progression steps: increase roll distance, remove band assistance, add tempo eccentrics, or increase band tension—suitable for progressive overload and measurable strength progress. Band Bicycle Crunch progresses via band tension, tempo, reps (15–30 per side), or pausing at peak contraction, but its overload ceiling for pure anti-extension strength is lower.

Limitations and precautions

Rollerout carries higher lumbar risk if you lack bracing or roll too far—excessive anterior pelvic tilt can produce dangerous shear on L4–L5. Bicycle crunch presents lower acute risk to the spine but can irritate hip flexors or neck if performed with poor cervical alignment. Overall, rollerout has a higher injury risk profile for inexperienced trainees.

Pros & Cons

Band Assisted Wheel Rollerout

+ Pros

  • High continuous tension on rectus abdominis for strength and hypertrophy
  • Direct anti-extension training transfers to heavy lifts (deadlift/squat stabilization)
  • Clear progression ladder: band assistance to full rollerout, tempo control, increased range
  • Engages posterior chain stabilizers (lower back, lats) improving core stiffness

− Cons

  • Higher technical demand and learning curve
  • Greater lumbar stress if performed with poor bracing
  • Requires a wheel or reliable anchor setup

Band Bicycle Crunch

+ Pros

  • Minimal equipment and easy setup for home workouts
  • Strong oblique and hip flexor engagement for torso rotation and athletic carryover
  • Lower immediate spinal shear risk when performed correctly
  • Easily performed for higher rep ranges (12–30 per side) for metabolic work

− Cons

  • Less anti-extension overload—limits maximal core strength development
  • Hip flexor domination can reduce abdominal targetting if form slips
  • Coordination demands may challenge some beginners

When Each Exercise Wins

1
For muscle hypertrophy: Band Assisted Wheel Rollerout

Rollerouts provide sustained tension across a long range of motion, creating eccentrically biased loading that stimulates abdominal hypertrophy. Use 6–12 controlled reps, 3–4 sets, with 2–3 second eccentrics and a band for assistance if needed.

2
For strength gains: Band Assisted Wheel Rollerout

The rollerout trains anti-extension strength under load and improves neural drive for core bracing, transferring directly to heavy compound lifts. Progress by reducing band assistance and increasing roll distance, aiming for 3–6 hard sets of 4–8 reps as you advance.

3
For beginners: Band Bicycle Crunch

Bicycle crunches are easier to modulate and teach: supine position, smaller ranges, and simple cueing (rib cage down, chin neutral) reduce lumbar stress. Start with 12–20 slow reps per side and light band tension to build coordination and endurance.

4
For home workouts: Band Bicycle Crunch

Bicycle crunches need only a band and mat and can be done in small spaces with minimal setup time. They allow quick volume work (3 sets of 20–30 reps) for core conditioning without specialized gear.

Frequently Asked Questions

Can I do both Band Assisted Wheel Rollerout and Band Bicycle Crunch in the same workout?

Yes. Pair them in a single session by placing rollerouts earlier when you are freshest for strength (3–6 reps) and bicycle crunches later for volume or oblique focus (12–20 reps per side). Balance total volume to avoid cumulative lumbar fatigue.

Which exercise is better for beginners?

Band Bicycle Crunch is better for most beginners because it’s supine, easier to scale, and has lower immediate lumbar load. Teach bracing, neutral neck position, and light band tension before progressing to standing or anti-extension drills.

How do the muscle activation patterns differ?

Rollerouts create sustained, lengthened loading with large eccentric control, recruiting rectus abdominis and posterior stabilizers for anti-extension. Bicycle crunches produce repetitive concentric flexion and rotation bursts, increasing oblique and hip flexor activation per rep.

Can Band Bicycle Crunch replace Band Assisted Wheel Rollerout?

Not fully. Bicycle crunches can replace rollerouts for conditioning and oblique work, but they don’t provide the same anti-extension overload or direct transfer to maximal core stiffness needed for heavy lifts. Use bicycle crunches when equipment, skill, or recovery demands limit rollerout use.

Comparison Summary

Use the Band Assisted Wheel Rollerout when your goal is to build core strength and targeted abdominal hypertrophy through high continuous tension and anti-extension training. It’s ideal for trainees who have solid bracing and posterior chain stability; program it with low–moderate reps, controlled eccentrics, and progressive reduction of band assistance. Choose the Band Bicycle Crunch when you need accessible core work, oblique and hip flexor conditioning, or a safer option for beginners and limited-space sessions. For general programming, rotate both: prioritize rollerouts for strength phases (3–6 weeks) and bicycle crunches for higher-volume conditioning and recovery sessions.

Exercise instructions

Steps from the exercise catalogue. Read the full sequence before starting.

Band Assisted Wheel Rollerout

  1. Kneel on the floor and hold the handles of the band with both hands, palms facing down.
  2. Place the band on the ground in front of you and position your hands shoulder-width apart.
  3. Engage your core and slowly roll the wheel forward, extending your body as far as you can while maintaining control.
Read remaining steps for Band Assisted Wheel Rollerout
  1. Pause for a moment at the furthest point, then slowly roll the wheel back towards your knees to return to the starting position.
  2. Repeat for the desired number of repetitions.

Band Bicycle Crunch

  1. Lie flat on your back with your hands behind your head and your knees bent.
  2. Lift your feet off the ground and bring your right knee towards your chest while simultaneously twisting your torso to bring your left elbow towards your right knee.
  3. Straighten your right leg while bringing your left knee towards your chest and twisting your torso to bring your right elbow towards your left knee.
Read remaining steps for Band Bicycle Crunch
  1. Continue alternating the twisting motion, as if you are pedaling a bicycle, while keeping your core engaged throughout the movement.
  2. Repeat for the desired number of repetitions.

Also Compare

Compare another pair

Choose two exercises to see their differences side by side.

Compare Exercises