
Deadlift With Bands vs Deadlift With Chains

Compare target muscles, equipment, difficulty, movement type, and secondary muscles for Deadlift With Bands and Deadlift With Chains.

Change comparison Share

Get comparison link

Select the link and use your device's Copy command.

Comparison overview

AI-generated
Deadlift With Bands vs Deadlift With Chains — you want a clear pick for back strength and posterior-chain development. I’ll break down how each method changes load curves, which muscles get extra work, setup and equipment needs, and practical cues so you can use them safely. You’ll get rep ranges for strength and hypertrophy, notes on progression, and decisive recommendations based on whether your priority is pure strength, muscle growth, or convenience. Read on and you’ll know exactly when to clip on bands and when to drape chains over the bar.

Exercise Comparison

Exercise A
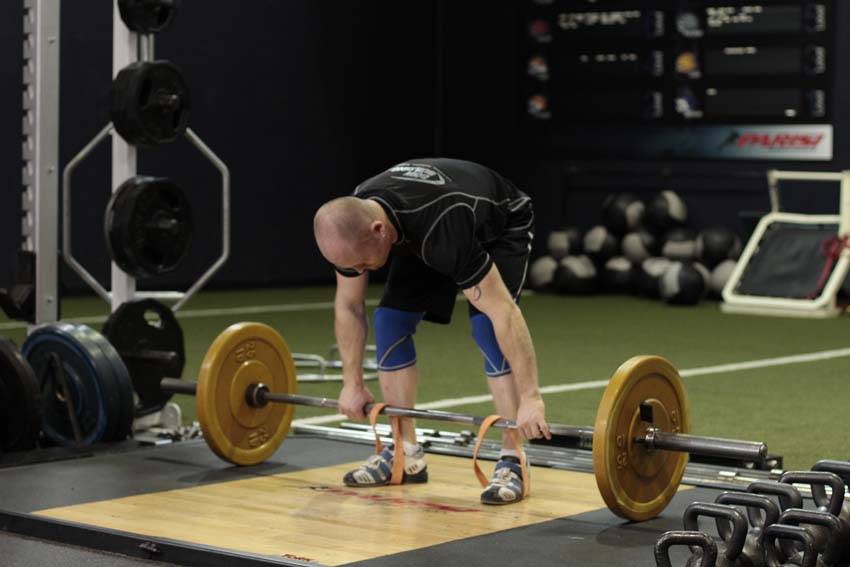
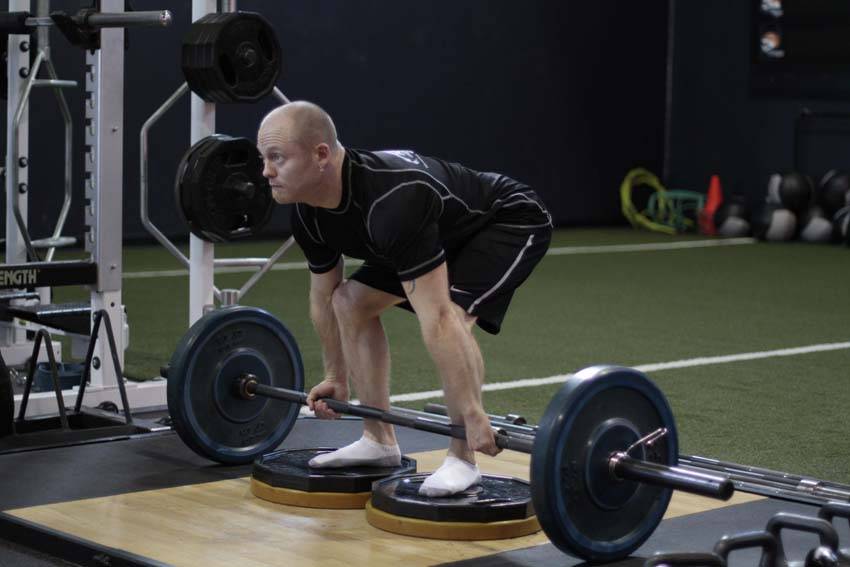
Deadlift With Bands demonstration

Deadlift With Bands

Target Erector-spinae
Equipment Barbell
Body Part Back
Difficulty Advanced
Movement Compound
Secondary Muscles
Forearms Glutes Hamstrings Middle Back Quadriceps Traps
VS
Exercise B
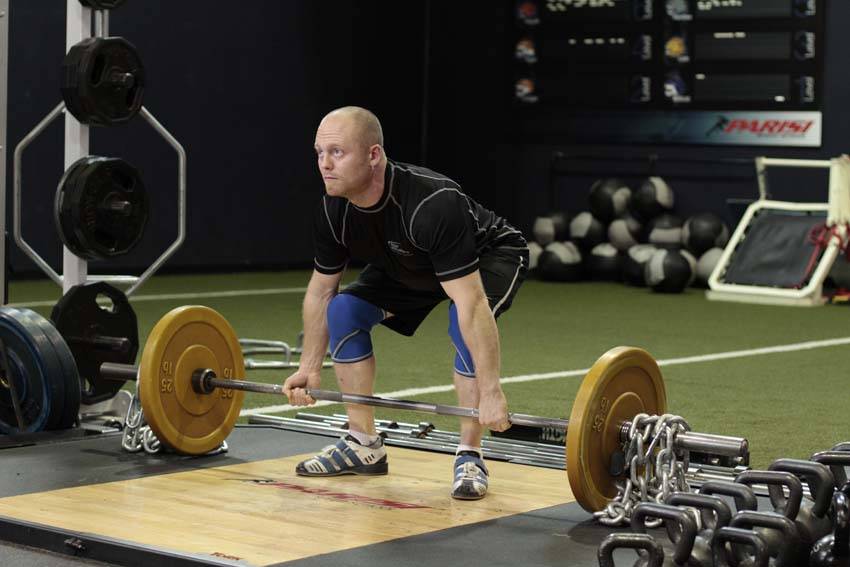
Deadlift With Chains demonstration

Deadlift With Chains

Target Erector-spinae
Equipment Barbell
Body Part Back
Difficulty Advanced
Movement Compound
Secondary Muscles
Forearms Glutes Hamstrings Middle Back Quadriceps Traps

Head-to-Head Comparison

Different values are marked. These are catalogue attributes, not performance scores.

Muscles used

Listed target and secondary muscles, shown on the body. Locations, not activation or strength scores.

  • Target
  • Secondary
  • Not highlighted

Deadlift With Bands

Front
Deadlift With Bands: front muscle locationsSolid: listed target. Striped: listed secondary. Grey: not highlighted. Locations, not activation or strength scores. See the muscle names below.
Back
Deadlift With Bands: back muscle locationsSolid: listed target. Striped: listed secondary. Grey: not highlighted. Locations, not activation or strength scores. See the muscle names below.
Target
Erector-spinae
Secondary
Forearms, Glutes, Hamstrings, Middle Back, Quadriceps, Traps

Not shown on diagram: Erector-spinae, Middle Back. These labels do not identify a precise region on this map.

Deadlift With Chains

Front
Deadlift With Chains: front muscle locationsSolid: listed target. Striped: listed secondary. Grey: not highlighted. Locations, not activation or strength scores. See the muscle names below.
Back
Deadlift With Chains: back muscle locationsSolid: listed target. Striped: listed secondary. Grey: not highlighted. Locations, not activation or strength scores. See the muscle names below.
Target
Erector-spinae
Secondary
Forearms, Glutes, Hamstrings, Middle Back, Quadriceps, Traps

Not shown on diagram: Erector-spinae, Middle Back. These labels do not identify a precise region on this map.

Grey does not mean a muscle is unused. The diagrams show only the mapped catalogue labels.

Attribute Deadlift With Bands Deadlift With Chains
Target Muscle
Erector-spinae
Erector-spinae
Body Part
Back
Back
Equipment
Barbell
Barbell
Difficulty
Advanced
Advanced
Movement Type
Compound
Compound
Secondary Muscles
Forearms, Glutes, Hamstrings, Middle Back, Quadriceps, Traps

Visual Comparison

An illustrative 1–10 profile derived from catalog difficulty, equipment, and listed-muscle fields—not measured performance or muscle activation.

Key Differences

  • Both exercises target the Erector-spinae using Barbell. The catalogue does not establish which exercise is better for an individual goal.

Muscle comparison

Shared target muscles

Both variations target the erector spinae as the prime mover for spinal extension throughout the lift. Because both add accommodating resistance, they keep external load higher through the lockout where the erectors normally operate at shorter muscle lengths. Overall peak erector-spinae activation is similar when top-end load increases by 10–30%, but bands produce an exponential increase while chains add load more linearly.

Secondary muscle differences

Forearms and traps see similar isometric demand under both. Bands introduce more horizontal vector forces and elastic recoil, so stabilizers in the middle back and scapular retractors work harder to control bar path. Chains maintain a purer vertical force vector, slightly increasing quadriceps and glute drive in heavier top-range positions without extra lateral instability.

Muscle involvement analysis

As you lift from the floor the external moment arm shortens; variable resistance compensates by raising load at the top. Bands escalate load exponentially—tension often rises 10–30% at full extension—so erectors and glutes stay under tension as the muscle length shortens. Chains add roughly 10–25% more load at lockout in a near-linear fashion, producing a steadier torque curve and smoother concentric overload across the last 10–20% of range.

Equipment and setup

Deadlift With Bands: setup

Deadlift With Bands requires a barbell, matched resistance bands (mini to heavy), secure anchor points or band pegs on a rack, and band collars or handles. You’ll also want band thickness options so you can tune the top-end tension by ~5–10 lb increments per band.

Deadlift With Chains: setup

Deadlift With Chains needs a barbell and matched chains with collars or chain hooks. Chains are heavier and less compact; typical chain setups add 10–50 lb total depending on link mass. A power rack or spotter is useful for safe loading/unloading of heavy chain links.

Access and practicality

Deadlift With Bands — bands are cheaper, travel-friendly, and let you fine-tune top-end resistance with smaller increments. Chains are durable but costlier and less practical for home setups.

Learning and progression

Learning the movements

Deadlift With Chains is easier to learn because the load increases more predictably and the vertical force vector stays consistent. Bands add elastic recoil and horizontal pull that require better bracing and bar-path control, increasing the skill demand.

Progression considerations

Both offer high progression potential. Bands allow micro-loading by swapping band thickness and stacking bands (useful for 5–15% top-end changes). Chains permit incremental chain-link weight changes and combine well with heavy singles and triples for strength progression in the 1–5 rep range.

Limitations and precautions

Bands carry a slightly higher technical injury risk if form breaks under elastic recoil—excessive lumbar flexion or forward bar drift can increase shear forces. Chains have lower instability risk but still expose you to heavy eccentric and concentric loads; improper setup or sudden loading remains hazardous.

Pros & Cons

Deadlift With Bands

+ Pros

  • Exponential top-end tension boosts lockout strength and glute/erector engagement
  • Portable and low-cost; easy to change band tension on the fly
  • Greater eccentric stretch-shortening stimulus via elastic recoil
  • Fine micro-loading by adding or swapping bands

− Cons

  • Adds horizontal force and instability that demands superior technique
  • Anchor setup can alter pull angle and effectiveness
  • Tension quantification is less precise than fixed weights

Deadlift With Chains

+ Pros

  • Linear, predictable rise in load with minimal horizontal pull
  • Cleaner vertical force vector helps maintain bar path and technique
  • Durable and straightforward to quantify added weight
  • Good for heavy singles and low-rep maximal strength work

− Cons

  • Less portable and more expensive than bands
  • Top-end added weight increments can be large (harder to micro-load)
  • Requires space and often a lift-off or spotter for safe chaining

When Each Exercise Wins

1
For muscle hypertrophy: Deadlift With Bands

Bands maintain higher tension through the lockout and create an extended time-under-tension via elastic recoil, which increases loading at shortened muscle lengths favorable for hypertrophy in the erectors, glutes, and hamstrings. Use 6–12 reps and moderate tempo (2–3s eccentric).

2
For strength gains: Deadlift With Chains

Chains provide a steadier, more predictable increase in top-end load that lets you focus on maximal force production in heavy singles and doubles (1–5 reps). The linear load curve helps transfer more directly to competition-style flat-bar deadlifts.

3
For beginners: Deadlift With Chains

Chains produce less lateral instability and a clearer vertical load progression, making it easier to learn bar path and hip-hinge mechanics before adding elastic complexity. Start with light chains and master form in the 5–8 rep range.

4
For home workouts: Deadlift With Bands

Bands are compact, inexpensive, and easy to rig in small spaces. They let you simulate accommodating resistance without hauling heavy chain links or specialized hardware.

Frequently Asked Questions

Can I do both Deadlift With Bands and Deadlift With Chains in the same workout?

Yes — pair them smartly: use chains for heavy singles or doubles early in the session, then follow with banded sets for volume and lockout overload. Limit total heavy work to avoid CNS fatigue; a sample session is 3 heavy chain singles then 3–4 banded sets of 6–8 reps.

Which exercise is better for beginners?

Chains are generally better for beginners because they keep the force vector vertical and create a predictable ramp in load. Start with light chains, focus on hip hinge and neutral spine, and stay in the 5–8 rep range until technique is consistent.

How do the muscle activation patterns differ?

Both increase erector-spinae activation at the lockout, but bands produce an exponential tension curve that raises activity at shortened muscle lengths and stresses stabilizers more. Chains add load more linearly, so activation increases steadily through the final 10–20% of range without added lateral forces.

Can Deadlift With Chains replace Deadlift With Bands?

Yes for some goals: chains can replace bands when you want predictable, heavy top-end loading for maximal strength. They’re less effective if you need compact equipment or want elastic recoil for hypertrophy, so pick the tool that matches your training block.

Comparison Summary

Use Deadlift With Bands when your goal is increased lockout tension, hypertrophy, and training variety—bands excel for higher-rep work (6–12) and for teaching force production through shortened ranges. Choose Deadlift With Chains when you prioritize raw strength transfer and want a predictable, linear load ramp for heavy singles and low-rep sets (1–5). For athletes learning technique or those who need precise load quantification, chains are the safer bet. If you train at home or travel a lot, bands give you approachable variable resistance. In practice, rotate both across mesocycles: bands for top-end hypertrophy blocks and chains for max-strength blocks.

Exercise instructions

Steps from the exercise catalogue. Read the full sequence before starting.

Deadlift With Bands

  1. To deadlift with short bands, simply loop them over the bar before you start, and step into them to set up. For long bands, they will need to be anchored to a secure base, such as heavy dumbbells or a rack.
  2. With your feet, and your grip set, take a big breath and then lower your hips and bend the knees until your shins contact the bar. Look forward with your head, keep your chest up and your back arched, and begin driving through the heels to move the weight upward. After the bar passes the knees, aggressively pull the bar back, pulling your shoulder blades together as you drive your hips forward into the bar.
  3. Lower the bar by bending at the hips and guiding it to the floor.

Deadlift With Chains

  1. You can attach the chains to the sleeves of the bar, or just drape the middle over the bar so there is a greater weight increase as you lift.
  2. Approach the bar so that it is centered over your feet. You feet should be about hip width apart. Bend at the hip to grip the bar at shoulder width, allowing your shoulder blades to protract. Typically, you would use an overhand grip or an over/under grip on heavier sets. With your feet, and your grip set, take a big breath and then lower your hips and bend the knees until your shins contact the bar.
  3. Look forward with your head, keep your chest up and your back arched, and begin driving through the heels to move the weight upward. After the bar passes the knees, aggressively pull the bar back, pulling your shoulder blades together as you drive your hips forward into the bar.
Read remaining steps for Deadlift With Chains
  1. Lower the bar by bending at the hips and guiding it to the floor.

Also Compare

Compare another pair

Choose two exercises to see their differences side by side.

Compare Exercises