
Deadlift With Bands vs Deficit Deadlift

Compare target muscles, equipment, difficulty, movement type, and secondary muscles for Deadlift With Bands and Deficit Deadlift.

Change comparison Share

Get comparison link

Select the link and use your device's Copy command.

Comparison overview

AI-generated
Deadlift With Bands vs Deficit Deadlift — choose the right deadlift variation for your back and posterior chain work. You’ll learn how each variation stresses the erector spinae, how secondary muscles like glutes, hamstrings and quads respond, what equipment you need, and which fits your goals for strength or muscle growth. I’ll give clear technique cues (hip hinge, neutral spine, bar path), concrete rep ranges (1–5 for strength, 6–12 for hypertrophy), and biomechanical notes (length–tension, force curves, range-of-motion differences) so you can pick and program the variation that addresses your weakest link.

Exercise Comparison

Exercise A
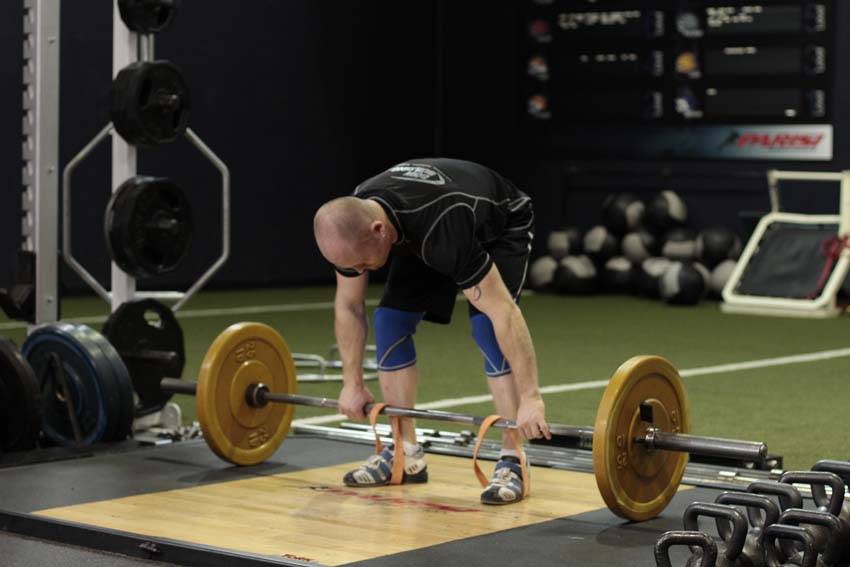
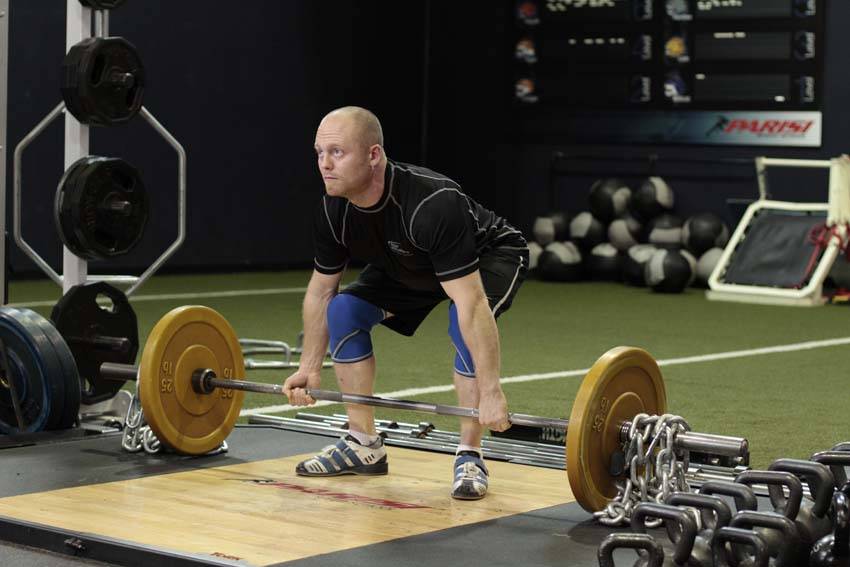
Deadlift With Bands demonstration

Deadlift With Bands

Target Erector-spinae
Equipment Barbell
Body Part Back
Difficulty Advanced
Movement Compound
Secondary Muscles
Forearms Glutes Hamstrings Middle Back Quadriceps Traps
VS
Exercise B
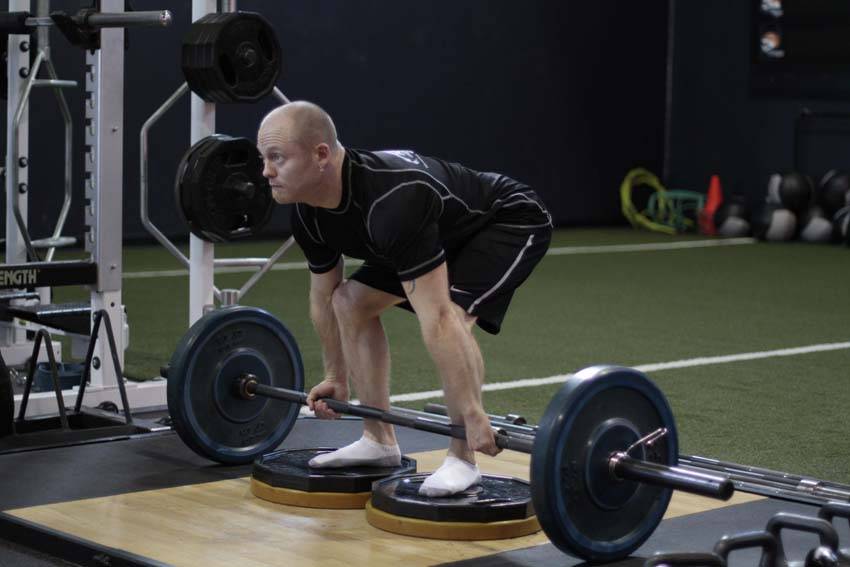
Deficit Deadlift demonstration

Deficit Deadlift

Target Erector-spinae
Equipment Barbell
Body Part Back
Difficulty Advanced
Movement Compound
Secondary Muscles
Forearms Glutes Hamstrings Middle Back Quadriceps Traps

Head-to-Head Comparison

Different values are marked. These are catalogue attributes, not performance scores.

Muscles used

Listed target and secondary muscles, shown on the body. Locations, not activation or strength scores.

  • Target
  • Secondary
  • Not highlighted

Deadlift With Bands

Front
Deadlift With Bands: front muscle locationsSolid: listed target. Striped: listed secondary. Grey: not highlighted. Locations, not activation or strength scores. See the muscle names below.
Back
Deadlift With Bands: back muscle locationsSolid: listed target. Striped: listed secondary. Grey: not highlighted. Locations, not activation or strength scores. See the muscle names below.
Target
Erector-spinae
Secondary
Forearms, Glutes, Hamstrings, Middle Back, Quadriceps, Traps

Not shown on diagram: Erector-spinae, Middle Back. These labels do not identify a precise region on this map.

Deficit Deadlift

Front
Deficit Deadlift: front muscle locationsSolid: listed target. Striped: listed secondary. Grey: not highlighted. Locations, not activation or strength scores. See the muscle names below.
Back
Deficit Deadlift: back muscle locationsSolid: listed target. Striped: listed secondary. Grey: not highlighted. Locations, not activation or strength scores. See the muscle names below.
Target
Erector-spinae
Secondary
Forearms, Glutes, Hamstrings, Middle Back, Quadriceps, Traps

Not shown on diagram: Erector-spinae, Middle Back. These labels do not identify a precise region on this map.

Grey does not mean a muscle is unused. The diagrams show only the mapped catalogue labels.

Attribute Deadlift With Bands Deficit Deadlift
Target Muscle
Erector-spinae
Erector-spinae
Body Part
Back
Back
Equipment
Barbell
Barbell
Difficulty
Advanced
Advanced
Movement Type
Compound
Compound
Secondary Muscles
Forearms, Glutes, Hamstrings, Middle Back, Quadriceps, Traps

Visual Comparison

An illustrative 1–10 profile derived from catalog difficulty, equipment, and listed-muscle fields—not measured performance or muscle activation.

Key Differences

  • Both exercises target the Erector-spinae using Barbell. The catalogue does not establish which exercise is better for an individual goal.

Muscle comparison

Shared target muscles

Both variations load the erector spinae through a heavy hip-hinge pattern, producing high spinal extensor activation during the concentric and isometric phases. Mechanically, both require resisting hip flexion torque and transferring force across the posterior chain, so average EMG-like activation for the erector spinae is similar under comparable relative loads (~70–90% 1RM). The main difference is where peak demands happen in the movement: deficit deadlifts increase demand at the start of the pull, while band-resisted deadlifts increase demand nearer the lockout.

Secondary muscle differences

Deficit deadlifts increase hip and knee range of motion (stand on a 1–4 in / 2.5–10 cm platform), which places hamstrings and glutes at a longer muscle length and raises quad involvement during the initial drive. Deadlifts with bands reduce low-end load and shift more relative tension to the top—this increases demand on traps and middle back to stabilize the bar at lockout and challenges forearms more during top-end tension. Bands also encourage faster bar velocity, recruiting more fast-twitch motor units during the concentric.

Muscle involvement analysis

With a deficit, the force curve is heavier at the bottom: the moment arm at the hip and knee increases (roughly +5–15° of hip flexion depending on platform), producing higher torque early in the pull and greater stretch-mediated tension in hamstrings/glutes. With bands, the force curve ramps up as you approach full extension: variable resistance can add ~10–30% of top-end load, so relative load is lower at the start and peaks at lockout, emphasizing late-range spinal extensor and trap activation.

Equipment and setup

Deadlift With Bands: setup

Deadlift With Bands requires a barbell, quality pull-up-style or loop bands rated for deadlift use, band anchor points (under plates or specialized anchors), and adequate floor space. Bands come in multiple tensions so you can adjust top-end overload by roughly 10–30%.

Deficit Deadlift: setup

Deficit Deadlift requires a barbell and a stable platform (1–4 inches / 2.5–10 cm high), or stacked plates/blocks to stand on. You’ll still need collar-secured plates to maintain a flat, secure foot surface and the same bar setup as a conventional deadlift.

Access and practicality

Deadlift With Bands — bands are portable, inexpensive, and let you get variable resistance without heavy additional plates. If you have a barbell and a few bands you can replicate many training effects at home or in limited space, whereas a proper, safe deficit setup often needs stable blocks or a lifting platform.

Learning and progression

Learning the movements

Deficit Deadlift is marginally easier to coach because it’s a straight increase in range-of-motion and uses consistent linear loading; beginners can focus on a deeper hip hinge and keeping the bar close. Deadlift With Bands adds setup and coordination: you must learn how variable resistance changes the feel of the pull and how to maintain bar path under increasing top tension.

Progression considerations

Deadlift With Bands offers broader progression options for advanced lifters—adjust band tension, combine bands with plates, and use accommodating resistance for speed work and peaking. Deficit Deadlifts progress through load, platform height (1–4 in / 2.5–10 cm), and tempo variations; useful but less flexible for top-end overload.

Limitations and precautions

Deficit Deadlift carries a higher relative injury risk for lifters with limited hip or ankle mobility because the increased ROM intensifies shear and flexion torque at the lumbar spine early in the pull. Bands can lower bottom-end load and reduce shear at the lowest position, but poor setup or chasing excessive top-end resistance can still cause technique breakdown. Overall, deficits present a higher risk for poorly mobile lifters.

Pros & Cons

Deadlift With Bands

+ Pros

  • Provides accommodating resistance that increases top-end overload (approx. +10–30%).
  • Improves lockout strength and bar velocity for 1–5 rep work.
  • Portable and easy to adjust tension without extra plates.
  • Reduces low-end shear compared with a straight heavy pull, useful for speed work.

− Cons

  • Requires correct band setup to avoid uneven loading or snapback.
  • Alters bar feel—can be hard to translate to raw 1RM numbers.
  • Less bottom-end stimulus for hamstrings and glutes compared to deficit pulls.

Deficit Deadlift

+ Pros

  • Increases range-of-motion to emphasize stretch-mediated tension in hamstrings and glutes.
  • Builds strength through the entire pull, especially the initial drive off the floor.
  • Simple setup with a platform and regular plates—no special gear required.
  • Teaches a deeper hip hinge and improved starting posture under load.

− Cons

  • Greater lumbar shear and technique demand, increasing injury risk for mobility-limited lifters.
  • Harder to overload the lockout specifically without adding chains or bands.
  • Platform height changes can complicate consistent technique and programming.

When Each Exercise Wins

1
For muscle hypertrophy: Deficit Deadlift

Deficit deadlifts increase range of motion and place hamstrings and glutes under greater stretch, boosting length‑tension and time under tension. Use 6–12 rep ranges and 1–4 in (2.5–10 cm) deficits to maximize muscle growth at the posterior chain.

2
For strength gains: Deadlift With Bands

Bands provide accommodating resistance that targets the weak point at lockout and improves rate of force development. Program heavy triples to singles with bands (1–5 reps) to increase top‑end force production and transfer to raw 1RM work.

3
For beginners: Deficit Deadlift

A controlled deficit pull teaches a stronger hip hinge and consistent bar path using linear loading—easier to coach while learning technique. Start with a small 1 in (2.5 cm) deficit and moderate submaximal loads before increasing depth.

4
For home workouts: Deadlift With Bands

Bands are compact and let you simulate variable resistance without a full plate set or built platform. With a barbell and 2–3 band tensions you can run strength and speed protocols in limited space.

Frequently Asked Questions

Can I do both Deadlift With Bands and Deficit Deadlift in the same workout?

Yes. Pair them intelligently: do one as your primary heavy or speed modality and the other as an accessory. Example: heavy deficit sets (3–5 reps) first to build bottom‑end strength, then banded singles for lockout speed, or vice versa on an alternate week.

Which exercise is better for beginners?

Deficit Deadlift is the better starting point because it uses consistent linear loading and reinforces a deeper hip hinge. Begin with a small deficit (1–2 in / 2.5–5 cm) and submaximal loads to build technique before introducing variable resistance.

How do the muscle activation patterns differ?

Deficits shift peak demand to the bottom of the lift, increasing stretch and activation in hamstrings and glutes; bands shift peak demand toward lockout, increasing erector and trap activation at full extension. In short: deficits emphasize early‑phase torque, bands emphasize late‑phase force.

Can Deficit Deadlift replace Deadlift With Bands?

Not completely. If your goal is improving lockout speed and top‑end force, bands are superior; deficits excel at bottom‑end strength and muscle stretch. Use them as complementary tools to address specific weak points rather than direct substitutes.

Comparison Summary

Use deficit deadlifts when your priority is posterior-chain hypertrophy, improving the initial pull, and teaching a deeper hip hinge; program deficits with 6–12 reps for muscle growth or 3–6 reps for strength work, and start with 1–2 in (2.5–5 cm) if mobility is limited. Choose deadlifts with bands when you need to develop lockout strength, increase bar velocity, or add accommodating resistance during peaking phases; load bands to contribute roughly 10–30% of top-end tension and focus on 1–5 rep ranges for strength. Both are advanced tools; match the variation to the specific biomechanical weakness you want to fix and use progressive overload, controlled tempo (2–4s eccentrics), and strict hip‑hinge technique to protect your spine.

Exercise instructions

Steps from the exercise catalogue. Read the full sequence before starting.

Deadlift With Bands

  1. To deadlift with short bands, simply loop them over the bar before you start, and step into them to set up. For long bands, they will need to be anchored to a secure base, such as heavy dumbbells or a rack.
  2. With your feet, and your grip set, take a big breath and then lower your hips and bend the knees until your shins contact the bar. Look forward with your head, keep your chest up and your back arched, and begin driving through the heels to move the weight upward. After the bar passes the knees, aggressively pull the bar back, pulling your shoulder blades together as you drive your hips forward into the bar.
  3. Lower the bar by bending at the hips and guiding it to the floor.

Deficit Deadlift

  1. Begin by having a platform or weight plates that you can stand on, usually 1-3 inches in height. Approach the bar so that it is centered over your feet. You feet should be about hip width apart. Bend at the hip to grip the bar at shoulder width, allowing your shoulder blades to protract. Typically, you would use an overhand grip or an over/under grip on heavier sets.
  2. With your feet, and your grip set, take a big breath and then lower your hips and bend the knees until your shins contact the bar. Look forward with your head, keep your chest up and your back arched, and begin driving through the heels to move the weight upward. After the bar passes the knees, aggressively pull the bar back, pulling your shoulder blades together as you drive your hips forward into the bar.
  3. Lower the bar by bending at the hips and guiding it to the floor.

Also Compare

Compare another pair

Choose two exercises to see their differences side by side.

Compare Exercises