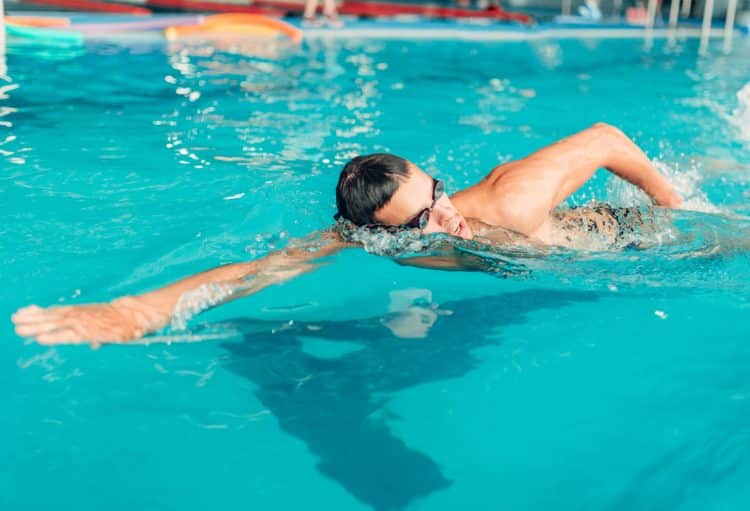
Swimming is an excellent low-impact cardiovascular exercise that will improve your lung capacity and allow your heart to beat more powerfully. But will it help you transform your body?
The answer to that question is a resounding yes! Not only is swimming a fantastic fat-burning form of workout, but it also helps build strength, endurance, and muscles. To transform your body in the pool, though, you’ve got to know how to do it right.
In this article, we’ll explore how swimming can help you lose unwanted body fat and gain muscle and provide you with the ideal in-the-water workouts to achieve those goals.
Why Swimming is Good For You
Swimming delivers all-around fitness benefits. It will improve a person’s strength, stamina, and suppleness all at the same time. Let’s break down the benefits of swimming regularly:
Improves Cardio Fitness
Swimming at a moderate pace for an extended period gives you an aerobic workout. Better still, it does it in a way that does not stress your joints. Regular swimming will improve your cardiac efficiency so your heart can pump more blood with every beat.
Level Up Your Fitness: Join our 💪 strong community in Fitness Volt Newsletter. Get daily inspiration, expert-backed workouts, nutrition tips, the latest in strength sports, and the support you need to reach your goals. Subscribe for free!
Because swimming works all the body’s major muscle groups, it promotes better blood flow and circulation. Improved circulation will transport oxygen and nutrients to your muscle cells more efficiently.
The controlled rhythmic breathing needed for swimming will boost your lung capacity so that you can take in more oxygen with each breath. [1]
Total Body Workout
Swimming provides a total body workout. Because water is around 800 times more dense than air, your muscles are more engaged, and your heart and lungs have to work harder. It’s also a great way to increase your metabolism and has an extremely low impact on the joints.
Swimming is a challenging form of exercise. It also works different muscles, depending on the stroke. If you do a mixture of back-stroke, freestyle, and breaststroke, you will exercise all major muscle groups, including abdominals, biceps and triceps, glutes, hamstrings, and quadriceps.
Swimming also helps keep joints flexible, especially in the neck, shoulders, hips, and groin, as you move your body through the water. So, it truly does provide a total body workout. [2]
Joint Friendly
Swimming is less taxing on your joints than most exercises. This is because your body’s natural buoyancy on the water helps avoid the jarring and bouncing that can lead to injury. When you are in the water, your weight is about one-tenth of your actual weight. You also get a much greater range of motion than on land. In addition, the water will support the weight of your limbs.
That makes swimming a fantastic choice for people that experience joint pains during land-based exercises. This may include people who suffer from arthritis, have back problems, are overweight, or are pregnant. An additional bonus for people with asthma is that the air around a swimming pool is usually very humid, making breathing easier. [3]
Ideal for Rehab
Swimming is excellent for people with injuries. The low-impact nature of swimming provides an option that you don’t get with most exercises — it provides a cushion for your injured body parts. The zero gravity environment allows you to slowly and safely strengthen your muscles and cardiovascular system as you rebuild from an injury. [4]
Safe During Pregnancy
Swimming can be done by most women during any stage of pregnancy. We’ve already covered the low-impact nature of swimming that makes it ideal for pregnant women. The water’s weightlessness and buoyancy can also help relieve pressure on the spine and pelvic area during pregnancy.
Swimming will boost a pregnant woman’s blood circulation and heart health. This will benefit both mother and baby. [5]
Improves Sleep
The combination of physical and mental effects of swimming will enhance your sleep. Swimming has a calming effect on the mind. It helps you relax and lower your stress levels, which can help you unwind before bed.
Swimming in water that is below your core body temperature helps alleviate the overheating that is common with land-based workouts. After a swim, your body temperature will gradually return to normal, which promotes sleep. Add in the physical exhaustion that results from a decent swim session, and you will definitely receive the sleep-enhancing benefits of this exercise. [6]
Boosts Mood
Swimming has a peaceful and calming effect on the psyche. The water’s rhythmic movements and the sense of weightlessness reduce stress and anxiety levels. Swimming encourages the release of endorphins, which are organic mood enhancers. These “feel-good” hormones can promote well-being and serve as a natural stress reliever.
Physical exercise like swimming can enhance cognitive performance and mental clarity. The increased blood supply to the brain encourages improved focus and concentration. Swimming is also a kind of mindfulness and meditation practice because it allows you to concentrate on your breathing and movements. This mindfulness can calm the mind and help reduce mental chatter. [7]
Reaching such swimming goals as improving stroke technique or extending swimming distance can help enhance self-esteem and give swimmers a sense of achievement. Finally, swimming can help develop mental toughness and discipline, particularly during demanding sessions.
Swimming for Weight Loss
People try all sorts of things to lose weight. They run, they skip, and they lift weights. But you rarely hear of people who swim to lose weight. Swimming simply doesn’t register with most people as an effective fat-loss mechanism. The reality is that swimming may just be one of the most effective ways of losing fat.
Can swimming help you lose belly fat?
Yes, swimming most definitely can help you to lose belly fat. Plus, it has a very low impact on your joints and tendons.
Swimming is a great full-body exercise. Unlike jogging or cycling, it incorporates the entire body’s musculature. It also delivers a very effective cardiovascular workout. The heart will be forced to pump oxygen faster to reach all corners of the body. This, in turn, will increase your metabolic rate.
A swimming workout is also very relaxing. A swim in the morning can set you up for a great day. This in itself will help you to lose weight. Stress increases your cortisol levels. This is a hormone that forces the body to store more fat. Swimming will lessen this effect.
What are Some Good Ways To Lose Fat While Swimming?
Let’s take a look at the two exercise approaches that are recognized as among the best when it comes to losing weight on the water:
Mid-Intensity Swimming
Mid-intensity swimming involves swimming at a pace you can maintain for 15-45 minutes. The key to getting the most fat-burning benefit here is to swim uniformly without stopping for the duration of the workout. Aim to work up to 45 minutes of non-stop swimming.
When you perform this type of constant mid-intensity cardio work at sixty percent of your maximum heart rate, your body will be forced to call on its stored body fat for energy. Your metabolism will also speed up, further enhancing the calorie burn.
If you are new to swimming, begin with five minutes of continuous swimming, then slowly build up your time. You will be surprised at how quickly your strength and stamina improve.
High-Intensity Interval Training (HIIT)
High-intensity interval training is well established as an effective way to lose fat fast. The same HIIT fat loss benefits you get in the gym can be achieved on the water. Here’s how to do it:
Begin with a slow five to 10-minute swim. Then swim for one minute at 90 percent of your maximum speed. Now recover for a minute at a very slow speed. Repeat the cycle five to ten times. If you can complete ten cycles (good luck!), then your training duration will be twenty minutes.
Alternatively, you can do two laps at high speed, followed by two slow laps, and repeat this cycle.
HIIT training will burn fewer calories than medium-intensity work while you are doing the workout. However, it will significantly accelerate your metabolism 24 hours after your workout. It will also release hormones into your system that will assist in the fat-burning process. This enhanced fat-burning process will continue for 48 hours. [8]
HIIT workouts can be very demanding. But they are within your capability. Just remember to start slowly and build up your intensity over time. For your first session, you might do just one sprint and one recovery for a total of two minutes of work time (don’t forget the 5-10 minute easy swim warm-up). Keep pushing yourself until you can complete between 5 and 10 cycles.
How much do you have to swim to lose weight?
Try to work four mid-intensity swim workouts into your schedule per week. However, you should limit HIIT workouts to once or twice weekly as it is very demanding. Any other swimming you do that day should be very low intensity.
Swimming Weight Loss Tips
- If you are a beginner, consider training under the supervision of a swimming teacher.
- Drink a minimum of two liters (70oz) of water per day
- Do not eat within an hour of getting into the water
- Reduce your carbohydrate intake
- Reduce your caloric intake to maintain a daily caloric deficit
- Join a club to increase your motivation
How many calories does swimming burn?
Medium-intensity swimming can burn an average of 0.1 and 0.14 calories per kilogram of body weight per minute. In other words, a 150-pound person will burn about 200 calories after 30 minutes of swimming. This compares to about 190 calories for 30 minutes of running.
From the above comparison, we can see that swimming burns slightly more calories than running over the same period. At the same time, swimming is far less taxing on your joints. So, if you have the choice, you should choose swimming over running.
Swimming is a fantastic way to lose weight. Follow our guidelines to build swimming into your weight loss program, combine it with a sensible nutrition program, throw in a dose of consistency, and you will be well on the way to achieving your weight loss goals.
Check Out: Calories Burned Swimming Calculator
Does Swimming Make You Hungry?
Have you noticed that you tend to get hungry after a session in the pool? There are some physiological reasons for those hunger pangs. One reason is that your body is warming up to return to your core body temperature. That requires energy in the form of calories. You have already burned off many calories in the pool, so combining the two will increase your appetite by stimulating the release of ghrelin, known as the hunger hormone.
Ghrelin release after exercise doesn’t just occur after a swimming workout. It’s common to all forms of exercise. But it is exacerbated by the need to warm the body up. The stimulation of the hunger hormone post-exercise is a reason why many people fail to lose weight. It’s very easy to choose the wrong types of post-workout food and/or to consume too many calories in your post-workout meal.
Research has shown that when you swim in a pool that is close to the ideal body temperature of 37 degrees Celsius (98 degrees Fahrenheit), you won’t feel as hungry after the session as if you were in a colder pool. Most pools, however, are at around 28 degrees Celsius (82 degrees Fahrenheit). [9]
One way to counter the cooling effect that causes you to feel hungry after swimming is to spend 10 minutes in a sauna or hot tub after you get out of the pool. A warm shower can have a similar effect, allowing you to return to your core body temperature quickly. Having a hot drink will also help.
We also recommend being prepared for your post-swim hunger pangs by packing some healthy snacks you can consume after you’ve changed.
Here a half a dozen great snack choices:
- Greek yogurt with berries
- Hard-boiled eggs
- Cottage cheese with pineapple
- Protein smoothie
- Tuna salad
- Rice cakes with nut butter
Swimming for Muscle Gain
Look at the physiques of top-class swimmers, and it quickly becomes obvious that it can help you build muscle. While they may not possess a bodybuilder’s physique, pro swimmers have an athletically muscled body with a great V-taper and a tight midsection. That sort of body, though, doesn’t happen automatically.
Level Up Your Fitness: Join our 💪 strong community in Fitness Volt Newsletter. Get daily inspiration, expert-backed workouts, nutrition tips, the latest in strength sports, and the support you need to reach your goals. Subscribe for free!
To build muscle through swimming, you have to combine your in-the-water work with time in the gym and nail your nutrition.
Can You Build Muscle from Swimming Alone?
Even though swimming is mainly thought of as a cardiovascular exercise, you are actually working against resistance in the pool. That is due to the viscosity of water. Water is 784 times more dense than air. So, every stroke you take is a form of resistance training.
With swimming, you have limited options for progressively increasing the resistance level. When you are in the gym, you can simply add more weight to the bar. You obviously can’t do that in the pool. However, because swimming is a weight-bearing activity, you can do it for a long period. It is also far safer than doing an exercise on land, allowing you to do it more often with less chance of injury.
Due to the limited potential for progressive resistance, a non-trained person can build strength and muscle mass when they begin swimming. However, this will peter out when their muscles become accustomed to the resistance provided by the water. From that point on, they will continue to develop muscular endurance, but there will be little in the way of hypertrophy.
Muscle Building Swimming Drills
Here are seven drills that will help you create the extra resistance in the water you need to build muscle:
1. Kickboard Resistance
Here’s a drill to help build strength and size in your quads, glutes, hip flexors, glutes, shoulders, and lats. You’ll need a kickboard for this exercise.
- Lie in the water with your feet against the wall, with a kickboard in front of you at arm’s length, held vertically, with half of it under the water.
- Push off the wall, keeping your arms locked in front of you.
- Kick as hard as you can to swim the length of the pool
2. Pool Pulls
This drill focuses on strengthening and developing your arms and shoulders. You will cut out your lower body involvement by placing a pool buoy between your legs. This foam or inflatable device you hold between your thighs helps prevent you from kicking.
- Stand in the pool with your back against the wall and a pool buoy between your thighs. If you tend to flutter kick with your ankles, you can also place a band around your ankles.
- Swim the length of the pool, using only your upper body to propel you forward.
- To progressively increase the resistance, you can wear paddles. This will increase the surface area of your hands, providing more load for the arms and shoulders.
3. Vertical Kicks
Vertical kicks are a leg-focused drill that works the quads, glutes, and hamstrings.
- Move into an area of the pool where you cannot touch the bottom.
- In an upright position, cross your hands over your chest.
- Kick as hard as you can with the goal of driving your body up so that your upper body lifts out of the water.
- Continue for 20 seconds.
- Rest for 20 seconds, then repeat. Do this four to five times.
- To add resistance, wear fins.
4. Pool Jumps
This drill provides an effective glute, core, quad, and upper body workout.
- Get into the pool in an area where your feet are touching the bottom and stand facing the wall with your hands on top of it.
- Push through your thighs as you pull yourself up to bring your feet out of the water to land on the pool’s edge.
- Reverse the motion to return to the pool.
- Do three pool jumps in a row.
- Rest for 20 seconds and then repeat.
- Do three sets of three pool jumps.
5. Dolphin Kick
The dolphin kick is a great move to work your core. Add this to the mix to strengthen and develop your entire core region. To add resistance, do dolphin kicks while wearing fins.
The dolphin kick is a challenging swimming technique that will take some time to master.
- Start with your torso long and straight, your arms extended over your head, and your hands clasped together. This is known as a streamlined position. Your face should be staring toward the bottom of the pool, and your head and spine should be aligned.
- Just before beginning the dolphin kicks, take a deep breath. Since kicks are usually done underwater, you won’t be able to breathe while performing them.
- Bring your feet together and slightly bend your knees to begin the dolphin kick. Instead of merely using your legs, use your hips and core muscles to generate power. The motion must be smooth and wavy, like a dolphin’s tail.
- Keep your body line straight by pressing your hips up and your chest down. As your hips rise, your legs should begin to travel down. This downward motion produces the impetus that carries you forward. Keep your ankles supple and your feet close together.
You must use your full body, not just your legs, to do the dolphin kick. A coordinated effort between your core, chest, and shoulders should produce a continuous wave-like movement. Your strength and the length of your swim determine how quickly you kick. Longer, more powerful kicks are typically employed for longer distances, while short, rapid kicks are frequently used for shorter distances. How long you can hold your breath underwater determines the time you do the movement.
6. L-Shape Kick
Here’s another exercise that will get your core firing.
- Enter the water with a kickboard. Position yourself as if sitting in a chair, hugging the kickboard to your chest. Your head and shoulder should be out of the water.
- Maintaining an upright torso, straighten your legs to a horizontal position. You have now created an ‘L’ shape out of your body.
- Begin kicking with your legs to propel yourself backward down the length of the pool.
7. Upright Skull
This is an upper-body-focused drill that makes a good counterpart to the vertical kick, which is lower-body dominant.
- Move into an area of the pool where you cannot touch the bottom.
- Place your arms just below the water’s surface in an upright position.
- Move your arms from side to side in a sculling action to move the water.
- Continue this action for 20 seconds.
- Pause for 20 seconds, just kicking lightly to stay afloat.
- Repeat the drill four more times.
Adding Drag
To increase resistance, you can make use of a pool parachute. This lightweight mini parachute you attach to your body with a harness or belt. The parachute will catch the water as you swim to create drag resistance. This helps to build strength and muscle size in the core and upper body.
Another way to add drag and resistance is to use a bungee cord. The cord is attached to a starting block on one end and clipped to your waist on the other end. You swim out until the cord is fully extended. Now continue swimming against the resistance for 20 seconds, even though you will go nowhere. Then allow the cord to pull you back in.
How to Breathe While Swimming
It wouldn’t be going too far to say that breathing technique is the most critical aspect of successful swimming. Learning to breathe correctly in the water can be challenging. Being anxious about getting enough air without swallowing water is normal.
Let’s break down the key things you need to do to master the art of breathing while swimming.
Whenever you are face down in the water, you need to exhale. This rids your lungs and bloodstream of carbon dioxide. As a result, when you rotate to breathe, you have more time to inhale as you don’t have to exhale first. Yet exhaling into the water is very unnatural for many people. Here is an exercise to help you with this:
Sink Down Drill
Tread water and breathe before bringing your arms down by your side and exhaling into the water. Your aim is to sink straight down to the bottom without any pauses or delays. Experiment between exhaling from your mouth and nose to see which is most natural for you.
When you exhale, you may find that you struggle to sink or that you sink a bit and then come back to the surface. This is a sign that you are not exhaling quickly enough and are subconsciously holding onto your breath.
If you sink a little but immediately return to the surface, do not give up. Keep exhaling. You will soon pass through a tipping point and then start to sink back down again.
Once you can sink to the bottom of the pool with a nice, controlled, and relaxed exhalation, try some easy laps of freestyle swimming, focusing on a smooth exhalation into the water using your normal breathing pattern to whichever side you feel most comfortable.
Using the Bow Wave
When you use a good stroke technique, your head will be low in the water when breathing. Lifting the head into the air excessively causes the whole upper torso to lift and the legs to sink, creating a lot of drag.
The secret to keeping your head low in the water is to breathe into the trough of air formed by the bow wave created around your head. The bow wave is formed as the head pushes forward through the water. This creates a small rise in the water in front of the head and then a trough alongside the chin and neck. This is a convenient channel to breathe beneath the main surface level of the water.
The bow wave forms off the top of your head. It is just deep enough to breathe into by the time it passes the level of your mouth. If you lift your head all the way out of the water to breathe, then the bow wave will not form off the top of your head, and there will be no trough.
On the other hand, if you bury your head in the water to improve your body position, this will also prevent the bow wave from forming.
To develop an effective bow-wave breathing technique, think about keeping the top of your head low in the water. Try to breathe just slightly behind you. Do not crane your head forward, as the bow wave will not be as deep. This will make it much harder to breathe.
Bilateral Breathing
Bilateral breathing is the ability to breathe to the left and the right, swapping sides regularly as you swim. This is good practice as it helps to keep your swim stroke symmetrical. Many people think of bilateral breathing as every three strokes alternately side to side. But there are other patterns, such as :
- Breathing 2-3-2-3: This means breathing twice to one side in a row and then performing three strokes to swap to the other side for two breaths in a row. This is the method used by many competitive swimmers.
- Breathing 5’s: Breathing every five strokes can be good for those with a fast stroke who find that breathing every three strokes makes them breathe too often.
- Swapping Sides Every Lap of the Pool: This is often done in competition to keep an eye on competitors in other lanes.
Many swimmers find it quite a challenge to adapt to bilateral breathing. They find it very unnatural to breathe on their non-dominant side. But, most people find that if they persevere with it for six weeks, they will adapt to it.
Timing Your Breathing
It is important that when you rotate to breathe, your head should rotate with the body at the same time. Yet, swimmers often turn the head slightly later once the body is already rotated. So, if you are breathing to the right, the right arm will already be in the recovery phase over the top of the water before you start breathing. When seen from the side of the pool, this can look like the swimmer will knock their nose with the right shoulder as the arm comes over. Late breathing reduces the time available to inhale, making the breathing feel a little tense and hurried.
Think of turning your head away from your arm as you breathe. So, if you are about to breathe to your left, turn your head smoothly away from that arm as your right-hand passes your head and extends forward. This should happen in one fluid motion, with the head rotting as the hand enters the water.
Most people will find that their breathing timing is better on one side than the other. Interestingly, it is often the preferred breathing side that has late timing.
Swim Breathing FAQs
Why is it sometimes hard to breathe underwater properly?
It is sometimes hard for people to breathe properly underwater because most of us feel anxiety when underwater. This is made worse when it comes to the idea of breathing underwater. We fear that we will be unable to breathe. There is a worry about getting a mouth or nose full of water. So, the first step in breathing underwater is learning to relax.
What is the Alexander breathing technique?
The Alexander technique is a method of breathing that connects posture with breathing ability. Alexander stated that working on one’s poise is more likely to have a positive effect than doing breathing exercises. This principle applies equally to swimming. You can prove this to yourself by doing the following:
- Sit forward on a chair with both feet on the ground. Rock forward from the hips, maintaining the length of the neck, and your body is 45 degrees with the eyes looking forward and down.
- Gently say ‘Aah’ and see how long you can comfortably sustain this sound.
- Now, without altering your position, take a breath and pull the head back so your eyes look ahead. Say ‘Aah’ again, and note the changes in the duration or quality of the sound. You will see a reduction in time because your breathing has been strained.
You can, therefore, improve your swimming breathing by improving your posture.
A Dozen Tips to Improve Your Swimming Technique
Swimming does not come naturally to most people. Here are a dozen practical tips to help improve your swimming form:
Tip #1: Master Your Freestyle Stroke Technique
- Freestyle is also known as the flutter kick because the feet seem to flutter at the water’s surface. Keep the legs relaxed and begin the movement at the top of the legs. The legs should flex slightly at the knee on the downbeat and straighten on the upbeat.
- Hand entry must be smooth, with a high wrist and elbow action. Entry should be made on the shoulder line, with the index finger and thumb entering the water first. After the entry, the hand slides forward and slightly downward.
- The catch is made following the entry of the hand, with the wrist slightly flexed.
- At the completion of the catch, the elbow begins to flex, and the hand begins a downward and outward path. As the hand approaches its deepest point, the down sweep is rounded into an up sweep.
- The push phase begins at the end of the down sweep, with the hand moving outward and up.
- The recovery phase starts with a high elbow action initiated by a shoulder roll with the hands passing close to the side of the body. The hand travels upward, slightly outward, and forward during the first half of recovery, with the palm facing either inward or backward.
Tip #2: Practice Your Power Stroke Technique
- The power stroke is a continuous arm stroke style where the arms move almost opposite each other. When one arm is in front, the other is at the back. At no time should both hands be seen in front of the head. Practice short distances at first, with the face in all the time. Then slowly move to longer distances, adding breathing.
Tip #3: Practice ‘Chicken Wings’
- This drill is used to develop a high elbow style. On recovery, the elbow is lifted high, with the thumb drawn along the side of the body until the thumb reaches the armpit.
Tip #4: Evaluate Your Freestyle Technique
Look out for:
- Smoothness as one arm takes over from the other for the pull
- High in the water body position
- Good body alignment, first on one side, then on the other
- Balanced movements
- Economical use of legs
Tip #5: Perfect Your Breathing Technique
The following drill will help you to develop an efficient breathing pattern:
- Hold a kickboard with one hand, thumb, and fingers on top and the elbow extended.
- Bend the knees to allow the shoulders under the water, turn the head to the side and place the face flat onto the water.
- Breathe naturally and gently rotate the head until the eyes face the pool’s bottom. Without a pause, gently rotate the head out again.
Tip #6: Master Your Backstroke Technique
- Develop confidence in gliding on your back in a streamlined position with the body slightly angled in the water.
- The depth of the head determines the position of the body. The ears should be just under the surface, the eyes looking up at about a 70-degree angle, and the body straight and relaxed.
- Keep a continuous kick action going while learning the stroke. The toes should make a splash on the surface while the knees remain below.
- The feet should be smooth, as ankle flexibility is very important. The toes should be turned naturally inward.
- Breathe naturally and avoid holding your breath.
- Follow a down-up-down arm recovery action. The body should rotate from side to side to assist the entry and recovery of the hands and arms.
- During the upward, backward, and inward arm movement, the hand should begin to accelerate.
- Once the shoulder is level with the hand, the palm begins a downward and outward motion until the hip passes the hand.
- The shoulder lifts, followed by the arm and then the hand. The back of the hand of the recovery arm is uppermost as the hand leaves the water.
- When the recovery arm reaches the vertical position, the palm faces outwards, ready for a smooth, turbulence-free re-entry with the little finger entering first.
Tip #7: Evaluate Your Backstroke Technique
Look for:
- Head back, chest up, streamlined position
- Continuous kicking action
- Breathing naturally
- Arm recovery starting with the little finger leading
- Straight arms during the recovery phase
- Down-up propulsive arm action
- Body rotates on the long axis, but the head remains still
Tip #8: Do the Periscope Drill
- With one hand held by the side (palm down), the other arm is raised to a near-vertical position, with the wrist relaxed and the back of the hand uppermost. Maintain a good body position and kick strongly over a distance of 10 meters (33 feet).
- Rise and lower the arms alternately through 90 degrees to a count of ‘right-2-3-left-2-3.’
- This drill will help you develop a vertical movement pattern in the recovery, with the arm reaching up and straight, except for a relaxed wrist.
Tip #9: Master Your Breaststroke Technique
- From gliding, rotate the hands out to catch the water.
- Bend the arms and forcefully pull them back to shoulder level. Make sure the elbows are pointed forward.
- Bring the arms together under the body. Bend the legs, pull the heels slightly, and breathe deeply and quickly through the mouth.
- Rotate the feet out and pull the toes toward the knees. The knees are about hip-width apart, the feet a little wider. The head should go back into the water.
- A quick and powerful kick comes during the arm extension. Push the shoulders forward. Exhale through the mouth and nose as you glide.
Tip #10: Evaluate Your Breaststroke Technique
Look for:
- Shoulders and body straight, hips flexed
- Butt under the water
- Eyes fixed straight ahead
- Pull both heels to the rear simultaneously — do not jerk them!
- Do not pull your knees under your stomach
- Turn the toes out and upward toward the knees
- Lower legs kick back quickly and forcefully
- Push off the water with the bottoms of your feet
- Fully extend the legs. Move the legs in a semicircle
- Bend the arms as you pull back
- Fully extend the arms, pushing the shoulders forward
- Inhale deeply as you bring your arms together under your body
- Kick as you extend your arms
Tip #11: Master Your Crawl Technique
- After catching the water, the bent arm is pulled through the water under the body
- The arm is bent the most when it reaches shoulder level. The legs move continuously, six kicks to one arm movement
- The extended arm enters the water in front of the head. The head turns to the opposite side.
- The other arm quickly and forcefully pulls back towards the thigh. This is when you should inhale.
- Once the hand has left the water at the thigh, the relaxed arm again swings forward above the water. The face turns into the water to exhale.
Tip #12: Evaluate Your Crawl Technique
Look for:
- Shoulders are up and straight
- Don’t rock
- The body is straight and hips are flexed
- Eyes are level with the water surface
- Place your feet on the water
- Leg movements are the same as the backstroke, but in a prone position
- Ankles are relaxed, toes extended
- Bottoms of the feet break the water surface
- Leg movements are round
- Arms move continuously
- Arms move alternately
- The extended arm enters the water in front of the head
- The fingers are together, and the palms are straight
- Inhale quickly and deeply and the hand passes the thigh
- Only turn your head to the side as you breathe; the shoulders stay straight
- Exhale long and completely underwater through the mouth and nose
- Alternate sides for breathing
Wrap Up
Swimming is a terrific form of exercise that combines aerobic and anaerobic effects like no other. It can also help transform your body, both in terms of losing fat and gaining muscle. In this article, we’ve covered several drills, strategies, and training methods that will help you burn fat and build muscle faster.
We recommend combining this pool work with weight training in the gym, and a nutrition plan designed to complement your goal. If your goal is to lose body fat, reduce your caloric intake by 500 calories below your maintenance level. To gain muscle mass, increase by 500 calories. Add two or three-hour-long sessions in the pool per week and watch your body transform.
References
- Tanaka H. Swimming exercise: impact of aquatic exercise on cardiovascular health. Sports Med. 2009;39(5):377-87. doi: 10.2165/00007256-200939050-00004. PMID: 19402742.
- Lee BA, Oh DJ. Effect of regular swimming exercise on the physical composition, strength, and blood lipid of middle-aged women. J Exerc Rehabil. 2015 Oct 30;11(5):266-71. doi: 10.12965/jer.150242. PMID: 26535217; PMCID: PMC4625655.
- Alkatan M, Baker JR, Machin DR, Park W, Akkari AS, Pasha EP, Tanaka H. Improved Function and Reduced Pain after Swimming and Cycling Training in Patients with Osteoarthritis. J Rheumatol. 2016 Mar;43(3):666-72. doi: 10.3899/jrheum.151110. [4] Epub 2016 Jan 15. PMID: 26773104.
- Marinho-Buzelli AR, Zaluski AJ, Mansfield A, Bonnyman AM, Musselman KE. The use of aquatic therapy among rehabilitation professionals for individuals with spinal cord injury or disorder. J Spinal Cord Med. 2019 Oct;42(sup1):158-165. doi: 10.1080/10790268.2019.1647935. PMID: 31573458; PMCID: PMC6783731.
- Juhl M, Kogevinas M, Andersen PK, Andersen AM, Olsen J. Is swimming during pregnancy a safe exercise? Epidemiology. 2010 Mar;21(2):253-8. doi: 10.1097/EDE.0b013e3181cb6267. PMID: 20110815.
- So BCL, Kwok SC, Lee PH. Effect of Aquatic Exercise on Sleep Efficiency of Adults With Chronic Musculoskeletal Pain. J Phys Act Health. 2021 Jun 30;18(9):1037-1045. doi: 10.1123/jpah.2020-0476. PMID: 34193628.
- Bashiri H, Enayati M, Bashiri A, Salari AA. Swimming exercise improves cognitive and behavioral disorders in male NMRI mice with sporadic Alzheimer-like disease. Physiol Behav. 2020 Sep 1;223:113003. doi: 10.1016/j.physbeh.2020.113003. Epub 2020 Jun 6. PMID: 32522682.
- Schaun GZ, Alberton CL, Ribeiro DO, Pinto SS. Acute effects of high-intensity interval training and moderate-intensity continuous training sessions on cardiorespiratory parameters in healthy young men. Eur J Appl Physiol. 2017 Jul;117(7):1437-1444. doi: 10.1007/s00421-017-3636-7. Epub 2017 May 9. PMID: 28488137.
- King JA, Wasse LK, Stensel DJ. The acute effects of swimming on appetite, food intake, and plasma acylated ghrelin. J Obes. 2011;2011:351628. doi: 10.1155/2011/351628. Epub 2010 Oct 3. PMID: 20953411; PMCID: PMC2952805.

