I’ve been lifting weights for about 40 years, ever since I bought my first Weider blue vinyl dumbbell set. During that time, I’ve trained as a bodybuilder, powerlifter, and Olympic lifter and used strength training to enhance my performance in various sports, including triathlon, rugby, and rock climbing. Now I just train for health and fitness.
While strength training has been good to me, it’s also taken its toll on my joints. I’ve got a torn knee meniscus, arthritis and bone spurs in both shoulders, and calcification in my elbows. Thankfully, none of these problems stop me from training, but they do mean I can’t lift like I used to.
For example, heavy bench presses are a thing of the past, and I don’t run. Not because I can’t, but the post-exercise cost is too high.
As a result, I’ve had to find training techniques that produce the best results with the least amount of joint stress. This has taken some trial and error but, armed with these training approaches, I can still work out hard and often and without any lasting joint pain.
These are the joint-friendly training methods I use to keep my workouts on track.
What Causes Joint Pain?
If you suffer from joint pain, you should seek medical advice to ensure that whatever you are doing won’t make it worse while exploring any potential solutions. It’s a bad idea to load up on anti-inflammatories or pain killers and push on regardless. That’s because there are several causes of joint pain.
The most common reasons that your joint hurt include:
Osteoarthritis – this is wear and tear of the hyaline cartilage that covers the ends of your bones. OA is probably the most common cause of joint pain in older people and hardcore exercisers.
Rheumatoid arthritis – caused by the overproduction and granulation of synovial fluid within the joint capsules, RA is characterized by swollen, distorted joints, especially in the fingers and wrists. RA is an autoimmune disease.
Tendinitis – inflammation, and swelling of the tendons, which is the connective tissue that attaches muscles to bones. Often caused by overuse.
Tendonosis – degeneration, thickening, scarring, and weakness of the tendons. This can be the result of working through and ignoring tendonitis.
Overuse – doing the same movements over and over can lead to joint pain, such as squatting every day. Overuse causes localized inflammation and swelling.
Joint injury – several structures make up a joint, including the articular surfaces, ligaments, tendons, and joints. All of these structures can be injured, for example, if you wrench a knee.
Bursitis – inflammation of the fluid sacks that pad and protect the tendons in joints. They can become swollen and cause pain, especially in the elbows and knees.
Underlying medical conditions – some diseases cause joint pain, including lupus, gout, fibromyalgia, sarcoidosis, and cancer.
The good news is that the most common causes of joint pain are not especially serious, and you should be able to train around them. However, you should get any unusual joint pain checked out to ensure that it’s not medically relevant.
Once you’ve got the go-ahead from your doctor, use the following methods to take the stress off your joints and continue training.
Best Joint-Friendly Bodybuilding Training Methods
These are the best methods I’ve found for training around joint pain. Depending on the cause of your joint pain, you may find some approaches better than others. Try each one for a week or so and monitor your reaction.
Sore muscles are fine and suggest the training method is working well, but if your joint pain remains the same or gets worse, you should move onto another strategy.
1. Super Slow
When most people lift weights, they take 1-2 seconds for the concentric or positive phase and 1-2 seconds for the eccentric or negative phase. Hitting failure normally means doing something like 12-20 reps, and a 12-rep set of two seconds up and two seconds down will keep your muscles under tension for about 48 seconds.
Fewer reps would mean less wear and tear but invariably also means lifting heavier weights, which can be problematic for sore joints too.
Super slow allows you to train using low reps AND light to moderate weights, reducing joint stress significantly.
Instead of a quite rapid tempo, super slow involves doing your reps much more slowly, such as 6-8 seconds up and 6-8 seconds down. If each rep takes between 12-18 seconds, you’ll only need to do 4-6 reps to hit the same TUT as a higher rep, faster tempo set.
In addition, moving more slowly also eliminates momentum, which means each rep is considerably more demanding. Because of this, you won’t be able to lift such heavy weights. Fewer reps combined with less weight equals considerably less joint stress. While super slow won’t build planet-shifting strength, it will help preserve or even build muscle mass.
2. Blood Flow Restriction Training

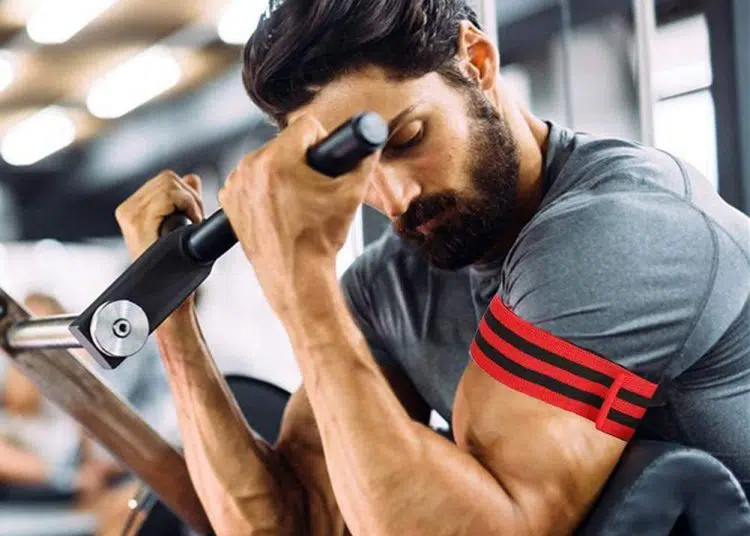
Blood flow restriction, also known as occlusion, is a training method that reduces oxygenated blood flow to your muscles. This causes an increase in lactic acid production and means your muscles fatigue faster than usual, allowing you to get an effective workout using lighter weights.
You can use blood flow restriction training to work your arms and legs, but it’s not really suitable for training your torso muscles. To do BFR training, simply tie wide bands above the muscle you want to train to partially restrict blood flow and then do your workout as usual.
You can read more about this joint-friendly training method in this guide.
3. Isometrics
A lot of joint pain is caused by repetitive movements. This is especially true for tendonitis and arthritis. The muscles themselves are not the problem! Isometrics, also known as static contraction training, involves very little joint movement, minimizing further joint wear and tear.
To do this type of training, do your chosen exercise but, instead of raising and lowering the weight, lock-off mid-rep and hold that position for as long as you can. This will create an intense muscle contraction without the need to move your joints.
Good examples of isometric exercises include:
- Wall squats
- Planks
- Biceps curl – arms held at 90-degrees
- Leg extensions – legs fully extended
- Leg curls – legs fully flexed
- Triceps pushdowns – elbows fully extended
- Calf raises – standing on tiptoes
While isometrics are very joint-friendly, there are a couple of things to consider before using this method. Firstly, isometrics can cause a significant rise in blood pressure. Make sure you do not hold your breath, as that will make matters even worse.
Secondly, isometrics only builds strength at the angle of contraction and about 15-degrees on either side. So, if you want to develop full-range strength, you’ll need to hold your joints in a few different positions.
Finally, it’s hard to quantify your performance during isometric exercises, so just contract your muscles as hard and as long as you can.
4. Dynamic Tension

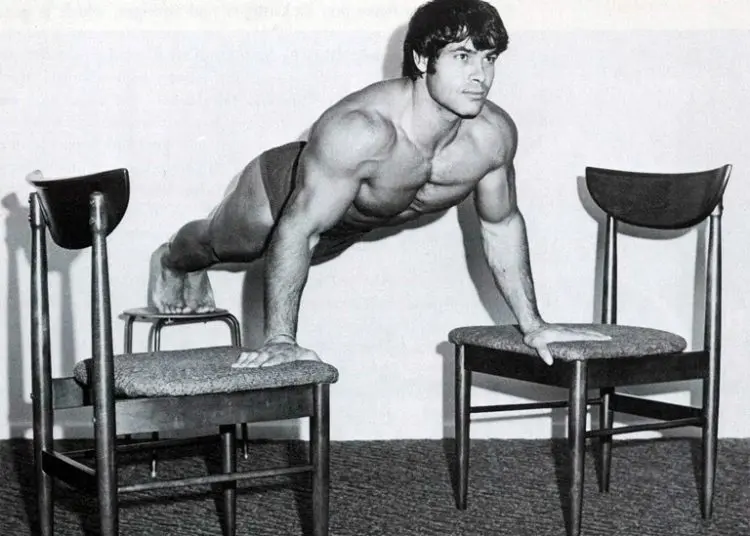
Dynamic tension is a training method from the golden age of bodybuilding and physical culture. Popularized by one of the first fitness marketers, Charles Atlas, it’s a way to make light weights feel heavy by maximizing muscle tension.
You can apply this training method to almost any exercise, for example, biceps curls.
Pick up a broomstick and hold with an underhand, shoulder-width grip, as if you were going to do biceps curls. Contract your biceps as hard as you can and slowly curl the stick up to shoulder level. Squeeze your muscles as hard as possible. Imagine the broomstick is really heavy, so you can’t lift it quickly or easily. Maintaining muscle tension, lower the stick and repeat.
Dynamic tension “fools” your muscles into thinking you are lifting a heavier weight, providing them with a great workout without overstressing your joints.
Read more about dynamic tension training in this in-depth guide.
5. Pre-Exhaust

Big compound exercises like bench presses and squats are great for building muscle but, done with heavy weights, are also hard on your joints. Pre-exhaust involves fatiguing your agonist or prime mover muscles with an isolation exercise so that you can’t lift as much weight for the following compound movement.
Pre-exhaust is a type of superset, and you must move quickly from one exercise to the next. Rest only after completing the second exercise. Examples of joint-saving pre-exhaust supersets include:
- Dumbbell flyes & bench press
- Leg extensions & squats
- Lateral raises & overhead presses
- Straight arm pulldowns & bent-over rows
Read more about supersets in our ultimate guide.
6. Resistance Bands

With many exercises, the hardest part is the start of each rep, when you need to get a stationary weight moving. This is called overcoming the moment of inertia, and it can be very hard on your joints.
When you train with resistance bands, there is no such moment of inertia to overcome, and the resistance comes on gradually as the band stretches. This is much more joint-friendly.
You can use resistance bands on their own, or you can use them in combination with free weights and even some machines. In each case, the resistance increases as you move through your rep, reducing that critical moment of inertia.
Resistance bands are light, portable, cheap, versatile, and very useful for anyone with joint pain.
7. Myo-Reps
Myo-reps are another training method for making light to moderate weights feel heavy. However, in this case, it’s by keeping your rests short to increase levels of fatigue.
To use the myo-reps method, pick a weight you can lift 12-20 times. Choose exercises that you can do safely to failure, such as leg extensions, leg presses, chest press machine, and push-ups. Bench presses, squats, and deadlifts are not suitable.
How to do myo-reps:
- When you are ready, rep out to form failure. Make a mental note of how many reps you do.
- Rest 10-15 seconds, and then do 25% of the reps from your original set. So, if you did 12 reps, pump out another three.
- Rest for another 10-15 seconds, and then do a second “mini set.”
- Continue until you are either unable to do three reps or you complete five mini sets in total.
Myo-reps are very intense, so you only need to run through this sequence once per exercise. After all, you’ll have trained to failure 5-6 times in the space of a couple of minutes, which is more than enough to trigger muscle growth. Myo-reps means training with light to moderate weights, which may be a helpful way to keep stress off your joints.
Read more about myo-reps in this guide.
8. Deep Water Strength Training
If you are really banged up, deep water resistance training could provide you with a workout lifeline. When you lift weights, there is usually a lever, a fulcrum, and a load. Invariably, the longer the lever and the heavier the load, the more stress there will be on the fulcrum – which is your joints.
When you work out in water, the load is provided not by an external weight but by the resistance of the water, which is dispersed along the entire surface area of the limb you are working, resulting in less joint stress.
Think about it like this:
In an exercise like dumbbell flyes, the weight is in your hand, the lever is your arm, and the fulcrum is your shoulders. The load is a long way from your shoulder, creating a long lever and a lot of joint stress.
But, if you do the same movement in deep water, the water pushes against your entire arm, so lever length is no longer an issue, and joint stress significantly decreases.
Training in deep water is not the ideal substitution to “real” strength training, but it’s a lot better than nothing. It’s definitely a useful option if you want to preserve your hard-won strength and muscle mass but need to give your aching joints a break.
You can train your upper body, lower body, and core with this joint-friendly training method.
9. Unilateral Training
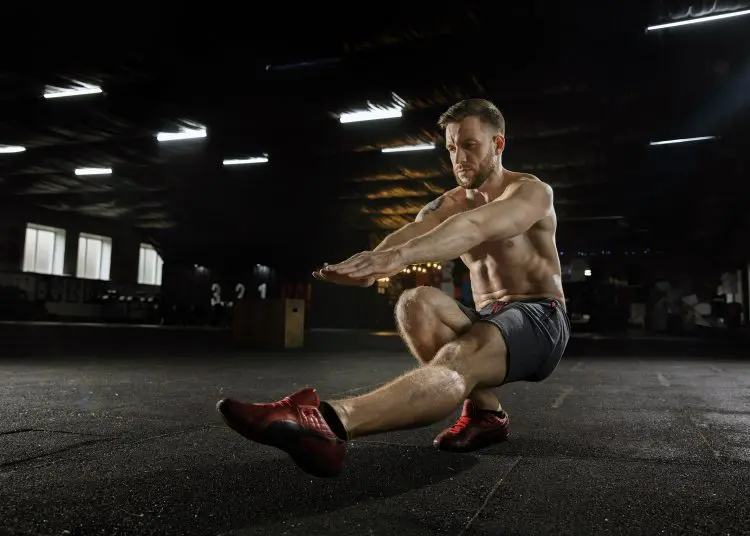
Unilateral or single-limbed exercises are much harder than their bilateral (two-limbed) counterparts. For example, just because you can do 30 push-ups does not mean you’ll be able to do 15 single-arm push-ups. In fact, you may not be able to do any at all.

Because you’ll have to work much harder to stabilize your joints, balance, and coordinate your movements, unilateral exercises make a little weight go a long way. Single-limb exercises that are just as effective as the two-limbed versions but use less weight include:
- Single-leg squats
- Single-arm dumbbell bench press
- Single-arm unsupported bent-over rows
- Single-arm shoulder press
If you find that heavy bench presses, squats, etc., hurt your joints, try the unilateral version. They’re usually harder, so you won’t be able to use as much weight. As an added benefit, single-limb exercises are good for increasing stability, a lack of which is a common source of joint pain.
Wrapping Up
It doesn’t matter if we’re talking elbow, shoulder, hip, knee, or back pain; things like arthritis and tendonitis are no one’s idea of fun. After all, exercise should be good for you and enjoyable, and not cause you harm!
That said, one of the downsides of living a healthy, active lifestyle is that it exposes your body to more wear and tear. This can cause acute and chronic problems. When it comes to joint pain, prevention is your best line of defense, but that’s not always possible. As regular exercisers, we ask a lot from our bodies.
In many cases, using the nine tried-and-tested strategies in this article will help alleviate joint pain and allow you to continue training. You probably won’t need to use these approaches indefinitely, either. Instead, use them as needed.
Remember, though, training through joint pain may make things worse, so speak to your doctor if your pain is severe or long-lasting. That way, you can rule out any serious underlying medical conditions.


