Walk into any gym, and you’ll find a plethora of machines and equipment, such as dumbbells, kettlebells, barbells, cables, and treadmills. While all these training tools can be effective, they are not essential for achieving your fitness goals.
As a personal trainer with over 35 years in the field, I can confidently say that you can get in great shape using just your body weight and an exercise mat. These allow you to train virtually every muscle in your body right from the comfort of your home. Alternatively, you can stuff your exercise mat inside your bag and train at the park or the beach.
In this article, I reveal some of the best mat exercises for your upper body, lower body, and core. Use these exercises in your mat workouts.
Recent Updates: On June 14, 2024, Fitness Volt’s Senior Editor, Vidur Saini (American Council on Exercise-CPT), updated the article and added actionable expert tips throughout the piece to improve the reader experience.
14 Best Mat Exercises For Your Upper Body, Lower Body, and Core
Add the following exercises to your arsenal:
- Push-Up
- Triceps Dip
- Pike Push-Up
- Shoulder YTIs
- Lunges
- Glute Bridge
- Fire Hydrants
- Donkey Kicks
- Frog Pumps
- Plank
- High Bird Dog
- Oblique Crunch
- Butt-Ups
- Bicycle Crunch
4 Best Upper Body Mat Exercises
When it comes to upper body exercises, most people gravitate toward barbells, dumbbells, and machines. However, you can get a pretty good workout using nothing but an exercise mat.
1. Push-up
| Sets & Reps | Target Muscles |
| 3 x 8-12 | Pectoralis major, triceps brachii, anterior deltoids |
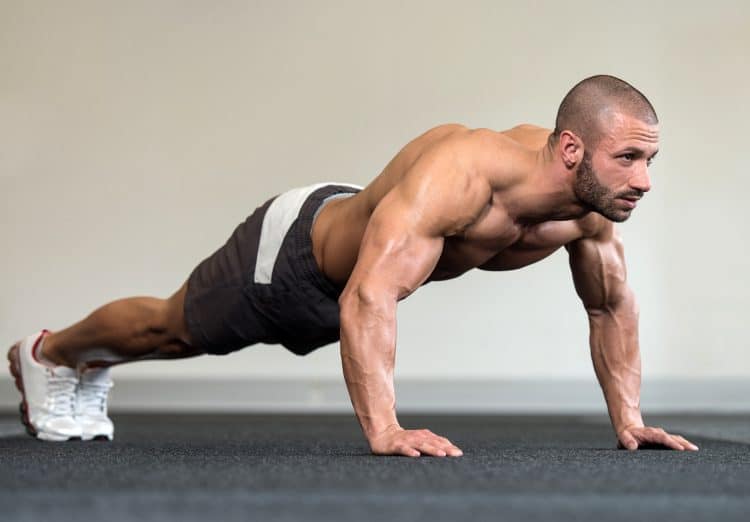
While you don’t need a mat for push-ups, using one may make your workout more comfortable and effective. With a mat, you have a padded surface for your hands and a handy reference point to ensure you always do push-ups with the same hand position.
Varying hand positions in your push-up routine (wide, narrow, staggered) is more effective for overall chest development than simply increasing the number of reps with a standard hand placement, says Saini.
How to do it:
- Squat down and place your hands on the mat, fingers pointing forward. Your hands should be roughly shoulder-width apart.
- Walk your feet back, so your body is straight.
- Brace your abs and pull your shoulders down and back.
- Bend your arms and lower your chest down to within an inch of the mat. Do not thrust your head down toward the floor. Instead, keep your neck neutral.
- Extend your arms and push yourself back until your elbows are straight but not locked.
- Repeat for the desired number of reps.
- Make push-ups easier by bending your legs and resting on your knees. The closer your knees are to your hands, the easier push-ups become.
Pro Tip: At the top of the push-up, actively protract your scapulae (push your chest forward and round your upper back) to fully engage the serratus anteriorly and maximize muscle fiber recruitment.
| Difficulty | Progression | Regression |
| Beginner | Incline push-ups, knee push-ups | Wall push-up |
2. Triceps dip
| Sets & Reps | Target Muscles |
| 3 x 8-12 | Triceps brachii |
Dips are usually done on parallel bars, on the edge of a chair or exercise bench, or with a special dip machine. However, you can also do this exercise on an exercise mat. Triceps dips are a good exercise for toning and strengthening the muscles on the back of your arms.
Saini recommends using 3-4 seconds on the eccentrics to promote greater muscle damage and subsequent growth.
How to do it:
- Sit on your exercise mat. Bend your legs and place your feet flat on the floor. Put your hands flat on the floor by your hips, so your fingers are pointing forward.
- Lift your butt off the floor, so your weight is supported on your hands and feet only.
- Bend your arms and lower your butt down toward the floor, and your elbows are bent to around 90 degrees.
- Extend your arms and repeat.
Pro Tip: Make sure your chest aligns with your hands throughout the range of motion for optimal muscle fiber recruitment.
| Difficulty | Progression | Regression |
| Beginner | Parallel bar dips | Table top hold |
3. Pike push-up
| Sets & Reps | Target Muscles |
| 3 x 8-12 | Anterior deltoids, triceps brachii, pectoralis major (upper) |
Regular push-ups work your chest, shoulders, and triceps. Pike push-ups increase shoulder muscle activation and simulate doing overhead presses with weights. While this is a challenging exercise, if you want stronger, shapelier shoulders, pike push-ups will help!
“You need decent thoracic spine mobility for this exercise,” says Saini. A proper pike position requires adequate shoulder flexion, which can be limited by a tight upper back.
How to do it:
- Adopt the push-up position with your arms and legs straight, and your core braced. Your hands should be around shoulder-width apart.
- Lift your hips up toward the ceiling, so your body forms an inverted V.
- Bend your arms and lower your head down toward the floor.
- Extend your arms and repeat.
Pro Tip: Maintain a hollow body position throughout the movement (abs engaged, back slightly rounded) to enhance shoulder stability and prevent excessive lumbar extension.
| Difficulty | Progression | Regression |
| Intermediate | Handstand push-up | Incline push-up, wall push-up |
4. Shoulder YTIs
| Sets & Reps | Target Muscles |
| 3 x 10-15 | Deltoids (all heads), trapezius |
Shoulder YTIs are three exercises rolled into one. They work your upper back and shoulders and are very good for your posture. Best of all, the only thing you need to do this exercise is a comfortable mat.
“While this is a great exercise to stimulate the three delt heads, don’t forget to incorporate like pike presses and push-ups into your routine for overall shoulder strength and development,” advises Saini.
How to do it:
- Lie prone on your mat with your forehead resting on the floor. Extend your arms in front of you, so your hands are slightly wider than shoulder-width apart and form a Y shape. Point your thumbs up toward the ceiling.
- Keep your arms straight, raise them a few inches off the floor and lower them again. Repeat 10-15 times.
- Next, move your arms down, so your hands are level with your shoulders. Your body should now look like a T. Raise your arms a few inches off the floor and then lower them again. Repeat 10-15 times.
- Finally, move your arms down by your sides to form an I shape. As before, lift your arms a few inches off the floor and then lower them. Repeat 10-15 times.
Pro Tip: Focus on initiating each raise from your posterior deltoids to ensure proper muscle activation and prevent over-reliance on the anterior deltoid.
| Difficulty | Progression | Regression |
| Beginner | Light dumbbells | Planks |
5 Best Lower Body Mat Exercises
Barbell back squats, leg presses, and deadlifts are among the best lower body exercises you can do. But, on the downside, you need equipment to do them. The good news is you can also work your legs with just an exercise mat.
1. Lunges
| Sets & Reps | Target Muscles |
| 3 x 8-12 | Quadriceps, hamstrings, gluteus maximus |
You don’t need a mat for lunges, but they can improve its effectiveness. Use your mat to ensure you take the same length step for every rep. Also, if you inadvertently lower your back knee to the floor, using a mat could help prevent bruises.
Saini adds that lunges aren’t just a lower-body exercise. They also heavily engage the core muscles, making them a great functional movement for improving stability and balance.
How to do it:
- Stand with your toes against the side edge of your exercise mat. Pull your shoulders down and back and look straight ahead.
- Step forward and across your mat, so your heel lands just past the opposite edge.
- Bend your legs and lower your rear knee down to about an inch above the mat. Your front shin and torso should remain relatively vertical.
- Push off your front leg and return to the starting position.
- Do your next repetition with the opposite leg.
- Alternate legs for the duration of your set.
Pro Tip: Drive through your heel as you push back to the starting position, emphasizing gluteus quadriceps stimulation.
| Difficulty | Progression | Regression |
| Beginner | Bodyweight lunges | Static lunges |
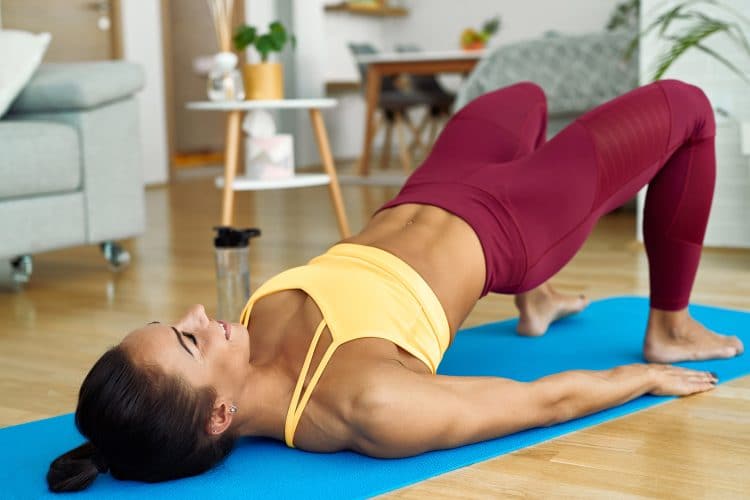
2. Glute bridge
| Sets & Reps | Target Muscles |
| 3 x 12-15 | Gluteus maximus, hamstrings |
Glute bridges target your hamstrings and glutes. While this is a straightforward exercise, it’s still an effective one. Make it even better by wearing a booty band around your legs to increase glute muscle activation.
“While the barbell hip thrust is often considered the superior glute exercise, the glute bridge is a valuable bodyweight alternative for people who train at home,” says Saini.
How to do it:
- Lie on your exercise mat with your legs bent and feet flat. Your feet should be about shoulder-width apart.
- Push your feet into the floor and lift your hips up toward the ceiling.
- Lower your butt back down to the floor and repeat.
- You can also do this exercise unilaterally, i.e., one leg at a time.
Pro Tip: Pause at the top of the bridge and squeeze your glutes to maximize muscle activation and improve mind-muscle connection.
| Difficulty | Progression | Regression |
| Beginner | Single-leg glute bridge | Fire hydrants |
Read also: Best glute bridge alternatives
3. Fire hydrants
| Sets & Reps | Target Muscles |
| 3 x 15-20 | Gluteus medius, gluteus minimus, tensor fasciae latae |
Fire hydrants work the outside of your hips and thighs, which can help give you a shapelier butt. This exercise is often overlooked but is crucial for strengthening the gluteus medius, a key stabilizer of the hip joint that can help prevent knee pain and injuries.
How to do it:
- Kneel on your mat on all fours so your shoulders are over your hands and your hips are over your knees. Your knees and hands should be roughly shoulder-width apart. Brace your core and look straight down at the floor.
- Lift one knee and inch off the floor and raise it up and out to the side, taking care not to twist your shoulders or hips.
- Return to the starting position and repeat.
- Do the same number of repetitions on both legs.
Pro Tip: Externally rotate your hip (turn your knee outward) as you lift your leg to increase gluteus medius activation and reduce tension on the tensor fasciae latae (TFL).
| Difficulty | Progression | Regression |
| Beginner | Ankle weight variations | Seated hip abduction |
4. Donkey kicks
| Sets & Reps | Target Muscles |
| 3 x 15-20 | Gluteus maximus, hamstrings |
Donkey kicks are very similar to fire hydrants, but you push your leg back and up instead of lifting your leg out to the side. This increases glute and hamstring activation.
However, as both exercises are equally effective, you could alternate between them to work your butt from all available angles, i.e., do one rep of fire hydrants followed by one rep of donkey kicks.
How to do it:
- Kneel on your mat on all fours so your shoulders are over your hands and your hips are over your knees. Your knees and hands should be roughly shoulder-width apart. Brace your core and look straight down at the floor.
- Lift one knee an inch off the floor, and then, keeping your leg bent, push your heel back and up toward the ceiling. Take care not to hyperextend your spine.
- Return to the starting position and repeat.
- Do the same number of repetitions on both legs.
Pro Tip: At the top of the kick, flex your foot and point your toes downward to maximize glute contraction and enhance the mind-muscle connection.
| Difficulty | Progression | Regression |
| Beginner | Weighted variation | Fire hydrants |
5. Frog pumps
| Sets & Reps | Target Muscles |
| 3 x 15-20 | Gluteus maximus, adductors |
Frog pumps are one of the most all-encompassing glutes and hip mat exercises you can do. They combine hip extension with external rotation to work multiple lower body muscles. If you need a quick but effective glute workout, this is the one to choose.
“This exercise is a great option for individuals with lower back pain, as it provides intense glute activation without putting any stress on the spine,” says Saini.
How to do it:
- Lie supine on your mat with your legs bent, knees apart, and feet pressed together so you look a little like a frog.
- Push your knees outward, drive the outside of your feet into the floor, and lift your hips up toward the ceiling.
- Lower your butt back down to the floor and repeat.
Pro Tip: Drive your heels together and maintain continuous tension in your glutes throughout the entire set to maximize TUT.
| Difficulty | Progression | Regression |
| Beginner | Hip thrusts | Glute bridge |
5 Best Core Mat Exercises
The core is the collective term for the midsection muscles. These include the rectus abdominis, transverse abdominis, obliques, and erector spinae muscles. A strong core can help prevent back pain as these muscles help stabilize your spine. Additionally, a well-developed core can help give you a toned abdomen and waist.
1. Plank
| Sets & Reps | Target Muscles |
| 3 x 30-60 seconds | Core (rectus abdominis, transverse abdominis, obliques) |
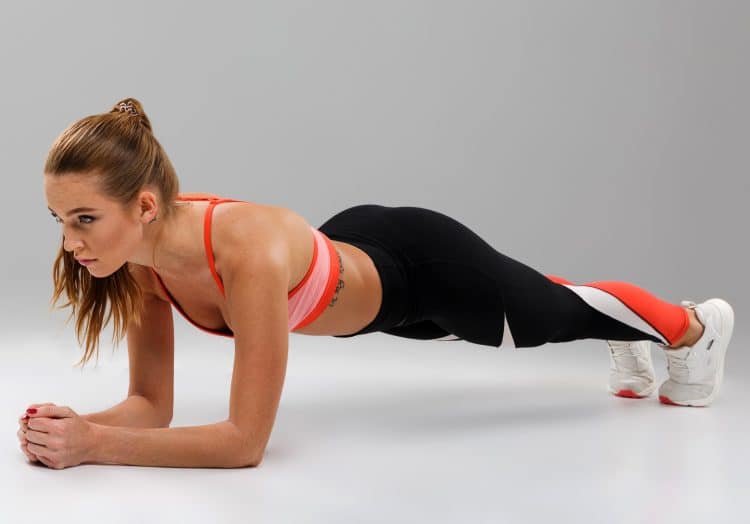
Planks are a classic core exercise. They teach you to brace your abs and stabilize your spine. All you need for planks is an exercise mat, making them the perfect exercise for home workouts.
“The plank is a fantastic anti-extension exercise, meaning it teaches your core to resist the tendency to arch your lower back, a common problem that can lead to pain and injury,” says Saini.
How to do it:
- Lie on your front on your exercise mat. Rest your upper body on your elbows and forearms. Brace your abs.
- Straighten your body and lift your hips off the floor.
- Maintain this position for the desired duration, e.g., 30 seconds. Take care not to hold your breath.
- Lower your hips back down to the floor, rest a moment, and repeat.
Pro Tip: Engage your lats by actively pulling your elbows towards your toes. This enhances core stability, protects your spine, and allows you to hold the plank longer.
| Difficulty | Progression | Regression |
| Beginner | Wear a weighted vest | Plank on knees |
2. High bird dog
| Sets & Reps | Target Muscles |
| 3 x 10-12 | Core, glutes, shoulders |
Bird dogs are usually done while kneeling. That’s a decent option for beginners but not usually intense enough for more experienced exercisers. The high bird dog is a much more challenging exercise and should provide a far more intense workout.
Saini suggests thinking of this exercise as a moving plank. It challenges your core stability in a dynamic way, making it a great functional exercise for improving balance and coordination.
How to do it:
- Adopt a high plank position with your arms, legs, and body straight. Brace your core.
- Without twisting your shoulders or hips, lift your left hand and right foot to roughly parallel to the ground. Hold this position for 3-5 seconds.
- Lower your limbs and then repeat on the opposite side.
- Continue alternating sides for the duration of your set.
Pro Tip: Focus on keeping your core braced and maintaining a neutral spine throughout the movement to prevent excessive lumbar extension and minimize the risk of lower back pain.
| Difficulty | Progression | Regression |
| Beginner | Hollow body holds | Planks |
3. Oblique crunch
| Sets & Reps | Target Muscles |
| 3 x 15-20 | Obliques, rectus abdominis |
As you’d expect from an exercise with obliques in its name, oblique crunches train your oblique muscles. While this exercise is pretty straightforward, it’s an effective way to work these all-important muscles.
Instead of focusing solely on the number of reps, prioritize quality contractions and a controlled tempo to maximize oblique activation and minimize momentum, cues Saini.
How to do it:
- Lie on your left side with your hips square, and your legs bent. Place your left hand on the right side of your waist to provide feedback from your working muscles. Put your right hand on the side of your head.
- Use your uppermost abs and obliques to flex your torso and draw your right shoulder down toward your hip. Move slowly and deliberately, contracting your obliques as hard as you can.
- Pause at the top of each rep for 2-3 seconds, lie back down, and repeat.
- Roll over and do the same number of reps on the opposite side.
Pro Tip: Rotate through your thoracic spine (upper back) rather than just your lumbar spine (lower back) to specifically target the obliques and minimize stress on the lower back.
| Difficulty | Progression | Regression |
| Beginner | Knee-raised oblique crunch | Crunches |
4. Butt-ups
| Sets & Reps | Target Muscles |
| 3 x 8-12 | Gluteus maximus, hamstrings |
With no bar to hang from and no captain’s chair to use, you may be wondering how you will do hanging knee and leg raises with nothing but an exercise mat. The good news is that you can work the same muscles with butt-ups. This might not be the most challenging abs exercise, but it can still be effective if you leave it to the end of your mat workout when your muscles are tired.
How to do it:
- Lie on your back. Brace your abs and raise your legs so they are straight and vertical. Press your lower back into the floor. Put your arms on the floor by your sides for balance. Rest your head on the floor to relax your neck.
- Without using your arms, lift your butt off the floor and push your feet up toward the ceiling. Try to keep your legs vertical, as moving them toward your head will make this exercise easier.
- Without dropping your legs, lower your butt back down to the floor and repeat.
- Increase abs engagement by exhaling forcefully as you lift your butt and inhaling as you lower.
Pro Tip: Hold the top position for as long as possible and use slow eccentrics to maximize core stimulation.
| Difficulty | Progression | Regression |
| Beginner | Dragon flag | Lying leg raises |
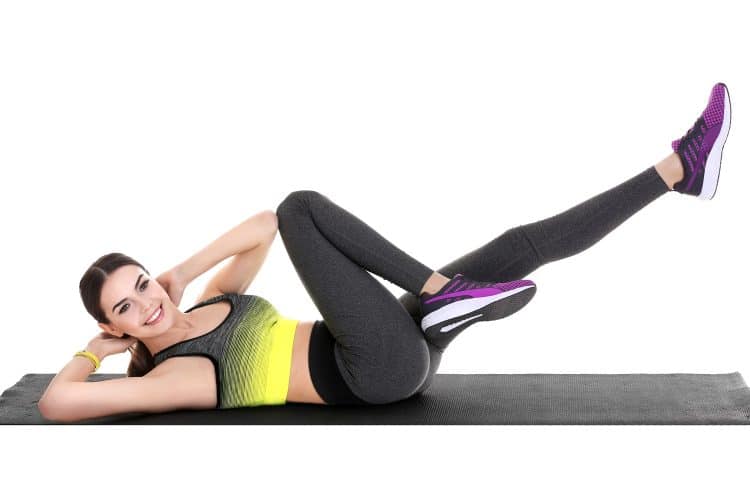
5. Bicycle crunch
| Sets & Reps | Target Muscles |
| 3 x 15-20 | Obliques, rectus abdominis |
Are you looking for a mat exercise that trains your abs and obliques simultaneously? Look no further than bicycle crunches. This is an excellent exercise if you want to work your entire core but don’t have much time to spare.
Don’t let this exercise turn into a neck crunch. Keep your chin tucked and focus on using your abs to initiate each rotation, says Saini.
How to do it:
- Lie on your back with your legs straight. Place your hands on your temples, brace your abs, and lift your feet a few inches off the floor. Press your lower back into the floor.
- Bend one leg and pull your knee in toward you. Simultaneously, lift your head and shoulders, twist your upper body, and touch your opposite elbow to your bent knee.
- Return to the starting position and repeat on the other side.
- Continue alternating legs for the duration of your set.
Pro Tip: Don’t just touch your elbow to your knee. Instead, try to touch your shoulder to your knee to increase the range of motion and further activate the obliques.
| Difficulty | Progression | Regression |
| Beginner | Weighted variation | Lying leg raise |
Best Mat Workout
Perform the following workout once weekly for the best results:
| Exercise | Sets | Reps | Rest (seconds) |
| Pike Push-Up | 3 | 8-12 | 90 |
| Lunges | 3 | 8-12/leg | 60 |
| Butt-Ups | 3 | 8-12 | 90 |
| Plank | 3 | 30-60 sec | 60 |
| High Bird Dog | 3 | 10-12/side | 60 |
Conclusion
While it’s nice to have a gym full of workout equipment at your disposal, you can achieve a high level of fitness armed with nothing but an exercise mat. People have been exercising successfully with just their body weight for thousands of years, and if they did it, so too can you!
While some people may see mat-based workouts are limiting, they really don’t need to be. After all, there are hundreds of great bodyweight mat exercises to try.
So, don’t use lack of equipment as an excuse not to work out. With nothing but an exercise mat for comfort, you can train virtually every muscle in your body.
And best of all, you can do mat-based workouts at home, and once you’ve bought your exercise mat, it won’t cost you a cent!


