Bodyweight training is incredibly effective for building muscle, strength, and overall functionality. That’s not to say that lifting weights is subpar or ineffective. It’s just that getting to the gym is sometimes impractical, leading to inconsistencies.
I’ve been a personal trainer for over 30 years, and during that time, I’ve used every strength training tool you can think of, from dumbbells to barbells to resistance machines to kettlebells to medicine balls. However, calisthenics is the training method I always come back to.
Bodyweight training helps overcome many of the barriers to consistent exercise. You need little, if any, equipment and minimal space, and you can work out almost anywhere. Plus, studies suggest it’s as effective as conventional strength training for hypertrophy. (1)
With that in mind, I will share 15 of my favorite bodyweight exercises in this article and tell you how to make calisthenic training even more effective.
Recent Updates: On June 18, 2024, Fitness Volt’s Senior Editor, Vidur Saini (American Council on Exercise-CPT), updated the article and added actionable expert tips throughout the piece to improve the reader experience. Level Up Your Fitness: Join our 💪 strong community in Fitness Volt Newsletter. Get daily inspiration, expert-backed workouts, nutrition tips, the latest in strength sports, and the support you need to reach your goals. Subscribe for free!
15 Best Bodyweight Exercises
Want to incorporate bodyweight exercises into your training but are unsure where to start? Here are the 15 best bodyweight exercises for building muscle size and gaining strength:
- Deficit Push-Up
- Parallel Bar Dip
- Handstand Push-Up
- Pull-Up And Chin-Up
- Inverted Row
- Rear Foot Elevated Split Squat
- Deficit Reverse Lunge
- Single-Leg Glute Bridge
- Squat Jump
- Sissy Squats
- Single-Leg Calf Raise
- Russian Kettlebell Challenge (RKC) Plank
- V-Sits
- Flutter Kicks
- Lying Windshield Wipers
Upper Body Exercises
There isn’t a bodybuilder alive who doesn’t want a muscular upper body. These exercises will sculpt your pecs, lats, deltoids, and arms.
1. Deficit Push-up
| Sets & Reps | Equipment Needed | Target Muscles |
| 3 x 8-12 | Push-up handles or weight plates | Pectoralis major, triceps brachii, anterior deltoids, core |
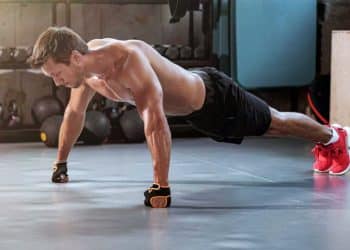
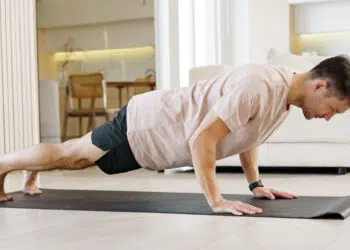
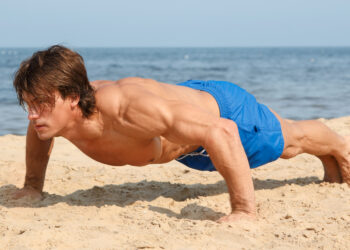
Push-ups are already a very well-known exercise. Still, many lifters ignore them in favor of barbell, dumbbell bench presses, and the chest press machine. That’s a shame because the push-up is such a powerful exercise that it really should be at the top of your must-do list.
There are many different push-up variations to choose from, but deficit push-ups are probably the best place to start. They allow you to use a larger-than-normal range of motion, making them more challenging and better for developing upper body strength and muscle mass.
How to do it:
- Place two dumbbells, yoga blocks, bricks, or thick books on the floor, slightly wider than shoulder-width apart.
- Squat down and place your hands on the raised surface, fingers pointing forward.
- Walk your feet out and back, so your body forms a straight line. Brace your abs and pull your shoulders down and back.
- Bend your arms and lower your chest down below the level of your hands.
- Push yourself back up, shrugging your shoulders forward at the top of each rep.
Pro Tip: At the bottom of the movement, actively protract your scapulae (push your shoulder blades away from each other) to engage your serratus anterior and further activate your chest.
| Difficulty | Progression | Regression |
| Intermediate | Feet elevated deficit push-up, archer push-up | Standard push-up |
2. Parallel Bar Dip
| Sets & Reps | Equipment Needed | Target Muscles |
| 3 x 8-12 | Parallel bars | Pectoralis major, triceps brachii, anterior deltoids |
Before the bench press became the world’s favorite chest exercise, if you wanted to develop your pecs or triceps, dips were how you did it. Parallel bar dips allow for an increased range of motion, and you’ve got to lift your entire body weight using just your arms. As such, the dip is a potent upper body builder.
There are two ways to do parallel dips. One emphasizes your chest, while the other is more triceps-dominant.
Pro Tip: As you descend, lean forward slightly, flare your elbows, and pause at the bottom to maximize muscle stimulation.
| Difficulty | Progression | Regression |
| Intermediate | Weighted dip | Assisted dip (using resistance band) |
3. Handstand Push-up
| Sets & Reps | Equipment Needed | Target Muscles |
| 3 x 5-8 | Wall | Shoulders, triceps, upper pectoralis major |
If you have mastered pike push-ups and are looking for a more challenging bodyweight shoulder exercise, handstand push-ups are the one for you! This exercise develops strength and muscle size and is also good for your balance. However, you must be able to do a solid handstand to do this exercise.
Saini prescribes developing a strong headstand hold before progressing to handstand push-ups to build the necessary neck and shoulder stability.
How to do it:
- Take off your shoes; the last thing you want is to make this exercise harder by creating extra friction against the wall.
- Find a smooth wall to do your push-ups against, and make sure there are no pictures or other obstructions that will get in your way.
- Squat down and place your hands flat on the floor, about shoulder-width apart. Your fingers should be pointing forward. Put a cushion between your hands for safety if you think you need one. Your hands should be about 12 inches away from the wall.
- Starting with one foot forward and one foot back, kick up and into a handstand so that your feet are resting against the wall. Brace your core and get your balance. Keep your legs straight.
- When you feel stable, bend your arms and lower your head down to lightly touch the floor/cushion.
- Extend your arms and push yourself back up.
- On completion, lower your legs back to the floor and stand up. Take a moment to check your balance; it’s not uncommon to feel a little dizzy after doing this exercise.
Pro Tip: Maintain a hollow body position throughout the entire movement. Think about pushing the floor away from you rather than simply pressing your body up.
| Difficulty | Progression | Regression |
| Advanced | Freestanding handstand push-up | Pike push-ups, incline pike push-ups |
4. Pull-up and Chin-up
| Sets & Reps | Equipment Needed | Target Muscles |
| 3 x max reps (or assisted) | Pull-up bar | Latissimus dorsi, biceps brachii, forearm muscles, core |
Pull-ups and chin-ups are classic upper-body pulling exercises. And yet, many lifters struggle to pump out 10 reps, and some can’t do them at all. This could be because they’re too heavy or too weak. Regardless, being able to do 10 pull-ups is a fitness benchmark that every exerciser should be able to reach.
Pull-ups and chin-ups are similar but involve different hand positions. Pull-ups are done with a pronated (overhand) slightly wider than shoulder-width grip, while chin-ups are done with an underhand, less-than-shoulder-width grip. Both work the lats and biceps, but chin-ups place your arms in a mechanically stronger position, so some people find them easier.
Regardless of which you do, pull-ups and chin-ups are almost unbeatable for building a wider, stronger back and more muscular arms.
Pro Tip: Initiate each rep by depressing your scapulae (pulling your shoulder blades down and together) before engaging your arms to maximize target muscle activation.
| Difficulty | Progression | Regression |
| Intermediate | Weighted pull-up/chin-up, L-sit pull-up | Assisted pull-up/chin-up, negatives |
Learn how to do them and the differences between pull-ups and chin-ups here.
5. Inverted Row
| Sets & Reps | Equipment Needed | Target Muscles |
| 3 x 8-12 | Smith machine or suspension trainer | Latissimus dorsi, biceps brachii, rhomboids, trapezius, posterior deltoids |
Inverted rows, also known as Australian pull-ups, are another great upper back and biceps exercise. However, unlike pull-ups and chin-ups, which are vertical pulls, inverted rows are horizontal pulls. Balancing vertical and horizontal pulling movements is vital for building a big, strong back and the structural integrity and health of your shoulders.
As an added benefit, inverted rows are easier than pull-ups and chin-ups, as you don’t need to lift your entire body weight to do them. This means they’re perfect for heavier and less-capable exercisers and for doing after chin-ups and pull-ups when your muscles are fatigued.
Pro Tip: Squeeze your shoulder blades together at the top of each rep and focus on leading with your elbows to maximize back muscle engagement.
| Difficulty | Progression | Regression |
| Beginner | Feet elevated inverted row, one-arm inverted row | Banded rows |
You can read more about this awesome upper-body pulling exercise here.
Lower Body Exercises
While many bodybuilders neglect their lower bodies, we don’t want you to be one of them. After all, friends don’t let friends skip leg day! Instead, use the following bodyweight exercises to build and strengthen your glutes, quadriceps, hamstrings, and calves.
1. Rear Foot Elevated Split Squat
| Sets & Reps | Equipment Needed | Target Muscles |
| 3 x 8-12/leg | Bench | Quadriceps, gluteus maximus |
Rear foot elevated split squats, or Bulgarian split squats, are among the best bodyweight lower-body exercises. Working one leg at a time means there is more weight on the target muscles, and you’ll have to work harder to stabilize your hips and knees, further increasing muscle engagement. This exercise is also very functional and good for improving balance and mobility.
Saini suggests using a wider stance for improved stability and glute activation. The key is finding a comfortable stance that allows for a deep range of motion.
How to do it:
- Stand with your back to a knee-high exercise bench. Bend one leg and place the top of your foot on the bench behind you. Hop forward and into a split stance.
- Bend your legs and lower your rear knee down toward the floor. Keep your back straight and your chest, and look straight ahead. Try to keep your front shin close to vertical, and do not let your knee move beyond your toes.
- Push down through your front foot and stand back up. You should feel that about 60% of your weight is on your front leg, and about 40% is on your rear leg.
- Do the same number of reps on each leg.
Pro Tip: Keep your torso upright and your front knee aligned with your ankle. As you descend, drive your front heel into the ground to activate your glutes and hamstrings.
| Difficulty | Progression | Regression |
| Beginner | Bulgarian split squat | Static lunges |
2. Deficit Reverse Lunge
| Sets & Reps | Equipment Needed | Target Muscles |
| 3 x 8-12/leg | Weight plate | Quadriceps, gluteus maximus, hamstrings |
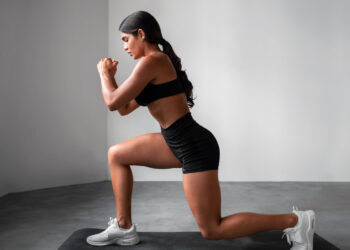
All types of lunges have the potential to be good muscle builders. Still, the reverse deficit lunge is arguably one of the best. Deficit exercises involve a larger range of motion than their regular counterparts, which means more work for the target muscles. Reverse lunges are a great way to overload your glutes and hamstrings and are more knee-friendly than forward lunges.
Saini advises using a slow and controlled eccentric (lowering) phase to maximize muscle damage and promote hypertrophy.
How to do it:
- Stand on a 4 to 6-inch platform with your feet together and your arms by your sides.
- Take a large step backward, bend your legs, and lower your rear knee down to within an inch of the floor.
- Push off your back leg and bring your feet back together on top of your platform.
- Step back with the opposite leg and repeat.
- Alternate legs for the duration of your set.
Pro Tip: Maintain a neutral spine throughout the movement and avoid letting your front knee collapse inward. Step back far enough to create a 90-degree angle in both knees at the bottom of the lunge.
| Difficulty | Progression | Regression |
| Intermediate | Bulgarian split squats | Conventional reverse lunge |
3. Single-Leg Glute Bridge
| Sets & Reps | Equipment Needed | Target Muscles |
| 3 x 10-15/leg | None | Gluteus maximus, hamstrings |
Regular glute bridges are a popular butt and hamstring exercise, but a lot of people find them too easy. Crank up the intensity by switching to single-leg glute bridges to make your workouts more productive.
“Drive through your heel and squeeze your glutes hard at the top of each rep,” says Saini. Pause for a moment to enhance the mind-muscle connection.
How to do it:
- Lie on your back with your legs bent and feet flat on the floor. Lift and extend one leg. Brace your core.
- Driving your heel into the floor, push your hips up until they form a straight line with your knees and shoulders.
- Lower your butt back to the floor and repeat.
- Swap sides and do the same number of reps with the opposite leg.
Pro Tip: Increase the challenge by adding a resistance band around your thighs just above your knees.
| Difficulty | Progression | Regression |
| Beginner | Weighted variation | Conventional glute bridge |
4. Squat Jump
| Sets & Reps | Equipment Needed | Target Muscles |
| 3 x 8-12 | None | Quadriceps, gluteus maximus, hamstrings, calves |
With only your body weight for resistance, regular air squats probably won’t provide enough overload to build muscle or increase your strength. Switching to more explosive squat jumps will increase muscle engagement. You’ll also have to work harder to decelerate your mass as you land, creating another stimulus for growth. You’ll get a great burn and pump in your legs with this exercise.
Saini recommends utilizing the stretch-shortening cycle (SSC) by rapidly transitioning from the eccentric to the concentric phase of the jump to enhance the power output and explosiveness.
How to do it:
- Stand with your feet shoulder-width apart, toes turned slightly outward.
- Descend quickly into a quarter to half-depth squat.
- Using your arms for added momentum, explode upward and leap into the air.
- Land on soft knees to absorb the shock and quickly descend into another rep.
Pro Tip: Focus on exploding upward from a deep squat position, fully extending your hips and knees.
| Difficulty | Progression | Regression |
| Beginner | Box jumps | Bodyweight squat |
5. Sissy Squats
| Sets & Reps | Equipment Needed | Target Muscles |
| 3 x 10-15 | None | Quadriceps |
Sissy squats are an old-school leg exercise that emphasizes your quadriceps. It feels a lot like extensions, but all you need is your body weight to do it. This exercise can be hard on your knees, so perform it cautiously if you have a history of knee pain.
Saini suggests people with knee pain or discomfort perform sissy squats on a slight incline to reduce stress on their joints.
How to do it:
- Stand next to a wall or some other object you can use for balance.
- Rise up onto your tiptoes.
- Push your hips and knees forward and squat down as you simultaneously lean back. Descend as far as you can, ideally until your shins are roughly parallel to the floor.
- Drive your toes into the floor and stand back up.
- Tense your quads at the top of each rep and repeat.
- Without resting, move immediately to the next exercise.
Pro Tip: Keep your heels elevated throughout the movement and lean back as far as possible while maintaining control to ensure maximum quadriceps engagement.
| Difficulty | Progression | Regression |
| Intermediate | Sissy squat with weight held at chest level | Assisted sissy squat |
6. Single-leg Calf Raise
| Sets & Reps | Equipment Needed | Target Muscles |
| 3 x 15-20/leg | Aerobic stepper | Calves |
You can’t have a complete leg workout without training your calves. But, with no calf raise machine to use, you may be wondering how best to overload your lower legs. Single-leg calf raises not only involve lifting more weight but also introduce instability to your workout, which increases gastrocnemius and soleus engagement.
“After you’ve hit mechanical failure on this exercise, perform lengthened partial to maximize gastroc stimulation,” says Saini.
Level Up Your Fitness: Join our 💪 strong community in Fitness Volt Newsletter. Get daily inspiration, expert-backed workouts, nutrition tips, the latest in strength sports, and the support you need to reach your goals. Subscribe for free!
How to do it:
- Stand on one leg with the ball of your foot on the edge of a step so your heel is free to move. Use your arms for balance as required.
- Keeping your leg straight, lower your heel down toward the floor and then rise up onto your tiptoes.
- Continue for the desired number of reps and then change legs.
Pro Tip: Perform the raise on a slight decline to increase the range of motion and stretch your calves fully at the bottom. Pause briefly at the top of each rep to intensify the contraction.
| Difficulty | Progression | Regression |
| Beginner | Weighted single-leg calf raise, double-leg calf raise | Seated calf raise |
Core Exercises
Core is the collective term for the muscles of your midsection. A strong core links your upper body to your lower body. It’s not enough to have strong arms or legs; you need strength in the middle, too. Use these bodyweight core exercises to strengthen your midsection muscles.
1. Russian Kettlebell Challenge (RKC) Plank
| Sets & Reps | Equipment Needed | Target Muscles |
| 3 x 30-60 sec | None | Core |
Planks are an excellent exercise, but if you can hold a perfect plank for more than 60 seconds, it’s probably not challenging enough to increase core strength. And who really wants to hold a plank for three, five, or ten minutes? Talk about boring!
RKC planks involve contracting your core as hard as possible, so you fatigue your muscles much faster. It’s a sprint and not a marathon. This is not only a better use of your time but also an excellent way to increase strength rather than endurance.
Pro Tip: Engage your entire body during the plank, from your toes to your fingertips. This will create a solid foundation and prevent any energy leaks.
| Difficulty | Progression | Regression |
| Intermediate | RKC plank with weight on the back | Standard plank |
You can read more about this challenging core exercise here.
2. V-Sits
| Sets & Reps | Equipment Needed | Target Muscles |
| 3 x 10-15 | None | Core |
V-sits, or V-ups, are challenging upper and lower abdominal exercises. Lifting your legs and upper body simultaneously means your abs are under a lot of muscle-building tension. However, this exercise can be a little hard on your lower back, so skip it if you experience any back pain.
Saini recommends using a yoga block or pillow under your tailbone for support if you have difficulty maintaining proper form.
How to do it:
- Lie on your back with your legs straight and arms above your head. Brace your abs.
- Keeping your arms and legs extended, raise your lower and upper body simultaneously. Reach up toward your toes, so you end up balancing on your lower back/butt, and your body resembles a V shape.
- Like back down and then repeat.
Pro Tip: Keep your legs straight and lift them as high as possible while maintaining a V-shape with your body. Avoid rounding your back and focus on engaging your core throughout the hold.
| Difficulty | Progression | Regression |
| Intermediate | Weighted V-sits | Russian twist |
3. Flutter Kicks
| Sets & Reps | Equipment Needed | Target Muscles |
| 3 x 30-60 sec | None | Core |
Flutter kicks are a tough-as-nails core conditioning exercise popular in the military. This move involves bracing your abs while you kick your legs alternatingly. The kicking motion destabilizes your lower body, forcing you to brace harder and recruit your obliques to maintain correct body alignment.
Saini advises focusing on engaging your core muscles and maintaining a neutral spine throughout the exercise to avoid lower back pain.
How to do it:
- Lie on your back with your legs straight. Place your hands next to your hips or under your butt as preferred. Brace your abs.
- Keeping your legs straight, lift your feet about 18 inches off the floor. Press your lower back into the floor.
- Without bending your knees, kick your legs as if you were swimming. Four kicks equal one rep, so 1, 2, 3, 1– 1, 2, 3, 2, – 1, 2, 3, 3, etc.
- Continue for the desired duration or until you cannot keep your lower back flat on the floor.
Pro Tip: Maintain a posterior pelvic tilt (tuck your tailbone under) to flatten your lower back against the ground. Keep your legs straight and raise them a few inches off the floor, focusing on controlled movement rather than speed.
| Difficulty | Progression | Regression |
| Beginner | Straight leg raises, hanging leg raises | Bent-knee flutter kicks |
4. Lying Windshield Wipers
| Sets & Reps | Equipment Needed | Target Muscles |
| 3 x 10-15 | None | Obliques, core |
Lying windshield wipers are a challenging core exercise that specifically targets your obliques. It’s a great home alternative to equipment-based core exercises like dumbbell side bends, cable Pallof presses, and cable woodchops. Be warned; this exercise is more strenuous than it looks!
To increase the difficulty, try lifting your head and shoulders off the ground as you perform the movement, cues Saini. This will challenge your core muscles even more.
How to do it:
- Lie on your back with your legs straight, and arms extended out to your sides. Brace your core and lift your legs so they’re vertical.
- Using your arms for balance, rotate your hips and lower your legs down to the side until they’re just above the floor and close to your outstretched hand.
- Return to the starting position and then repeat to the other side.
Pro Tip: Initiate the movement from your obliques and avoid using momentum to swing your legs. Keep your lower back pressed into the ground throughout the entire exercise.
| Difficulty | Progression | Regression |
| Intermediate | Hanging windshield wipers, weighted windshield wipers | Bent-knee windshield wipers |
Best Bodyweight Workout For Size and Strenght
Build a jacked physique using this bodyweight-only workout:
| Exercise | Sets | Reps | Rest (seconds) |
| Pull-Up and Chin-Up (Alternating) | 3 | Max reps | 90-120 |
| Rear Foot Elevated Split Squat | 3 | 8-12/leg | 60-90 |
| Deficit Push-Up | 3 | 8-12 | 60-90 |
| Inverted Row | 3 | 8-12 | 60-90 |
| Single-Leg Glute Bridge (Alternating) | 3 | 10-15/leg | 60-90 |
| Lying Windshield Wipers | 3 | 10 per side | 60-90 |
How to Make Bodyweight Exercises More Productive and Challenging
The best thing about bodyweight exercises is also their biggest drawback — your body weight. Using a fixed weight means it can be hard to progress your workouts without resorting to doing more reps.
Use the following methods to increase the difficulty of your bodyweight workout. You may not be able to use all of these methods for every exercise. However, there should still be enough options to ensure that your workouts are always challenging and productive.
1. Slow Down
Moving more slowly does two things; it means each rep takes longer to perform, and it eliminates all momentum, so you can’t inadvertently cheat your way through your workout. So, instead of using a typical 1:1 tempo (lift in one second, lower in one second), try a 2:2, 3:3, or even a 5:5 tempo. Slowing down makes any dynamic movement much harder.
2. Add Mid-Rep Pauses
Like using a slower tempo, mid-rep pauses increase your time under tension and eliminate momentum. Plus, you’ll need to work harder to get your body moving again after each pause, increasing muscle activation.
To do paused reps, simply stop at the mid-point of your chosen exercise for 2-5 seconds. For example, during push-ups, pause with your chest hovering an inch above the floor, or, with rear foot elevated split squats, pause with your knee an inch above the floor.
Just make sure that, when you pause, your muscles are under tension. There would be no point in pausing with your limbs straight or unloaded, e.g., at the bottom of a pull-up.
3. Do 21s
Bodybuilders do 21s with biceps curls, but you can apply this training method to almost any exercise. Divide your chosen movement into two parts — an upper half and a lower half. Do seven upper-range reps, seven lower-range reps, and then seven reps to total 21.
21s increase time under tension and partially reduces blood flow into your muscles, starving them of oxygen and producing fatigue.
4. Take Shorter Rests Between Sets
The longer you rest between sets, the more recovered you’ll be, and the easier subsequent exercises will feel. Work harder by taking shorter breaks between sets so that you are more fatigued when you start pumping out the reps.
You can use this method in a very structured fashion to create progressive overload. For example, instead of resting 60 seconds between sets, start reducing your rest periods over a period of weeks to make your workouts harder, i.e.,
- First week: 60 seconds
- Second week: 55 seconds
- Third week: 50 seconds
- Fourth week: 45 seconds
- …so on
5. Do Back-to-Back Supersets
Make your bodyweight workouts harder by pairing similar exercises together into supersets. This means you’ll start your second exercise already feeling tired, which will make it considerably more demanding.
For example
- Sissy squats followed by squat jumps
- Dips followed by push-ups
- RKC planks followed by flutter kicks
Make sure that the second exercise is easier than the first so that you aren’t too tired to perform the second movement properly.
6. Wear a Weighted Vest
A weighted vest will make any bodyweight exercise harder. Simply strap it on and get to work! However, a little weight goes a long way, so don’t go too heavy too soon. Instead, start with about 10 percent of your body weight and increase gradually after that.
No weighted vest? That’s okay; just load a few bottles of water for a low-tech/low-cost alternative.
Check out this guide to the best-weighted vests for more details on this useful training tool.
Benefits of Bodyweight Training
A lot of bodybuilders and experienced lifters are very quick to dismiss bodyweight exercises, believing that they’re not challenging enough to be effective. Bodyweight training is, many people think, only suitable for beginners.
However, this point of view is not necessarily true, and there are some great bodyweight exercises that are perfect for packing on muscle or increasing strength.
Bodyweight exercises are the foundation of strength training, and you should master working with your body before progressing to weights. After all, if you can’t do push-ups or air squats correctly, you can’t expect to do bench presses, or barbell back squats correctly, either.
In addition, you can do most bodyweight exercises anywhere and anytime, making them useful for whenever you can’t make it to the gym. Bodyweight exercises also tend to be pretty joint-friendly, as movements are usually more natural than many machine and free-weight exercises.
But, can you really build muscle size and strength with bodyweight exercises?
You bet!
According to research, provided you perform your chosen bodyweight exercise using a full range of motion and take each set to failure, it will trigger the same response as other forms of strength training. (2)
Another study compared bench presses and push-ups and found that these two different exercises were similarly effective for developing mass and strength (3).
FAQs
1. Are bodyweight exercises really as effective as lifting weights?
Your body is capable of plenty of incredible feats, but differentiating between different types of resistance training is not one of them! Providing you expose your muscles to sufficient work and tension, they will respond by getting stronger and bigger.
Consequently, it doesn’t matter whether you are lifting a carefully calibrated barbell or your own body weight; work hard and be consistent, and your training will pay off.
Does this mean that bodyweight training is better than lifting weights? Probably not. But it’s arguably as effective, giving you another training option to use.
2. Are bodyweight exercises safe?
All types of exercise come with a risk of injury. This is especially true if you use sloppy form or too much weight. Drop a barbell across your chest, and you run the risk of serious injury.
However, bodyweight exercises are one of the safest ways to train for strength and muscle mass. The movements are natural, and you can adapt them to match your fitness level and abilities. Additionally, there are no weights to drop.
So, while no type of training is 100% safe, the risk of injury with most bodyweight exercises is very low.
3. What are some good bodyweight workout programs to try?
In my experience, one of the reasons that people fail to get good results from bodyweight training is that they don’t follow a program. Instead, they do a few weeks of pull-ups, push-ups, and air squats and then wonder why they’re not jacked or ripped.
Consequently, to get good results from any type of training, including bodyweight exercises, you need to follow a plan. Thankfully, there are lots to choose from!
Here is an article detailing 11 of the best FREE calisthenic routines, all of which are tried, tested, and proven to work. Also, check out our archives for At-Home Workouts And Exercises.
Related: Calisthenics Workout Plan: A Beginner’s Guide
4. What is the best diet when doing bodyweight exercises?
Contrary to what you might have heard, there is no single best diet for bodyweight training or calisthenics. Rather, your diet should support your workouts and your exercise goals.
This means creating a calorie deficit if you want to lose weight or eating more to create a calorie surplus to gain weight. You also need to consume sufficient protein to fuel muscle recovery and growth. Ideally, your diet should be high in natural foods and low in sugar and processed junk.
Remember, food is not just a source of energy, it also provides you with the nutrients you need to be healthy.
Finally, make sure that your diet, like your workouts, is sustainable and something you enjoy. if you can’t stick to your diet, it doesn’t matter how good it seems – it won’t produce the results you are looking for.
Related: Fix Your Diet in Six Weeks!
Wrapping Up
Contrary to popular opinion, bodyweight exercises aren’t just suitable for beginners. No matter how long you’ve been training, you can build muscle and strength with bodyweight training, even if you have to use some workout intensifiers to make your workouts intense enough to be productive.
So, whether you are unable to make it to the gym or just want an alternative to lifting weights, it’s good to know that bodyweight exercises can be as productive as regular strength training.
References:
1 – Kotarsky CJ, Christensen BK, Miller JS, Hackney KJ. Effect of Progressive Calisthenic Push-up Training on Muscle Strength and Thickness. J Strength Cond Res. 2018 Mar;32(3):651-659. doi: 10.1519/JSC.0000000000002345. PMID: 29466268.
2 – Counts BR, Buckner SL, Dankel SJ, Jessee MB, Mattocks KT, Mouser JG, Laurentino GC, Loenneke JP. The acute and chronic effects of “NO LOAD” resistance training. Physiol Behav. 2016 Oct 1;164(Pt A):345-52. doi: 10.1016/j.physbeh.2016.06.024. Epub 2016 Jun 18. PMID: 27329807.
3 – Calatayud J, Borreani S, Colado JC, Martin F, Tella V, Andersen LL. Bench press and push-up at comparable levels of muscle activity results in similar strength gains. J Strength Cond Res. 2015 Jan;29(1):246-53. doi: 10.1519/JSC.0000000000000589. PMID: 24983847.



Great Demonstration I love the challenge