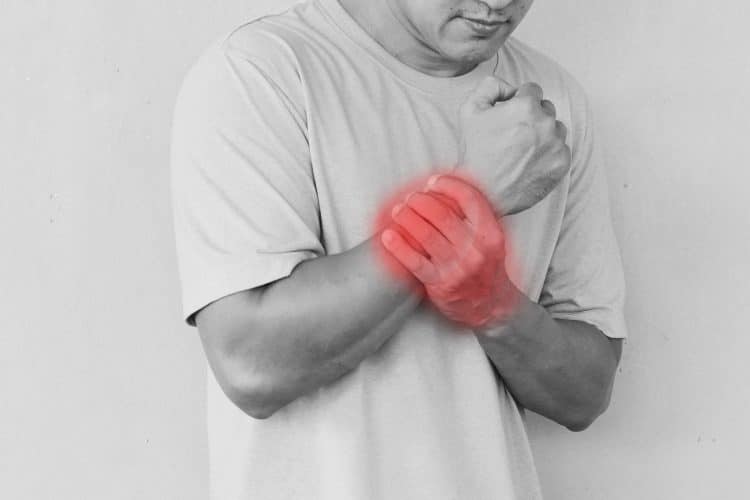
Most people have heard of shin splints. Well, we can splint our forearms too. It happens when the muscles, tendons, or ligaments become strained or sprained. Weightlifters, tennis players, and gymnasts are susceptible, but anyone can suffer from this painful condition.
Do you experience a throbbing sensation close to your elbow while lifting weights? If so, there’s a good chance you’re suffering from forearm splints.
In this article, you’ll learn everything you need to know about forearm splints, including five tips on preventing the injury.
What Causes Forearm Splints
Forearm splints are stress fractures caused by the overuse of tendons, joints, and tissues in your forearm. There are two forearm bones, the ulna and the radius. A fracture in either of these bones could cause a forearm splint.
Here are the most common causes of forearm splints.
- The repetitive nature of weight training makes gymgoers susceptible to forearm splints. While curling heavy weight, you’re putting your biceps and forearms under direct pressure.
- Repetitive manual labor work, like digging or carrying a wheelbarrow can cause forearm splints.
- Inflammation or injury to tendons.
- Overstretching of the elbow joint.
- Nerve entrapment that causes painful compression resulting from repetitive wrist movement.
- A fall injury that results in a forearm bone fracture.
- A condition such as angina or arthritis.
Related: Skinny Forearms? Build Your Lower Arms with These 13 Exercises and Workout!
Symptoms of Forearm Splint
The first sign of a forearm splint is a deep, throbbing pain in the forearm, close to the elbow. The pain will feel like it’s originating from the elbow rather than the forearm itself.
For gymgoers, this pain usually occurs when they grip a barbell, dumbbell, or kettlebell. Repetitive lifting with a forceful grip will only make the pain worse.
A forearm splint is similar to a golfer’s elbow. In the case of a forearm splint, muscles of the forearm flexors go into spasm after being lengthened suddenly from a relaxed position. Extending the wrist, elbow, and fingers while in spasm lengthens and stretches these flexor muscles and can cause pain.
Here are six more common symptoms that you may be suffering from a forearm splint:
- Loss of strength in the lower arm.
- Pain when your try to grip an object.
- Stiffness in the forearm, especially first thing in the morning.
- A feeling of numbness in the wrist, fingers, hand, or elbow.
- A burning sensation when you put pressure on the forearm.
- A lump developing over an inflamed forearm muscle.
Must Read: How To Prevent Forearm Pain When Curling
Diagnosis of Forearm Splints
Forearm splints do not generally go away on their own. If you are experiencing throbbing pain in your upper forearm, you should see a doctor. Here are some tests your doctor might request —
1. X-ray
The doctor usually begins by asking what you were doing when you experienced the pain and where the pain is focused. They might follow it up with a touch test to determine the exact location of the pain, followed by an x-ray. This will provide the doctor with a two-dimensional image of bones in the lower arm, as well as muscles and joints.
2. MRI
If the doctor is still unsure of the underlying cause of the problem, he may order a magnetic resonance image or MRI. This will provide an even more detailed view of the bones, muscles, and tissue.
3. Ultrasound
The third imaging test a doctor might request is an ultrasound which uses sound waves and an electronic transducer to look at your arm tissues in real-time.
Check Out: Meet Jeff Dabe: The Real Life Popeye With Unbelievable 19 Inch Forearms
Treatment
After the doctor diagnoses a forearm splint, they will likely prescribe the recommended treatment, which might consist of the well-known RICE method.
RICE stands for rest, ice, compression, and elevation.
Rest
It is important to provide your forearm with the time needed to rebuild the crack in the bone, meaning you might have to hold off weight training for a while.
Because most upper body exercises involve holding onto weight, you’ll have to stop training your upper body during recovery. You should, however, be able to train your legs.
Ice
Ice will reduce the swelling around the pain point. During the initial phase of the injury, you should ice the pain area every couple of hours for twenty minutes at a time.
Compression
You should also consider compressing the injury site. A compression forearm sleeve might come in handy. As a result of the enhanced bracing and improved venous blood flow, which removes waste products from the area more quickly, you might notice an improvement in the pain. However, you do not want a compressive sleeve that is overly restrictive, as this might cut off blood flow to the affected area.
Elevation
During your recovery period, you should try to keep your forearm elevated. It doesn’t need to be excessively high, though. When you’re seated, place a couple of pillows under your elbow. The elevation will help reduce the swelling.
The doctor may also prescribe NSAIDs, or non-steroidal anti-inflammatory drugs if you are experiencing a lot of pain.
How to Avoid Forearm Splints
Here are three ways to avoid forearm splints:
1. Don’t Overwork Your Forearms
You could prevent forearm splints by avoiding doing too many reps on exercises that focus on your forearms such as the bicep curl and deadlift. Also, ensure that you’re giving your forearms enough time to recuperate between sets and workouts.
2. Strengthen the Forearm Flexors
By doing specific exercises to strengthen your forearm flexors, you will be able to reduce your injury risk. Stronger forearm muscles will reduce the load on the bone and the joints.
The muscles of the forearms can be divided into four parts:
- Flexors
- Extensors
- Rotators
- Extrinsic muscles
Forearm anatomy is very complicated. However, wrist mechanics are relatively simple. It bends forward (flexion) and backward (extension). Secondary movements are abduction (moving the hand toward the body) and adduction (moving the hand away from the body). The best exercises to strengthen the forearms involve bending (flexing) and extending the wrists.
Here are four exercises to strengthen the forearms and wrists:
1. Wrist Curls
- Sit on the edge of a bench with a barbell held in a palms-up grip. Your hands should be about 10 inches apart. Rest your forearms on your knees with your wrists hanging over the edge of your knees. Make sure that the forearms are parallel to the floor throughout the movement.
- Extend your wrists down all the way as you allow the bar to roll down your fingers.
- From the bottom position, flex your forearms to bring the bar back to the start position.
- Do three sets of 12-15 reps.
2. Reverse Wrist Curls
- Sit on the edge of a bench with a barbell held in a palms-down grip. Your hands should be about 10 inches apart. Rest your forearms on your knees with your wrists hanging over the edge of your knees. Make sure that the forearms are parallel to the floor throughout the movement.
- Extend your wrists down all the way as you allow the bar to roll down your fingers.
- From the bottom position, flex your forearms to bring the bar back to the start position.
- Do three sets of 12-15 reps.
I prefer to use an EZ curl bar on reverse wrist curls. As the hands extend upward, the knuckle of the pointer finger stays higher than the knuckle of the pinkie (little finger). This makes it quite uncomfortable to use a straight bar. An EZ curl bar allows your hands to remain in their natural position, reducing wrist strain.
3. Wrist Adduction
- Stand with your arms by your sides, holding a pair of light dumbbells in each hand.
- Without bending your elbows, adduct your hands to bring your thumbs upward.
- Lower and repeat.
- Do three sets of 12 reps.
4. Wrist Abduction
- Kneel on the floor with your forearms resting on a bench and your wrists hanging over the edge of the bench facing down. You should have a pair of light dumbbells in your hands. Your thumbs should be about eight inches apart.
- Twist the wrists to bring your thumbs up and away from your body.
- Lower and repeat.
- Do three sets of 12 reps.
3. Stretching
Stretching can help remove lactic acid and toxins from the forearm injury site. Here are three simple stretches you can do daily:
1. Forearm Flexor / Extensor (Stretch One)
- Hold your arm out straight in front of you and bend the wrist and fingers towards and then away from you using the other hand.
- Hold for three to five seconds and repeat six to 10 times.
2. Forearm Flexor (Stretch Two)
- Sit on a chair with your forearm resting on a table, palms facing up. Your hand and wrist should be over the edge of the table.
- Use the other to push down on the bend of the wrist until you feel a gentle stretch.
- Hold for three to five seconds and repeat six to 10 times.
3. Wrist Flexion Stretch
- Place the back of your hand on a table.
- Gently push your arm forward to stretch the outside of the wrist and forearm.
- Hold for three to five seconds and repeat six to 10 times.
Related: Best Forearm Exercises
Summary
When you return to the weights after a forearm splint injury, use lighter weights for gripping exercises.
Over a period of weeks, gradually build up to what you were lifting before the injury while regularly performing the strengthening and stretching exercises covered in this article.
References
Fitness Volt is committed to providing our readers with science-based information. We use only credible and peer-reviewed sources to support the information we share in our articles.
- Najafi, M., Arazpour, M., Aminian, G., Curran, S., Madani, S. P., & Hutchins, S. W. (2015). Effect of a new hand-forearm splint on grip strength, pain, and function in patients with tennis elbow. Prosthetics and Orthotics International, 40(3), 363–368. https://doi.org/10.1177/0309364615592694
- What Is the RICE Method for Injuries? (2017, May 23). WebMD. https://www.webmd.com/first-aid/rice-method-injuries


