It is no secret that push-up is one of the most versatile exercises. The newbies mostly use the exercise as a foundational movement to build upper body strength and advanced lifters benefit from it by using it as a warmup or a way to annihilate their muscles during or after a workout as a finisher.
When it comes to building upper body muscle mass, strength, and endurance, there’s more than one way to skin the cat. You could get a membership to your fancy local gym for access to sophisticated training equipment, or you could buy a budget-friendly push-up board for your home gym and workout at your convenience.
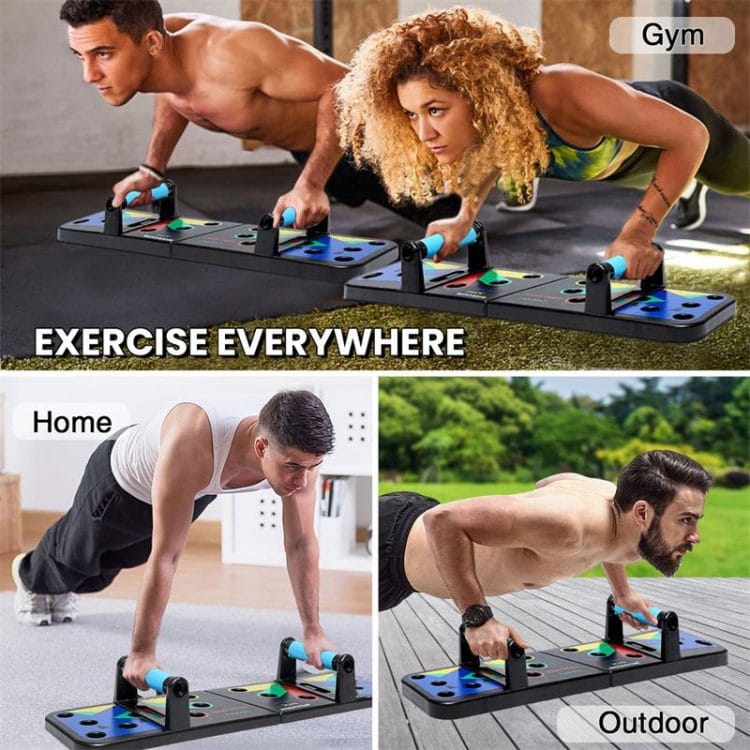
The push-up board has gained popularity over the past few years. Not only is it making its way into the homes of fitness enthusiasts, but many gyms are adding it to their arsenal for its versatility.
What is a Push-up Board?

A push-up board leverages the benefits of the push-up and supercharges them to target your upper body more efficiently.
But why push-up, you ask?
Push-up is a compound movement that primarily strengthens the chest, triceps, and shoulders. Additionally, it strengthens the stabilizer muscle groups like the biceps, back, core, and erector spinae.
Level Up Your Fitness: Join our 💪 strong community in Fitness Volt Newsletter. Get daily inspiration, expert-backed workouts, nutrition tips, the latest in strength sports, and the support you need to reach your goals. Subscribe for free!
It would be safe to say that push-up is one of the most effective pushing movements and only a few other bodyweight exercises can target so many different muscle groups using the same movement pattern.
The best part about the push-up is that most of us have performed the functional lift growing up — either in our PT classes or to show off our strength to our friends.
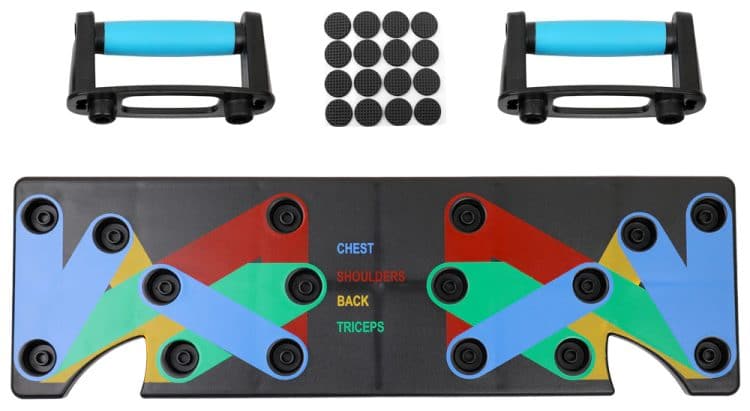
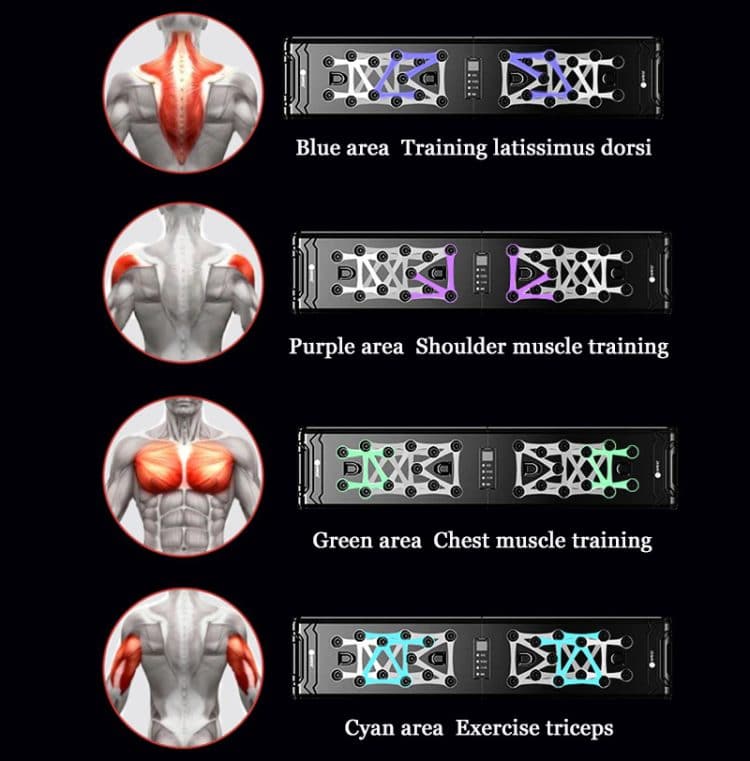
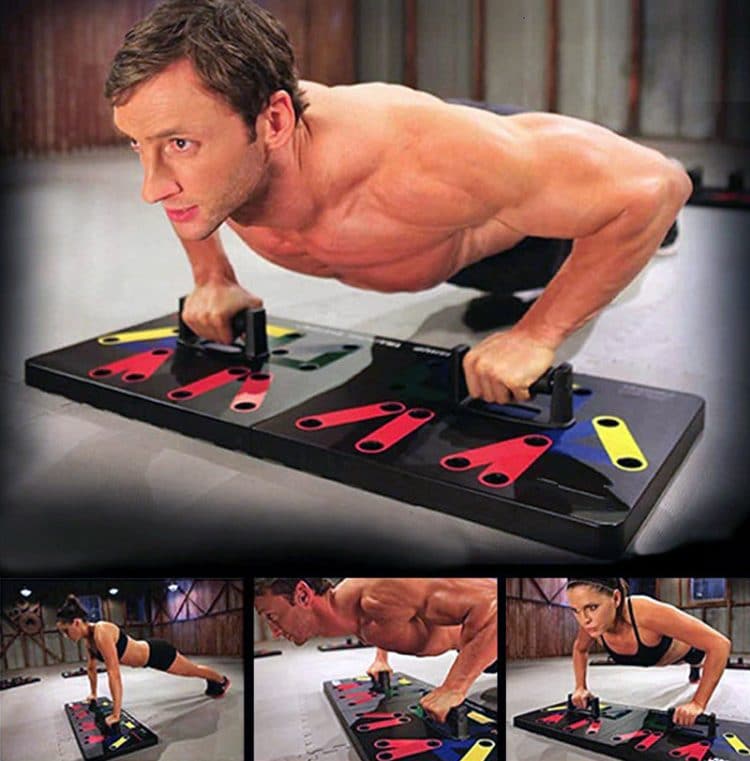
A push-up board is a stable and sturdy platform with color-coded handle adjustments. An individual can use the different hand placement options to train his upper body from different angles.
You could perform more than 30 different push-up variations using the push-up board and take your workout intensity to the next level by incorporating HIIT circuits.
Check Out: Calories Burned Push-Ups Calculator
Benefits and Disadvantages of Push-up Board
Before we get into the pros and cons of using a push-up board, let’s talk about the health benefits of performing push-ups. You should consider performing push-ups every day as it helps in:
- Protecting your shoulders and lower back from injuries
- Improving your flexibility
- Improving your performance in sports and athletic activities
- Building core strength
- Burning calories
- Improving your balance and posture

Now that you are up to speed with the advantages of adding the push-up to your daily routine, here is everything you need to know before you buy a push-up board:
Benefits of Push-up Board
1. Budget-Friendly
Most push-up boards cost less than $70, making them a great piece of training equipment to have at your home. You could find a pushup board starting at $30, but investing in a better quality board will pay dividends in the long run.
2. Versatile
The versatile workout equipment is great for people of all ages and experience levels.
While you do not necessarily need the pushup board to perform all variations, the board makes it easier to perform the exercises without putting your joints and wrists in vulnerable positions.
Since you do not have to stress about getting your hand placement right, you can better focus on establishing a mind-muscle connection and contracting your target muscles with every repetition.
3. Great For Beginners
The correct hand placement can make all the difference when it comes to the pushup.
The inbuilt color-coded patterns help a newbie perform pushups with the correct form. A push-up board ensures there is no unnecessary stress on the individual’s joints.
Research suggests that push-up bars can help increase the range of motion of your push-up, which can help you gain strength and build muscle faster. (1)
If a beginner lacks the upper-body strength to perform a push-up, they could make the exercise easier by planting their knees on the floor.
4. Home Gym
A push-up board is easy to assemble, and most boards on the market are made with high-quality material that make them long-lasting and a great value for your hard-earned money. On top of that, the push-up board is compact and won’t take up too much storage space in your home.
Having a push-up board at home ensures that you never skip a workout. Most people use snow, storm, or rain as an excuse to miss the gym. However, having a push-up board in your closet renders these excuses useless.
Related: Best Compact Home Gyms
Level Up Your Fitness: Join our 💪 strong community in Fitness Volt Newsletter. Get daily inspiration, expert-backed workouts, nutrition tips, the latest in strength sports, and the support you need to reach your goals. Subscribe for free!
5. Double as Parallettes
The pushup board doubles as parallettes, which makes it a great tool for calisthenics and gymnastics.
Performing handstand, planche push-up, and L-sit are easier on the push-up board than the floor because of the handles. The board also gives you a little extra height that could make it easier for you to execute the exercises.
6. Wrist Health
Although the orthodox pushup is a great upper body exercise, it puts your wrists in a compromising position. The pain is largely due to a lack of wrist mobility and grip strength.
Additionally, performing handstands and planche push-ups puts your entire body weight on your wrists, which can be extremely painful for people dealing with wrist injuries.
Using a push-up puts your wrists in a neutral (palms facing each other) position and increases your range of motion. This technique can be incredibly effective in elevating unnecessary stress from your wrists.
Related: Bench Press vs Push-Ups: Which One Should You Do?
Disadvantages of Push-up Board
1. Fixed Hand Placements
While using a push-up board, you are constricted to the hand placements designed into the board. You also cannot do without the handles that come with it.
People who like tweaking their hand positions to target their muscles differently might have a hard time adjusting to the board. On top of that, losing even one handle can render the board useless as finding a replacement handle can be hard.
2. Plateaus
This is not a pushup board problem but rather a bodyweight exercise problem. While using the pushup board, your muscle and strength gain will most certainly plateau over time.
You could add resistance by placing weight plates on top of your back, but that could damage the board. However, you could delay the plateau by performing HIIT workouts.
3. Not Too Different From Push-up Bars
One of the biggest drawbacks of a push-up board is that it is not too different from push-up handles. If you know how to use the pushup handles to target your chest, shoulders, triceps, and back, you could skip buying a push-up board.
How To Use a Push-up Board
Here is how to use a push-up board:
- Set up the push-up board on an even surface.
- Secure the handles in the appropriate color-coded position based on the muscle you are planning to target.
- Once you have the board ready, get into the starting position by grabbing the handles with an overhand (pronated) grip.
- Your hands should be directly under your shoulders, and your body should be in a straight line throughout the movement.
- Slowly lower your torso towards the board until your shoulders are a few inches away from the handles.
- Return to the starting position explosively.
- Pause and contract your target muscles at the top.
Push-up Board Tips:
- Do not lock out your arms at the top of the movement as it will take away the tension from your target muscles and put it on your elbows.
- If you are a beginner, you could perform the exercise by balancing your lower body on your knees instead of your feet.
- Gripping the bars tightly will help you generate more power.
- Make sure your neck and spine are aligned while performing the exercise.
- Do not shrug your shoulders.
- Keep your core and glutes braced throughout the movement.
- Breathe in while lowering your body towards the floor and exhale sharply as you return to the starting position.
- Don’t flare your elbows too wide as it will put unnecessary tension on your shoulders and rotator cuffs.
Who should be using the push-up board?
Many people have the same question while talking about the pushup board — “Is it good for beginners, intermediate, or advanced?”
While it is great for beginners, people with all experience levels could benefit from the board.
A newbie could learn the correct technique of performing the pushup on the board. On the other hand, an advanced lifter could use it to exhaust his muscles using supersets or by performing the different pushup variations at the end of a workout.
Additionally, COVID-19 taught us the importance of having training equipment at home, and the pushup board is a budget-friendly option that will not burn a hole in your pocket.
Push-up Board Workout
You’ll be performing high-intensity workouts four days a week. Your daily training regimen will include hitting two muscle groups, core, and cardio.
Pushup Board Workout Split
- Day 1: Chest and Back
- Day 2: Tricep and Shoulders
- Day 3: Rest
- Day 4: Back and Triceps
- Day 5: Shoulders and Chest
- Day 6: Rest
- Day 7: Rest
Day 1: Chest and Back
- Warm-Up
- Jog in place: 15 seconds
- Air punches: 20 reps
- Jumping jack: 15 reps
- Chest Superset 1
- Wide pushup (overhand grip): 8-12 reps
- Squat (floor to ceiling explosion): 10-15 reps
- Crunch: 25 reps
- Chest Superset 2
- Wide angled push-up: 8-12 reps
- Bent-knee jumping jack: 15 reps
- Bicycle crunch: 15 reps
- Chest Superset 3
- Vertical push-up: 8-12 reps
- Mountain climber: 30 seconds
- Windshield wiper: 15 reps
- Chest Superset 4
- Horizontal push-up: 8-12 reps
- Squat: 15 reps
- Cross-legged sit-up: 20 reps
- Chest Superset 5
- Inside diagonal push-up: 8-12 reps
- High-knees: 15 reps
- Side crunch: 15 (per side)
- Back Superset 1
- Outside Diagonal push-up: 8-12 reps
- Burpee: 10 reps
- Side plank raise: 10 reps (per side)
- Back Superset 2
- Horizontal push-up (supinated grip): 8-12 reps
- Lunge: 10 reps (per side)
- Hip raise: 25 reps
* Perform the same warm-up routine at the beginning of every day.
Day 2: Shoulders and Triceps
- Shoulder Superset 1
- Outside vertical push-up: 8-12 reps
- Burpee: 10 reps
- V-crunch: 10 reps
- Shoulder Superset 2
- Outside-diagonal push-up: 8-12 reps
- Lunge jump: 10 reps (each side)
- Floor kick-out: 10 reps
- Shoulder Superset 3
- Vertical (inside) push-up: 8-12 reps
- Jumping jack: 25 reps
- Floor leg raise: 15 reps
- Shoulder Superset 4
- Inside-angled push-up: 8-12 reps
- Ski jump: 10 reps (each side)
- Russian twist: 15 reps (each side)
- Tricep Superset 1
- Outside vertical push-up: 8-15 reps
- Burpee: 10 reps
- Leg climber: 10 reps (each side)
- Tricep Superset 2
- Horizontal push-up: 8-12 reps
- High knees: 20 seconds
- Russian Twist: 10 reps (each side)
- Tricep Superset 3
- Inside vertical push-up: 8-12 reps
- Squat jump: 10 reps
- Toe-touch crunch: 10 reps
Day 3: Rest
Day 4: Back and Triceps
- Back Superset 1
- Outside Diagonal push-up: 8-12 reps
- Burpee: 10 reps
- Side plank raise: 10 reps (per side)
- Back Superset 2
- Horizontal push-up (supinated grip): 8-12 reps
- Lunge: 10 reps (per side)
- Hip raise: 25 reps
- Tricep Superset 1
- Outside vertical push-up: 8-15 reps
- Burpee: 10 reps
- Leg climber: 10 reps (each side)
- Tricep Superset 2
- Horizontal push-up: 8-12 reps
- High knees: 20 seconds
- Russian Twist: 10 reps (each side)
- Tricep Superset 3
- Inside vertical push-up: 8-12 reps
- Squat jump: 10 reps
- Toe-touch crunch: 10 reps
Day 5: Shoulders and Chest
- Shoulder Superset 1
- Outside vertical push-up: 8-12 reps
- Burpee: 10 reps
- V-crunch: 10 reps
- Shoulder Superset 2
- Outside-diagonal push-up: 8-12 reps
- Cycle split jump: 10 reps (each side)
- Floor kick-out: 10 reps
- Shoulder Superset 3
- Vertical (inside) push-up: 8-12 reps
- Jumping jack: 25 reps
- Floor leg raise: 15 reps
- Shoulder Superset 4
- Inside-angled push-up: 8-12 reps
- Ski jump: 10 reps (each side)
- Russian twist: 15 reps (each side)
- Chest Superset 1
- Wide push-up: 8-12 reps
- Squat (floor to ceiling explosion): 10-15 reps
- Crunch: 25 reps
- Chest Superset 2
- Wide angled push-up: 8-12 reps
- Bent-knee jack: 15 reps
- Bicycle crunch: 15 reps
- Chest Superset 3
- Vertical push-up: 8-12 reps
- Mountain climber: 30 seconds
- Windshield wiper: 15 reps
- Chest Superset 4
- Horizontal push-up: 8-12 reps
- Squat: 15 reps
- Cross-legged sit-up: 20 reps
- Chest Superset 5
- Inside diagonal push-up: 8-12 reps
- High-knees: 15 reps
- Side crunch: 15 (per side)
You’ll be ending your week with the hardest and the longest workout routine. The two rest days after the fifth day are well deserved.
Day 6: Rest
Day 7: Rest
Wrapping Up
The push-up board is a great tool for people of any experience level. Used in a HIIT training routine — like the one mentioned above — it can help you carve a chiseled physique while building endurance and stamina.
If you train at home, a pushup board and a pull-up bar are must-haves in your arsenal. These pieces of training equipment will make you realize the power of bodyweight exercises.
Next Read: 11 Best Wall Mounted Pull-Up Bars Reviewed for 2023
References
- McMahon GE, Morse CI, Burden A, Winwood K, Onambélé GL. Impact of range of motion during ecologically valid resistance training protocols on muscle size, subcutaneous fat, and strength. J Strength Cond Res. 2014 Jan;28(1):245-55. doi: 10.1519/JSC.0b013e318297143a. PMID: 23629583.


