


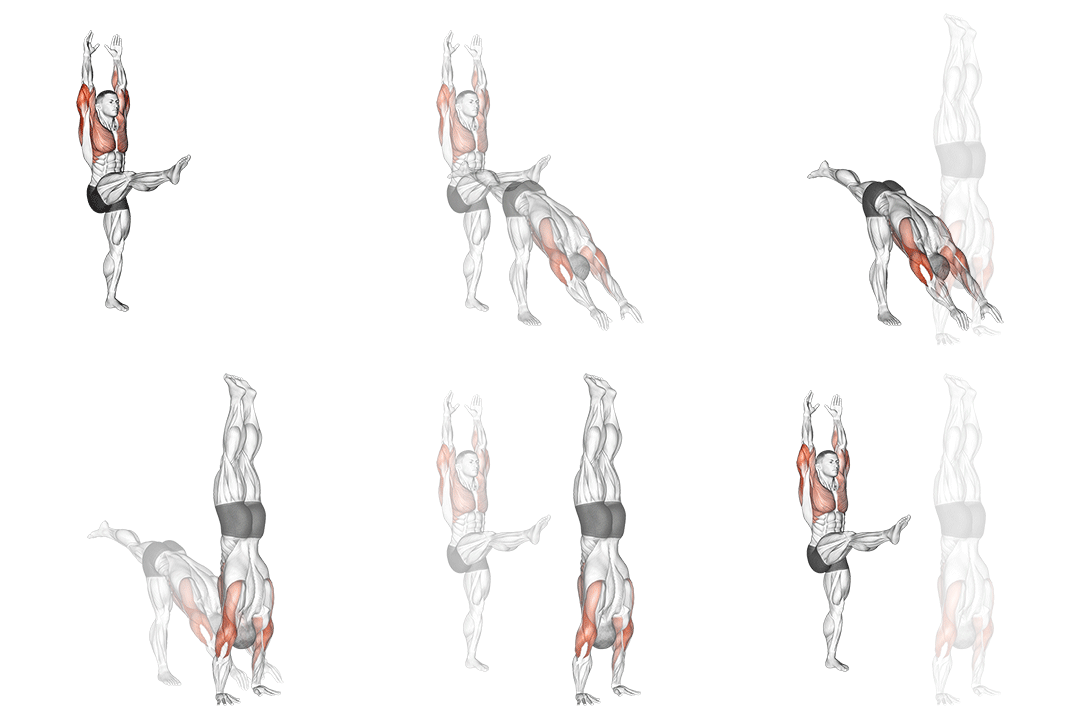
A freestanding handstand is a straight-arm balance on your hands with the body stacked upside down, without a wall. Most of the work is balance and shoulder strength, learned against a wall first. This page shows you which step of the progression you are on, from the first wall holds to a steady freestanding hold.
Want to press up and down in a handstand instead? See our handstand push-up guide.
The freestanding handstand progression, step by step
Pass each step before you spend time on the next. The pass mark is the number to hit with strict form.
-
1

Plank base
Pass: 30 s plank
Squeeze the glutes and keep the ribs down. The same body line goes upside down later.
-
2
Wall plank and walk-up
Pass: Walk up to a chest-to-wall handstand and hold 10 s
Walk the feet up the wall and the hands toward it a little more each session. This step is about getting used to being upside down.
-
3
Chest-to-wall handstand
Pass: 30 s chest-to-wall handstand
Push the floor away and lift the shoulders toward the ears. Keep the ribs in so the back does not arch.
-
4
Learn to bail
Pass: Cartwheel out of a chest-to-wall handstand on cue
Move one hand and turn the hips so you land on your feet facing sideways. Practice both sides.
-
5
Controlled kick-up
Pass: 5 kick-ups in a row where the heels just tap the wall
Kick softly. If you would crack a glass wall with your heels, you kicked too hard.
-
6
First freestanding holds
Pass: 10 s freestanding handstand
Steer with the fingers. Press harder through the fingertips when you start to fall toward your back.
-
7
Freestanding handstand
Pass: 30 s freestanding handstand
End each hold when your back starts to arch, even if you could stay up longer.


How long does it take to learn the freestanding handstand?
No reliable source gives a timeline. The r/bodyweightfitness wiki suggests 5 to 10 minutes of handstand practice per session. Track the step you are on rather than the date.
Common freestanding handstand mistakes
Back-to-wall only
Facing away from the wall lets the back arch. The r/bodyweightfitness wiki prefers chest-to-wall because it forces a straight line.
No bail plan
If you fear falling, you will cut every attempt short. Learn the cartwheel exit before going freestanding.
Kicking too hard
A big kick sends you past balance. Kick softly and arrive with control.
Holding to failure
Tired holds teach a bent line and raise fall risk. Come down while the line is still clean.
Train the freestanding handstand safely
- Warm up the wrists and shoulders before every session.
- Practice on a clear floor with nothing behind you to fall onto.
- A head rush when upside down is common and fades. Keep breathing during the hold.
- Skip handstand work until you can hold a 30 s plank.
Where the freestanding handstand pass marks come from
- r/bodyweightfitness wiki, Handstand Progression
- GMB Fitness, Taking Your Handstand Off the Wall
- r/bodyweightfitness wiki, Core Progression
- USA Gymnastics, Shoulder Maintenance 101
- Steven Low (author of Overcoming Gravity), The Fundamentals of Bodyweight Strength Training
Pass marks are FitnessVolt coaching standard v1, based on these sources. They show readiness to practise the next step, not a guarantee.