



A handstand push-up lowers from a handstand until the top of the head touches the floor, then presses back to straight arms. It is an overhead press with your whole body weight, and most people learn it against a wall first. This page shows you which step of the progression you are on, how to do the rep and what it works.
The handstand push-up progression, step by step
Pass each step before you spend time on the next. The pass mark is the number to hit with strict form.
-
1

Pike push-ups
Pass: 10 pike push-ups
Lean forward so the head lands in front of the hands. Head and hands should make a triangle.
-
2
Chest-to-wall handstand
Pass: 30 s chest-to-wall handstand
Walk the feet up the wall and the hands in close. Push tall through the shoulders.
-
3
Feet-on-box pike push-ups
Pass: 10 feet-on-box pike push-ups
Put the toes on the box and stack the hips over the shoulders. A higher box makes it harder.
-
4
One-leg box pike push-ups
Pass: 5 one-leg box pike push-ups each leg
Raise the box first, then lift one leg toward the ceiling. Both put more weight on the hands.
-
5
Wall handstand push-up negatives
Pass: 5 wall handstand push-up negatives, 3 s down each
Kick up with your back to the wall and lower for a slow count of three.
-
6
First wall handstand push-up
Pass: 1 strict wall handstand push-up
Drive through the heel of the palm. Do not bounce off the head.
-
7
Wall handstand push-ups
Pass: 3 strict wall handstand push-ups in a row
Each rep starts and finishes in a stable handstand, with no rest on the head at the bottom.


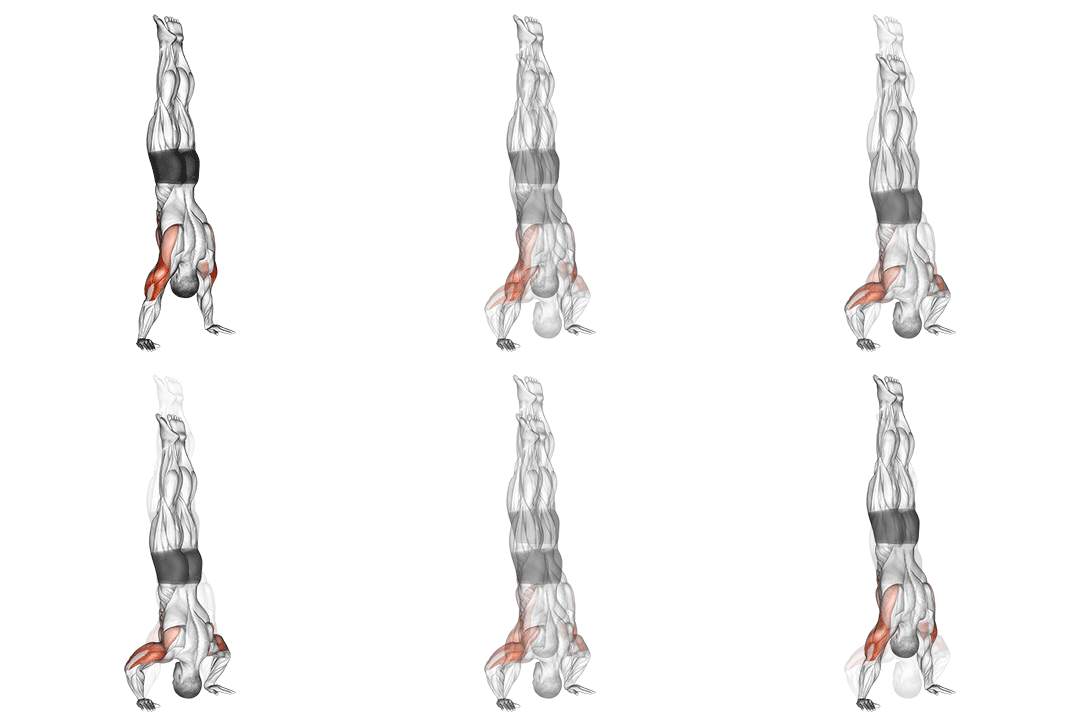
How to do a wall handstand push-up
- Take your shoes off and find a clear, smooth wall.
- Place your hands flat on the floor about shoulder-width apart and a hand’s length from the wall, fingers pointing forward.
- Kick up into a handstand with your back to the wall, so your heels rest on it. Brace your core and keep your legs straight.
- Bend your arms and lower slowly until the top of your head lightly touches the floor in front of your hands.
- Press back up to straight arms.
- Come down one leg at a time and stand up slowly. A moment of dizziness is common at first.
Spread your fingers and grip the floor with them. It steadies the balance and helps the press. The hold in step 2 faces the wall to build a tall shoulder line, but the push-up is learned with your back to the wall, because you can kick up into it and come down easily.
Common handstand push-up mistakes
Dropping onto the head
Falling the last few inches puts the load on the neck. Lower for a slow count and let the head only tap the floor.
Head lands level with the hands
The head should land in front of the hands so head and hands form a triangle. Without it the press is weaker and the balance is worse.
Elbows flaring out
Elbows that point sideways shift the work onto the shoulders. Keep the elbows tracking backward rather than flaring sideways.
Stacking mats to shorten the rep
A pile of mats under the head cuts the range and slows strength gain. CrossFit advises a higher box or one leg up instead.
Train the handstand push-up safely
- Learn to come down from a handstand before you train push-ups in one. A cartwheel out to the side works.
- Lower under control so the top of the head only taps the floor. Stop for any neck pain.
- Warm up the wrists and shoulders before every session.
- Use a clear wall and a box that will not slide.
- Count these sets toward your overhead pressing and cut back other overhead work if your shoulders feel it.
Muscles worked in the handstand push-up
The handstand push-up works the shoulders first, with the triceps, upper traps and core behind them.
- Shoulders: all three heads of the deltoids work, and the front delts do the most.
- Triceps: straighten the elbows to press you back up.
- Upper traps: lift the shoulder blades as the arms go overhead, which keeps the shoulders stable at the top.
- Core: keeps the body straight and stops the legs from swaying off the wall.
Benefits of the handstand push-up
The handstand push-up trains the shoulders and triceps hard with no equipment. It is a good test of strength for your body weight, and it is easy to scale: the steps above range from a pike push-up most people can do to a strict wall rep.
Handstand push-up variations
- Wall-facing handstand push-ups: walk your feet up the wall so your chest faces it. Many people find the balance easier this way, but you need a wall walk to get into position.
- Deficit handstand push-ups: put your hands on parallettes or sturdy blocks so your head can go below hand level. The extra range makes the rep harder. Do not force the shoulders past a comfortable depth.
- Assisted handstand push-ups: a partner holds your legs or a band takes some of your weight while you press.
- Freestanding handstand push-ups: the same rep with no wall. Only try them once you can hold a steady freestanding handstand. Our handstand progression builds that balance.
For more shoulder work at home, see our bodyweight shoulder exercises, and to keep your shoulders healthy, read how to avoid shoulder pain in the gym.
How long does it take to learn the handstand push-up?
There is no fixed timeline. CrossFit says the path from push-ups and dips through box pike push-ups to the wall may take years, and GMB's head coach says it is not a move that happens overnight. Retest every 3 weeks and judge progress by the step you are on.
Where the handstand push-up pass marks come from
- CrossFit, HSPU and You: Master the Movement
- CrossFit, Strict Before Kipping?
- CrossFit, Handstand Push-Up Variations
- GMB Fitness, Handstand Push-Up Progression: Training for Advanced Power & Control
- r/bodyweightfitness wiki, Handstand Progression
- GMB Fitness, Taking Your Handstand Off the Wall
- Steven Low (author of Overcoming Gravity), Prilepin tables for bodyweight strength isometric and eccentric exercises
- USA Gymnastics, Shoulder Maintenance 101
Pass marks are FitnessVolt coaching standard v1, based on these sources. They show readiness to practise the next step, not a guarantee.